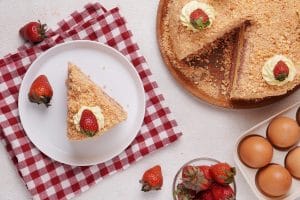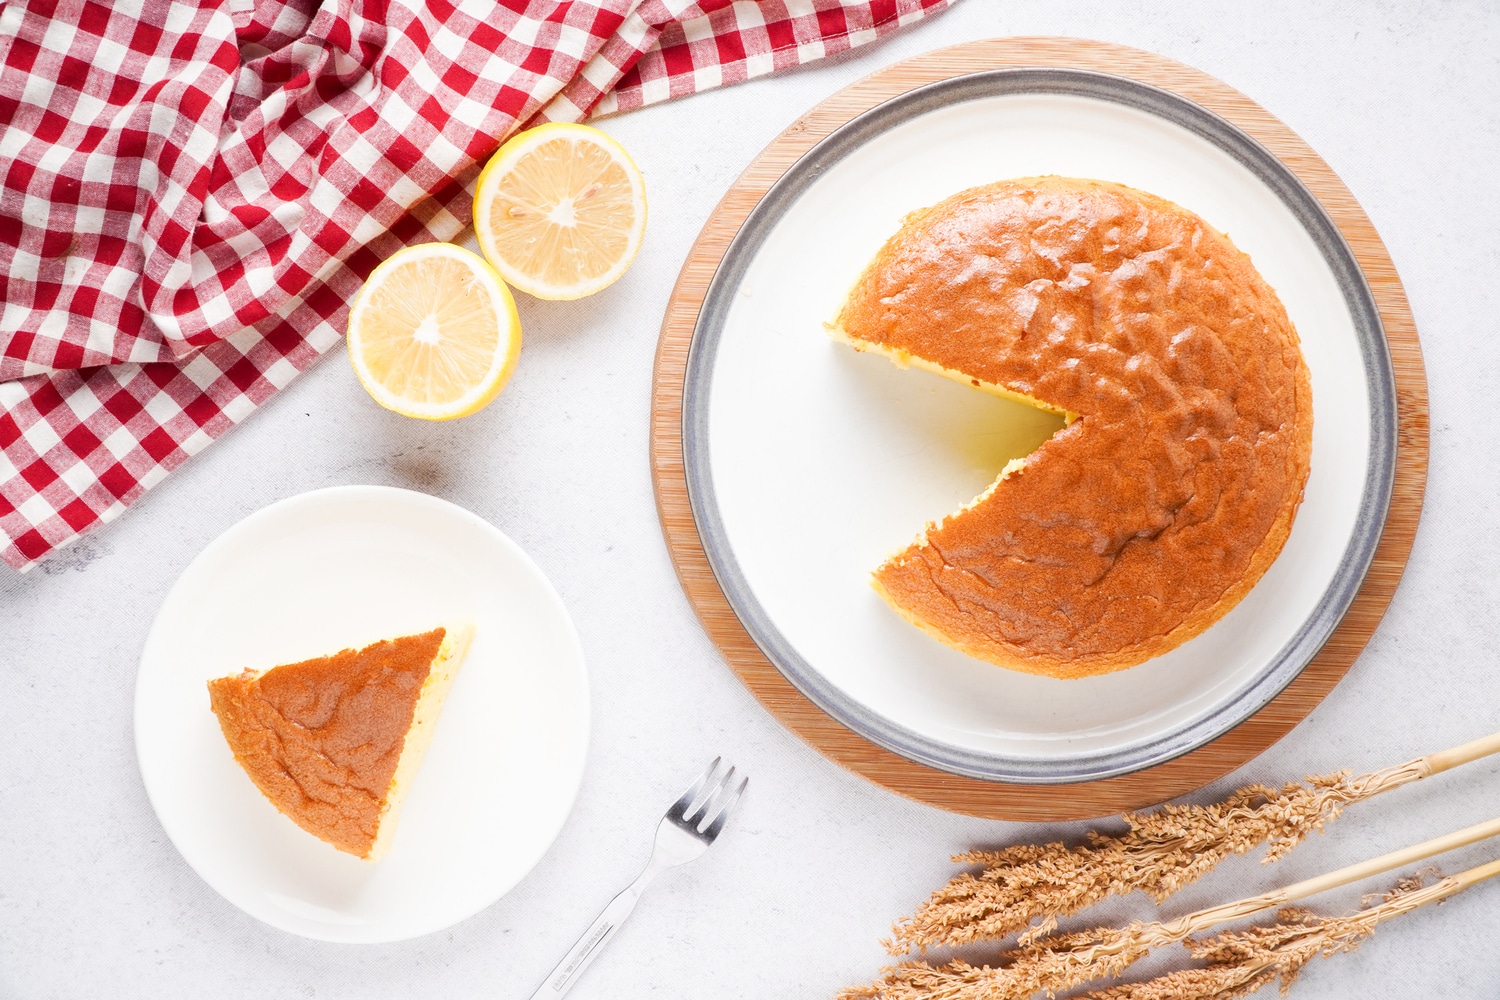
Fluffy Japanese Cotton Cheesecake
Important Note: When you buy through our links, we may earn a commission. As an Amazon Associate we earn from qualifying purchases. Content, pricing, offers and availability are subject to change at any time - more info.
Japanese cotton cheesecake, also called Japanese soufflé cheesecake, is a gorgeously light, fluffy, and creamy dessert. This fluffy cheesecake is best described as a combination between NY-style cheesecake and chiffon cake.
In this Japanese cotton cheesecake recipe, I’ll share how to make fluffy jiggly Japanese cheesecake that melts in your mouth. You’ll also get that satisfying spongy sound when digging into your piece.
What Is So Special About Japanese Cheesecake?
So, you may be wondering what all the hype around this cotton cheesecake is about. It’s got particular qualities and is heavenly and delicate on the palate.
When warm, Japanese cheesecake has a jiggly, sponge-like, fluffy texture that, when chilled, becomes creamier and richer. It’s the closest thing to eating a cloud. Hence the name ‘cotton cheesecake’.
Compared to New York cheesecake, it’s lighter and won’t leave a heavy sensation in the stomach. A slice of Japanese cheesecake has fewer calories than a typical cheesecake but is just as creamy and delicious.
This is the best Japanese cotton cheesecake recipe because I’m sharing all the tips and tricks for a flawless result. Making any type of soufflé can be challenging, but if you are gentle yet firm with your egg whites, all will turn out well.
What Do I Need To Make Fluffy Japanese Cheesecake?

First, make sure you have all the necessary equipment:
- Sieve
- 2 large mixing bowls
- 1 medium pot
- A whisk
- Electric hand mixer with a whisk attachment
- Large rubber spatula
- 8×3 inch round cake form (or similar, high edges preferred)
- Parchment paper
- Aluminum foil (if cake form has a removable bottom)
- Baking tray with high edges (big enough to fit the cake form)
Here is the ingredients list for making Japanese soufflé cheesecake:
- 5.6 oz cream cheese, room temperature
- 1 Tbsp. unsalted butter, room temperature
- 2 ½ Tbsp. whole-fat milk
- ¼ cup all-purpose flour
- 1 1/3 Tbsp. cornstarch
- 4 eggs, yolks and whites separated
- 1/4 tsp lemon juice
- 3 oz sugar
- Optional: apricot jam or honey to make the cake glisten
How To Make Japanese Cotton Cheesecake
Step 1: Preheat the oven
Preheat the oven to 340°F. You’ll later want to turn it down to 320°F once you add the cake.
Prepare a round cake form. Cut a piece of parchment paper the size of the cake form and place it on the bottom of it. Butter the sides of the cake pan.
Step 2: Prepare the cream cheese and butter mixture
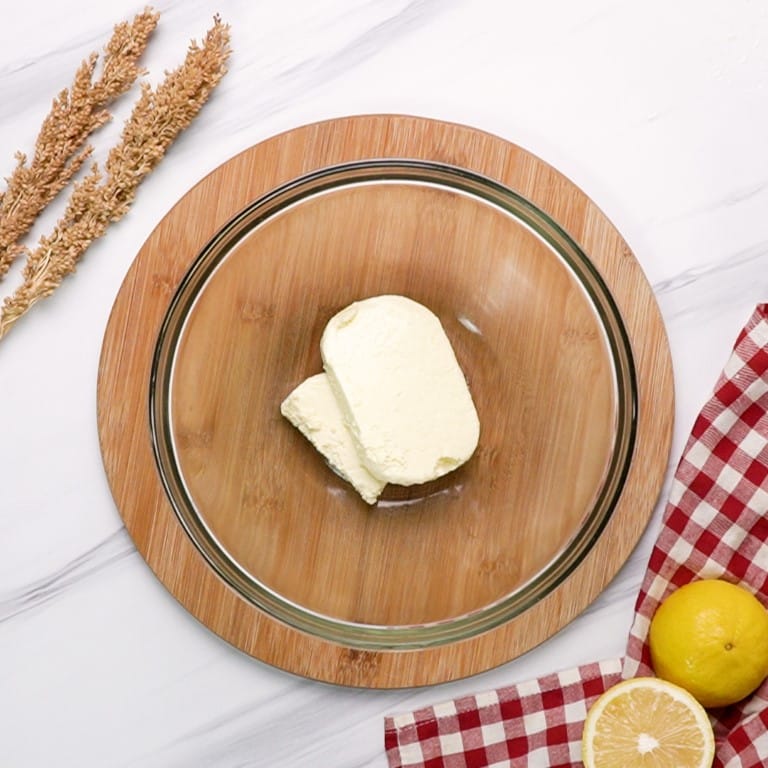
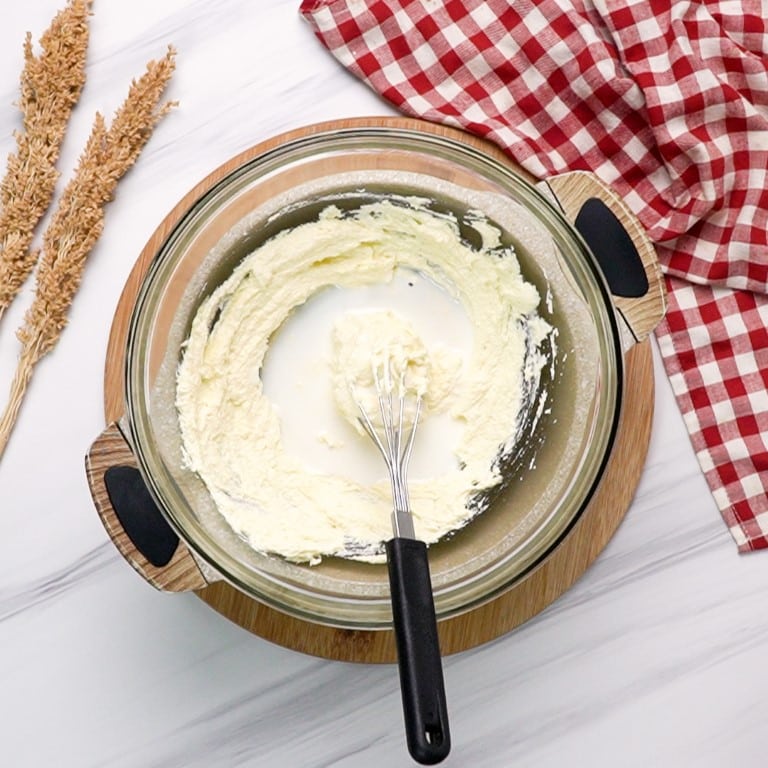
Add room-temperature cream cheese to a large bowl and mix with a spatula until smooth. Now add unsalted butter to the cream cheese but don’t whisk yet.
Step 3: Boil water in a small/medium pot
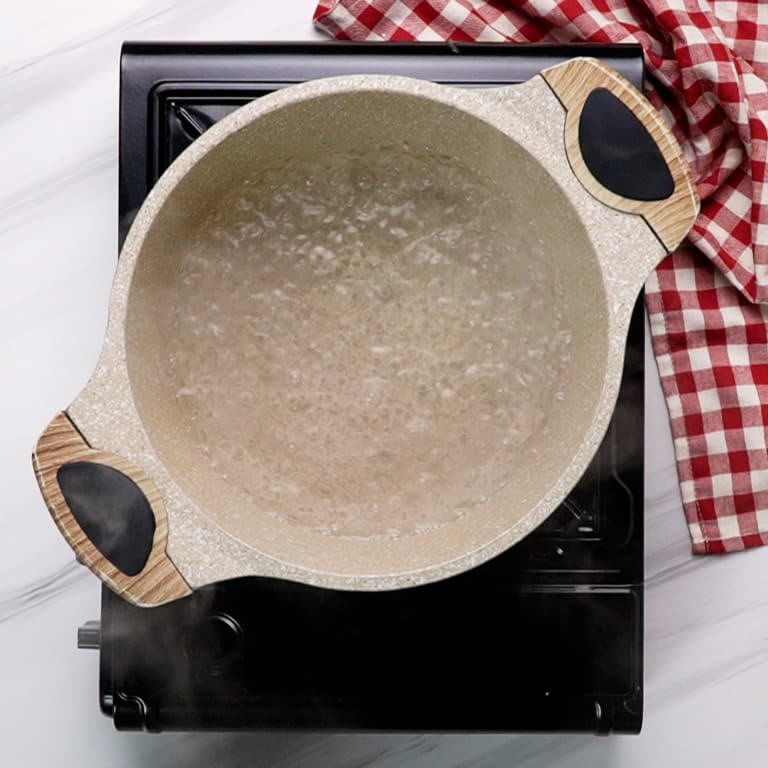
In a small/medium pot, bring water to a boil.
Step 4: Melt the butter into the warm cream cheese
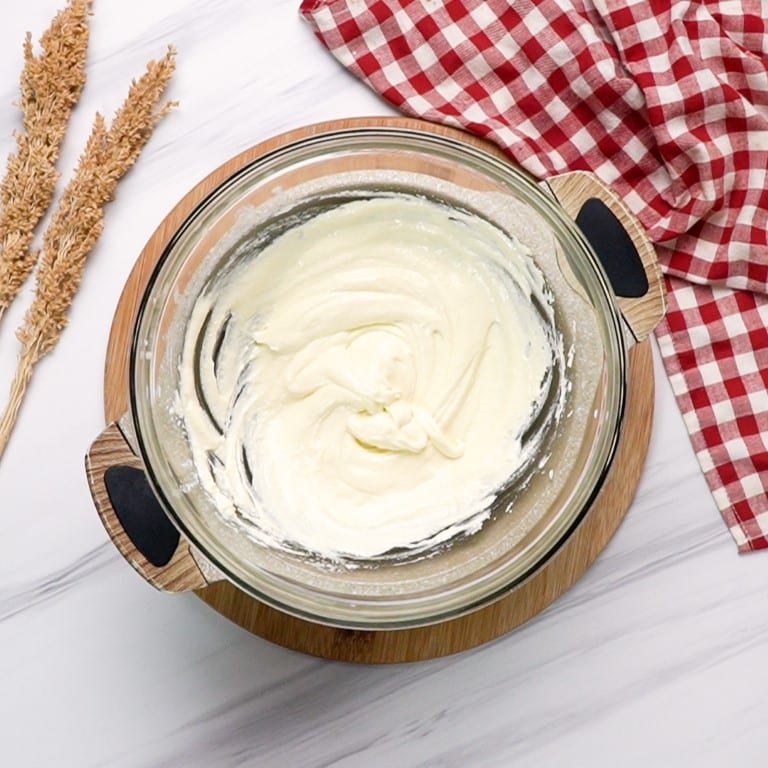
Place the bowl with cream cheese and butter and whisk until the butter is melted & the cream cheese is warm.
Step 5: Blend in sifted flour, cornstarch & yolks for a smooth mixture
Whisk in milk until all mixed & warm, then take the bowl out of the pot. Sift in flour & cornstarch, and gently whisk until combined. Scrape edges with a spatula to incorporate. Whisk the yolks into the cream cheese mixture. There shouldn’t be any lumps of flour left.
Step 6: Beat the egg whites into soft peaks
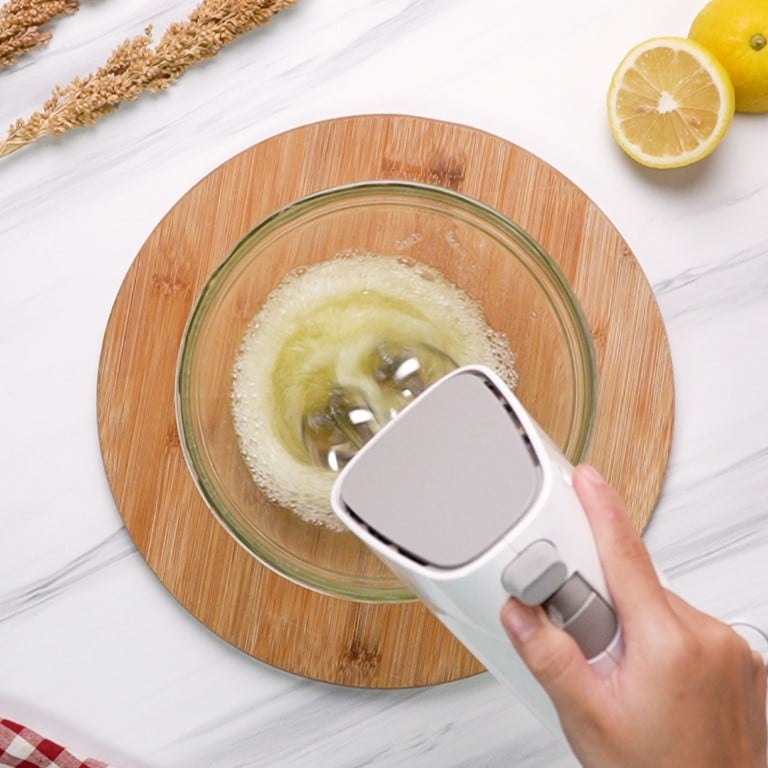
Beat the egg whites and lemon juice with the electric mixer, increasing the speed gradually.
Step 7: Gradually incorporate sugar into the egg whites
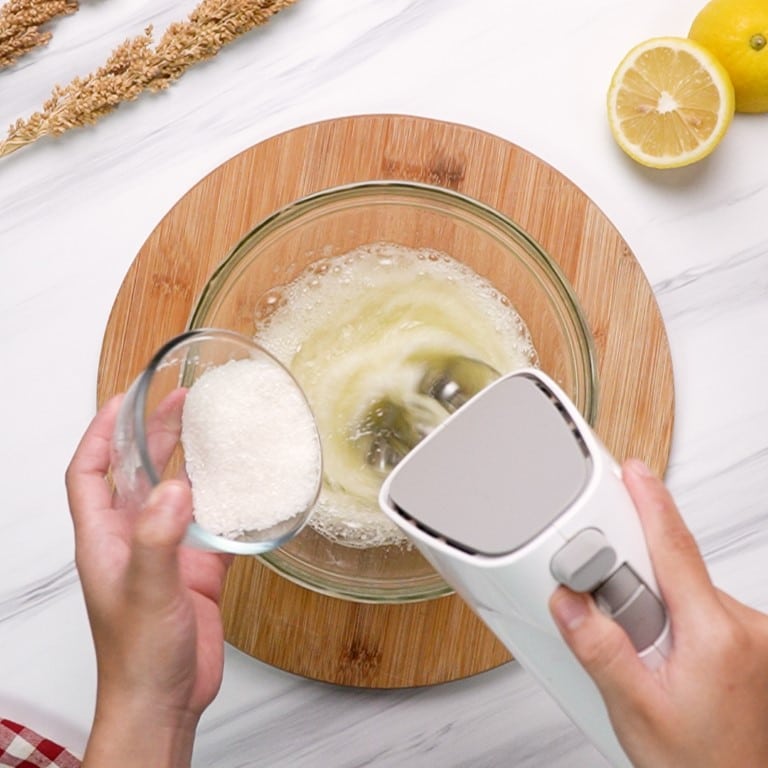
After 30-40 seconds, add 1/3 of the sugar and keep beating for another 30 seconds, then add another 1/3, and repeat with the last part of the sugar. Beat until soft peaks form.
Step 8: Fold the egg whites into the cream cheese mixture
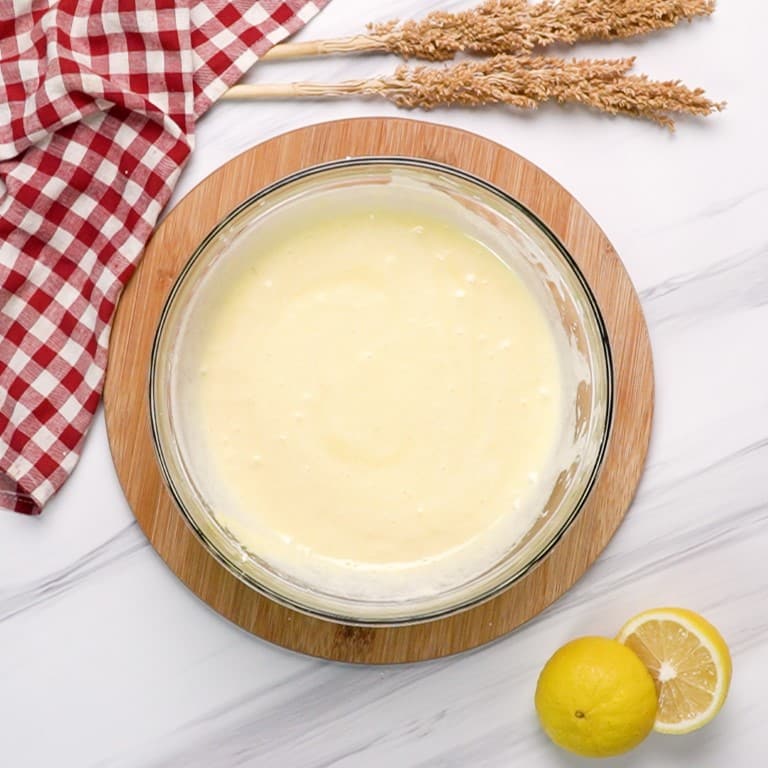
Add 1/3 of the egg whites to the cream cheese mixture (make sure the mixture is still a little bit warm) and whisk it in gently in one direction only. Don’t over-whisk.
Switch to a spatula and fold in another 1/3 of the cream cheese mixture gently, then repeat with the remaining until everything is combined (the final mixture should be pretty liquid).
Step 9: Pour into the cake mold and bake
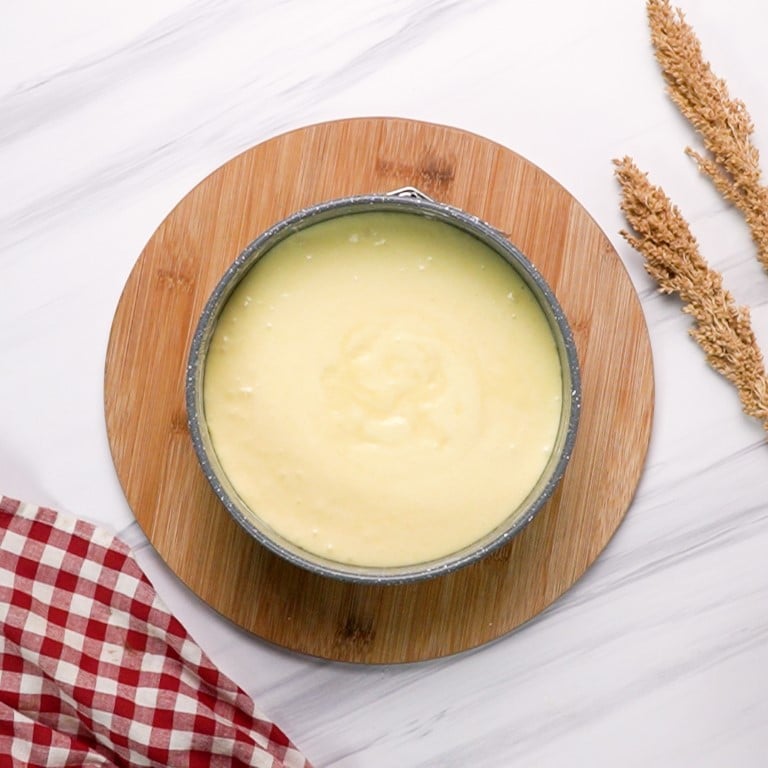
Pour the cake mixture into the prepared cake mold from 20 cm high to help remove large air bubbles. Use a spatula to remove any additional air bubbles and then tap the pan against the counter to finish.
Step 10: Position the cake pan inside a deep rectangular tray
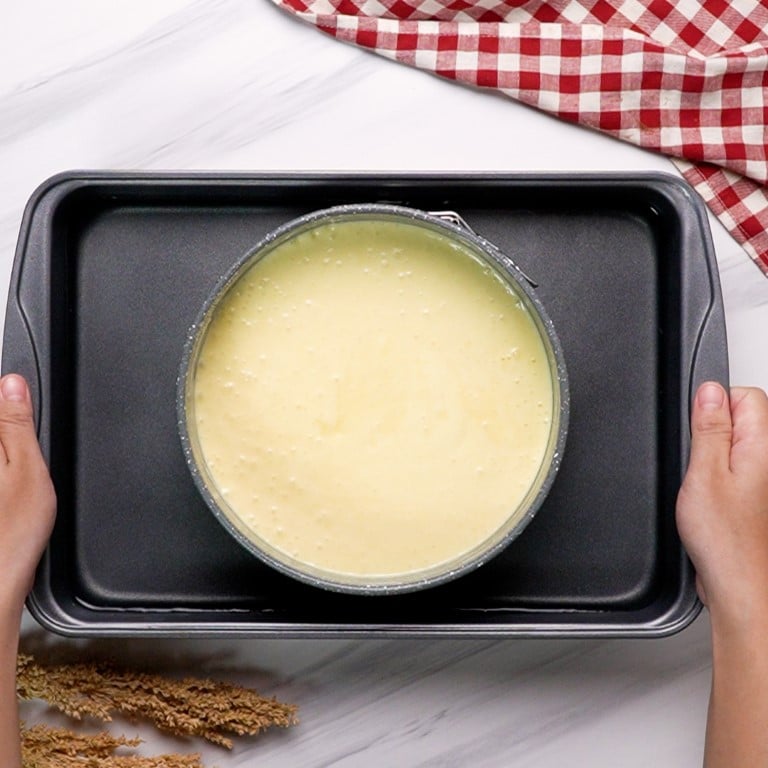
Place the cake pan in the deep rectangular baking tray and fill the tray 1/4 to 1/3 with hot water.
Bake the cake at 320°F for 20min on the mid rack. It should rise significantly at this point. You may want to increase the temperature if it doesn’t.
Open the oven door and allow the steam to release for 5 – 10s.
Continue baking at 230°F for 50min. Then turn the oven off and let the cake rest inside the oven for another 10 minutes.
Step 11: Remove from the mold and serve
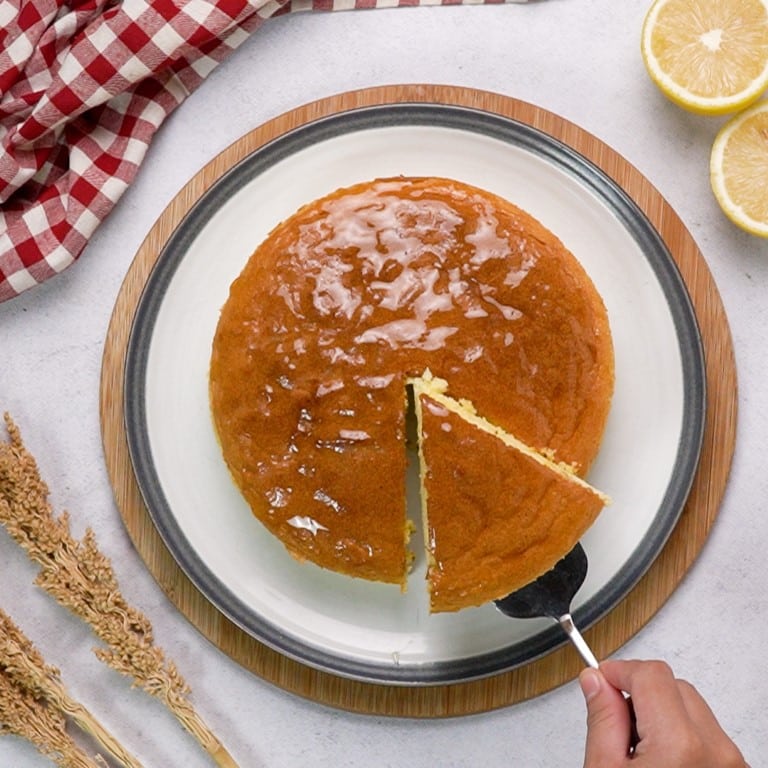
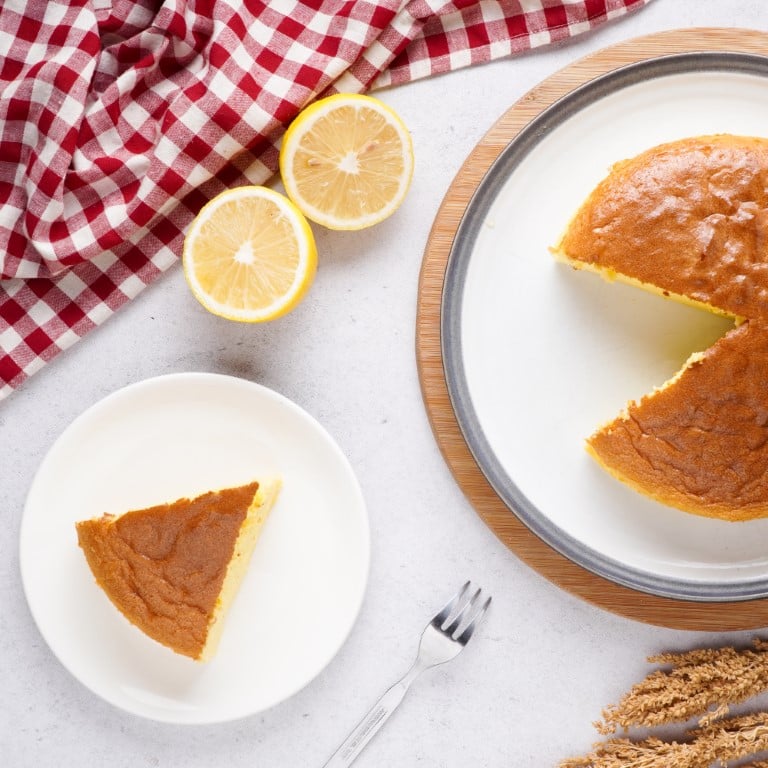
Gently tap around the mold for the cake to fall out. Remove the wet parchment paper and place a new circle of parchment paper on the bottom. Flip the cake onto a serving plate.
Brush honey or apricot jam to the top to make it look pretty. Enjoy warm for maximum jiggles.
Notes & Tips
- To remove air bubbles, follow the techniques in the steps above: pour the batter into the cake pan from 20 cm high over the thin edge of the rubber spatula, tap the cake pan against the counter, and use the spatula to remove any remaining bubbles.
- Make sure to use the “folding technique” to combine the cream cheese batter and the remaining 2/3 of the egg whites. Fold the egg whites in one direction from the side to the center and across to the other side.
- Be careful not to overwork the batter. Overmixing will prevent the cake from rising and it’ll become flat.
- If you undermix the batter, your cake will be uneven. The egg white will rise to the top, resulting in a cake that resembles meringue on top and a dense cheesecake at the bottom.
- To help you whip egg whites into soft peaks, gradually increase the mixer speed from medium to medium-high to high, each speed taking about two to three minutes.
- If you’re using a cake mold with a removable bottom, make sure to wrap aluminum foil under and around the bottom of the pan before adding the boiling water. This will prevent water from seeping into the cake mold.
Variations & Serving Suggestions
The cornstarch and baking powder should be naturally gluten-free. Replace the all-purpose flour in your Japanese cheesecake with sweet rice flour to make it gluten-free (Mochiko).
Brushing a little honey or apricot jam is optional, but it adds a nice glistening to the top of the cake. You could also dust it with powdered sugar and top it with some arranged berries for presentation.
I haven’t added any flavoring to this already perfect fluffy Japanese cheesecake recipe, but you’re welcome to incorporate a teaspoon of pure vanilla extract along with the egg yolks. Try caramel extract or almond extract for a twist.
To make either a matcha-flavored Japanese cheesecake or a chocolate-flavored Japanese cheesecake, flavorings can be added to the egg yolk batter, such as 2 tablespoons of matcha powder or 2 tablespoons of cocoa powder.
Why Is My Japanese Cheesecake Flat?
Wondering how to keep Japanese cheesecake fluffy? Your Japanese jiggly cheesecake may not be fluffy for a few reasons:
Your egg whites may have been under-whipped. Be sure to whip the egg whites until they have medium-soft peaks. Not too stiff, but stiff enough to stick to the bowl when flipped, yet fold into a shape when lifted.
Your egg whites are not fully incorporated into the batter. Folding techniques are used to combine the batter and remaining egg whites. Not enough or too little mixing will make the cake uneven. The egg white will rise to the top, resulting in a cake that resembles meringue on top and a dense cheesecake at the bottom.
The batter has been overworked with egg whites. Overmixing will prevent the cake from rising. This is how you get a flat cheesecake.
Why Is My Japanese Cheesecake Not Brown On The Top?
If you didn’t get a brown top, the temperature of the oven may have been too low. Every oven is different, so it’s a good idea to adjust the temperature by observing the baking process.
For a brown, creme brûlée effect, you can also broil the cake’s top for 5 minutes before cooling it in the oven. Additionally, check that your cake is baking in the middle of the oven’s rack and if you used parchment paper to line the cake pan’s rim, make sure it’s not too high.
Ingredients
- 5.6 oz cream cheese room temperature
- 1 Tbsp. unsalted butter room temperature
- 2 ½ Tbsp. whole-fat milk
- ¼ cup all-purpose flour
- 1 1/3 Tbsp. cornstarch
- 4 eggs yolks and whites separated
- 1/4 tsp lemon juice
- 3 oz sugar
- Optional: apricot jam or honey to make the cake glisten
Instructions
- Preheat the oven to 340°F (lower to 320°F once the cake is in).
- Add cream cheese to a large bowl and mix with a spatula until smooth.
- Add butter to the cream cheese. Heat a pot of boiling water and place the bowl inside then whisk until the butter is melted & the cream cheese is warm.
- Whisk in milk until combined and warm, then take the bowl out of the pot.
- Sift in flour & cornstarch, and whisk gently to combine. Scrape edges with a spatula. Whisk the yolks into the cream cheese mixture one at a time.
- In a separate bowl, beat the egg whites and lemon juice on medium-high speed.
- After 30-40 seconds, add 1/3 of the sugar and keep beating for another 30 seconds, then add another 1/3, and repeat with the last until soft peaks form.
- Add 1/3 of the egg whites to the cream cheese mixture and whisk it in gently.
- Switch to a spatula and carefully fold in another 1/3 of the cream cheese mixture, then repeat with the remaining until everything is combined.
- Prepare the cake form with a piece of parchment paper on the bottom of it, and butter the sides. Pour in the batter from high up over the spatula’s thin edge.
- Place cake pan in a deep rectangular baking tray filled 1/4 to 1/3 with hot water.
- Bake cake at 320°F for 20min. Open the oven door for 5-10s.
- Continue baking at 230°F for 50min. Turn the oven off and let the cake rest inside the oven for another 10 minutes.
- Gently tap around the mold for the cake to fall out. Brush honey or apricot jam to the top to make it look pretty. Enjoy!