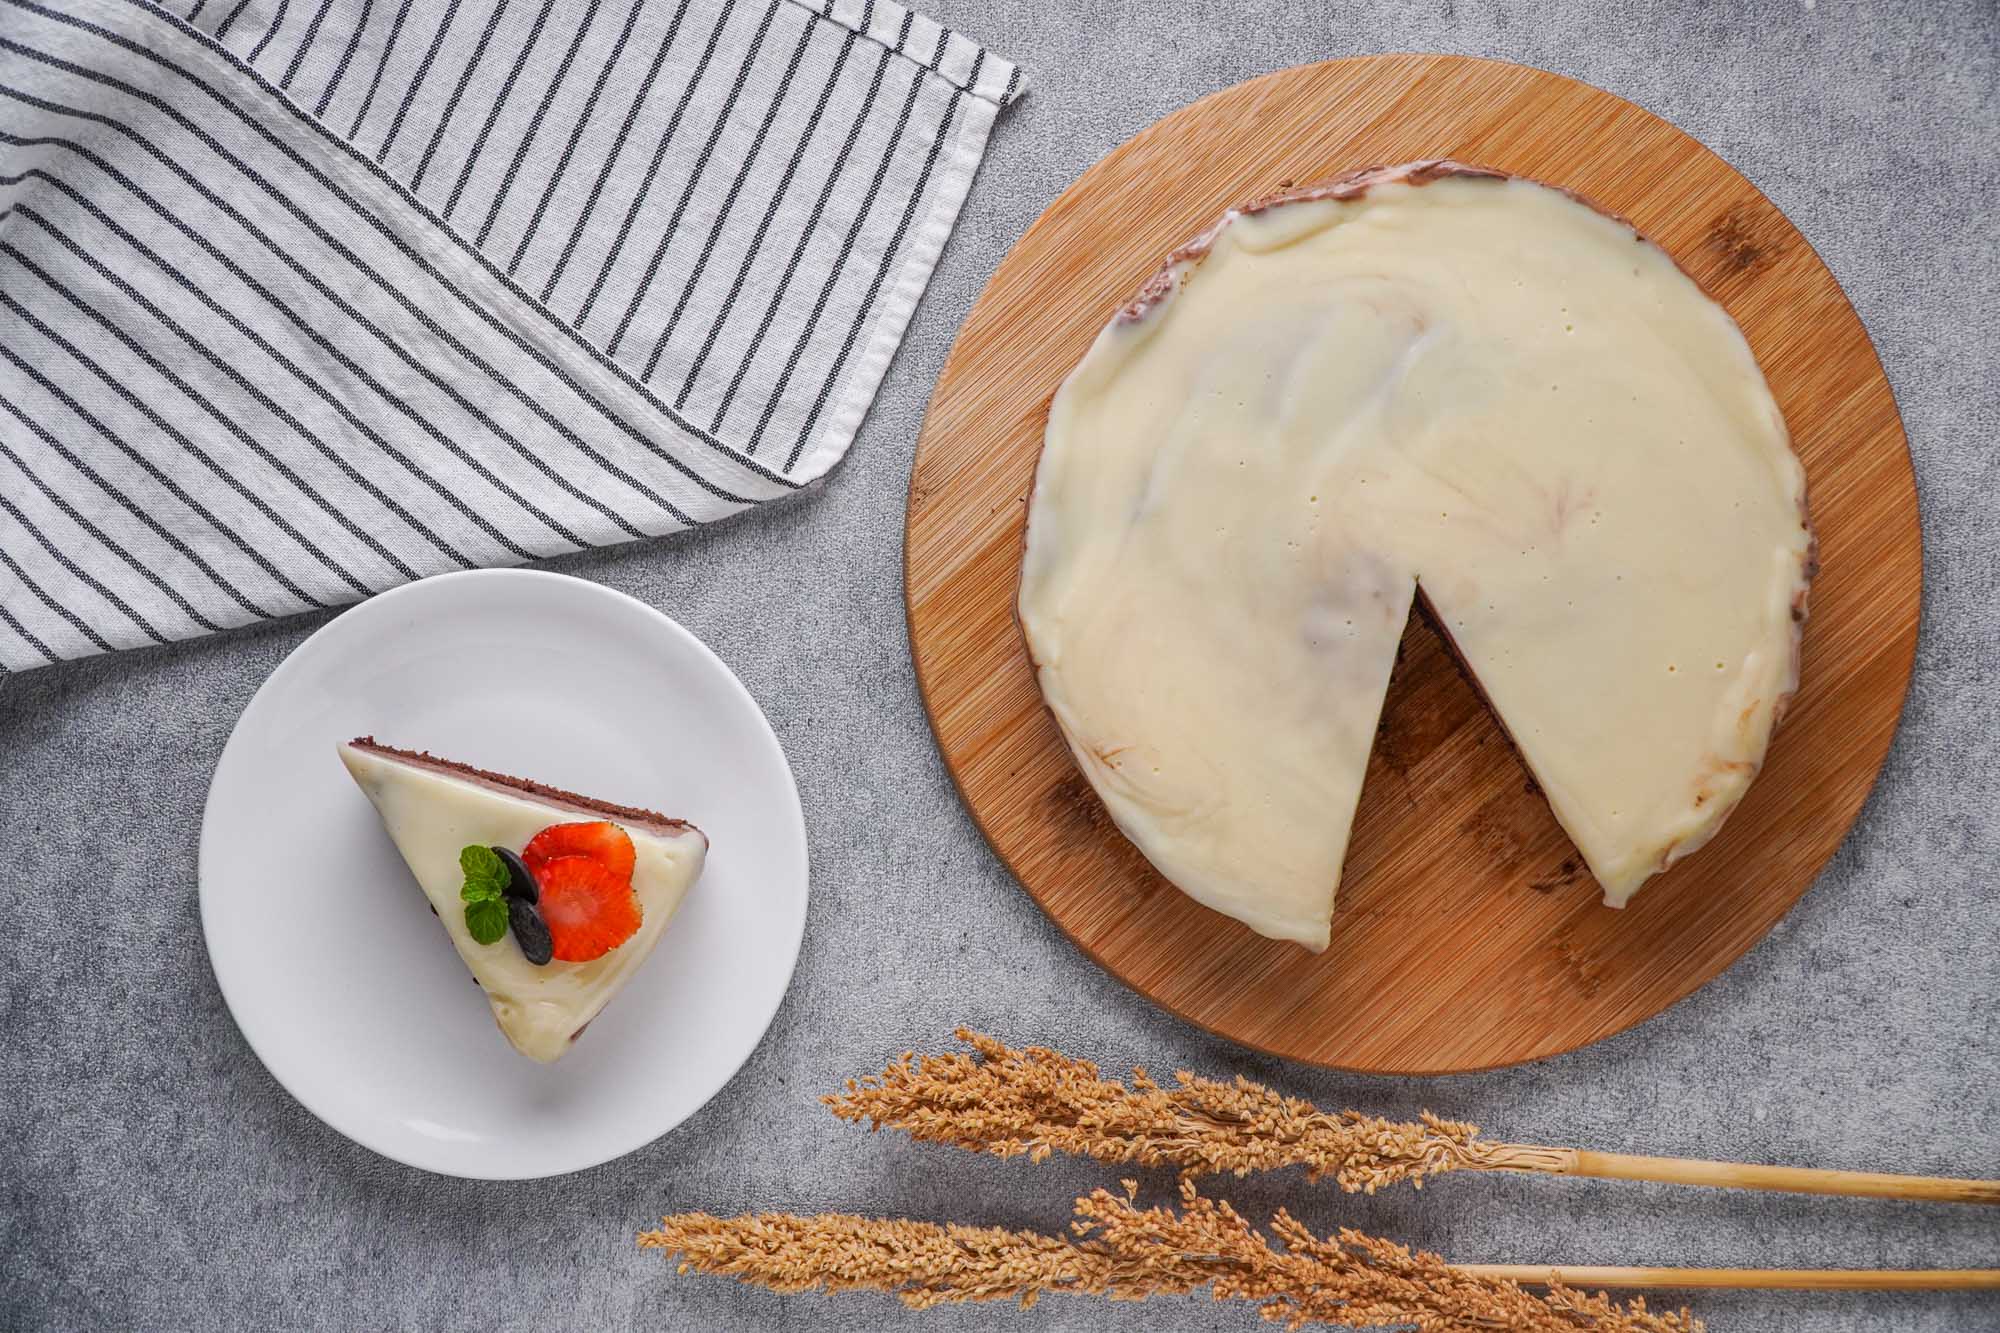
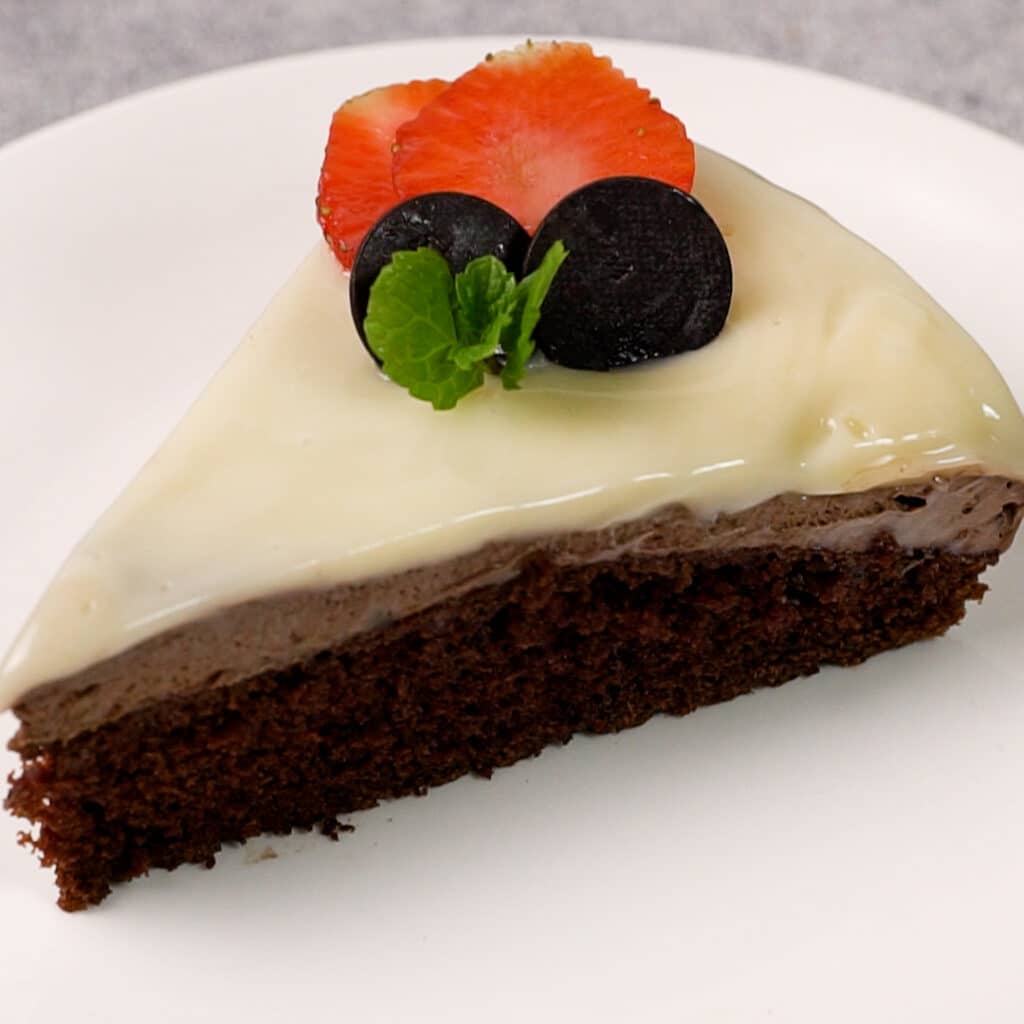
Irresistible Black Tie Mousse Cake
Important Note: When you buy through our links, we may earn a commission. As an Amazon Associate we earn from qualifying purchases. Content, pricing, offers and availability are subject to change at any time - more info.
Picture this: a luxuriously luscious mousse cake that is the culinary equivalent of wearing a tuxedo or that perfect little black dress. But this isn’t just any mousse cake, my friends. This, dear readers, is the Irresistible Black Tie Mousse Cake that will elevate your dessert game to new heights! Why should you make this recipe, you ask? Well, if the idea of smooth, velvety chocolate mousse layered between moist, rich chocolate cake, topped with a divine chocolate ganache doesn’t entice you, then I don’t know what will! This dessert is a showstopper that will impress your guests and have them swooning in delight at your culinary prowess. And the best part? It’s not as complicated as it sounds, so even if you’re a beginner baker, you can absolutely pull this off!
Let me tell you a little secret: the key to achieving that perfect mousse texture is to whip the cream until it forms soft peaks, ensuring a light and airy consistency that will make your taste buds dance with joy. And as for that glorious ganache, did you know that it’s a French invention dating back to the 19th century? Talk about a noble dessert heritage! So, are you ready to embark on this gastronomic adventure? Grab your apron, your whisk, and your finest chocolate, and let’s dive into the steps to create this incredible Black Tie Mousse Cake!
Yield & Servings:
One 9-inch cake, serves 12
Timing:
Prep time: 45 minutes
Cook time: 35 minutes
Chilling time: 4 hours
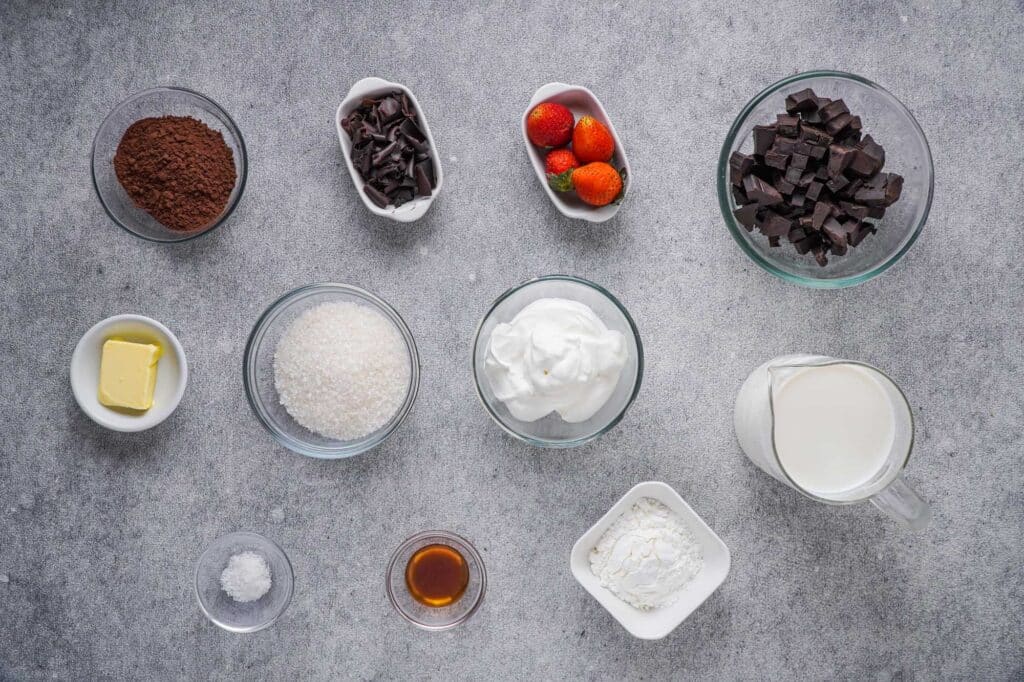
Ingredients:
For the chocolate cake:
1 ¾ cups all-purpose flour
1 ½ tsp baking powder
1 ½ tsp baking soda
¾ cup unsweetened cocoa powder
2 cups granulated sugar
½ tsp salt
2 large eggs
1 cup whole milk
½ cup vegetable oil
1 tsp vanilla extract
1 cup boiling water
For the chocolate mousse:
1 ½ cups heavy cream
½ cup granulated sugar
½ cup unsweetened cocoa powder
1 tsp vanilla extract
For the white chocolate ganache:
1 cup white chocolate chips
½ cup heavy cream
Notable Equipment & Tools:
9-inch springform pan
Electric mixer
Mixing bowls
Saucepan
Offset spatula
Step-by-step Instructions:
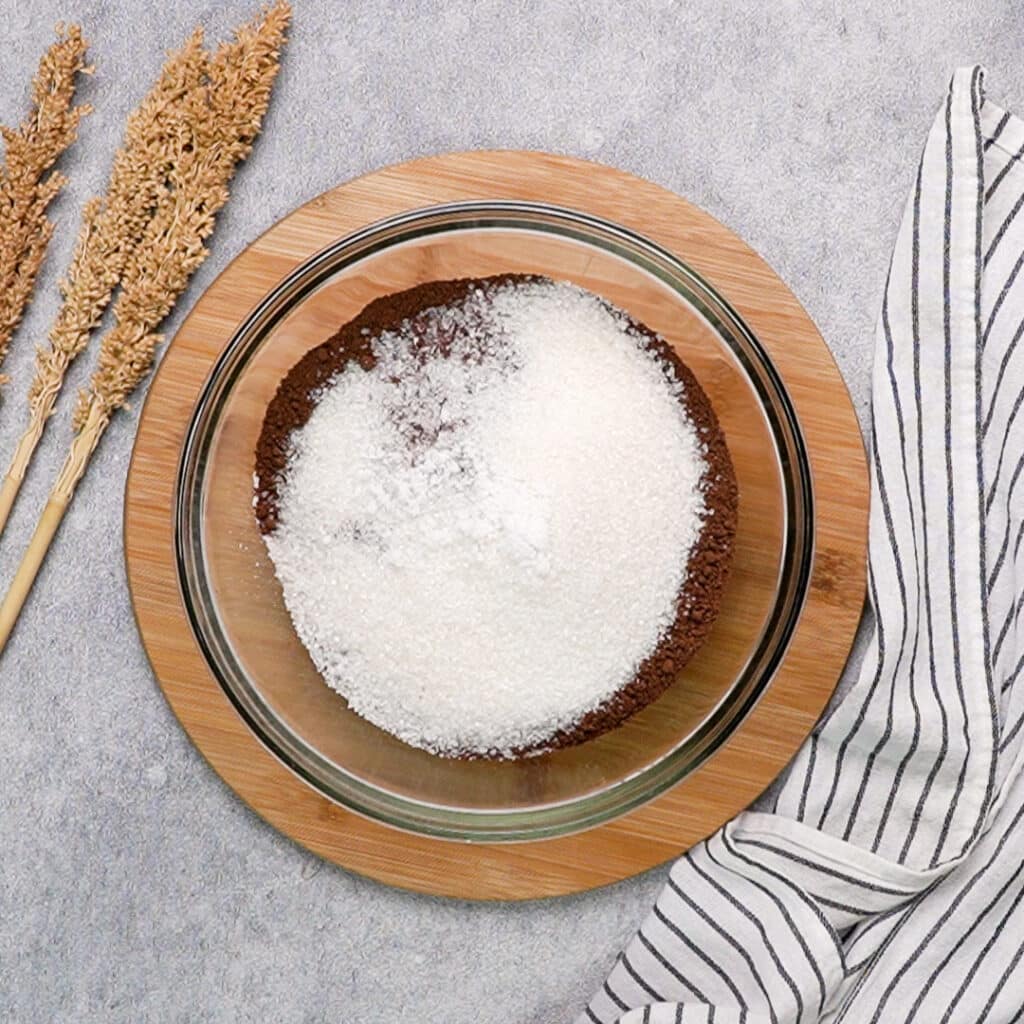
Step 1: In a large mixing bowl, whisk together the flour, baking powder, baking soda, cocoa powder, sugar, and salt.
- Preheat your oven to 350°F (175°C). Grease and flour a 9-inch springform pan.
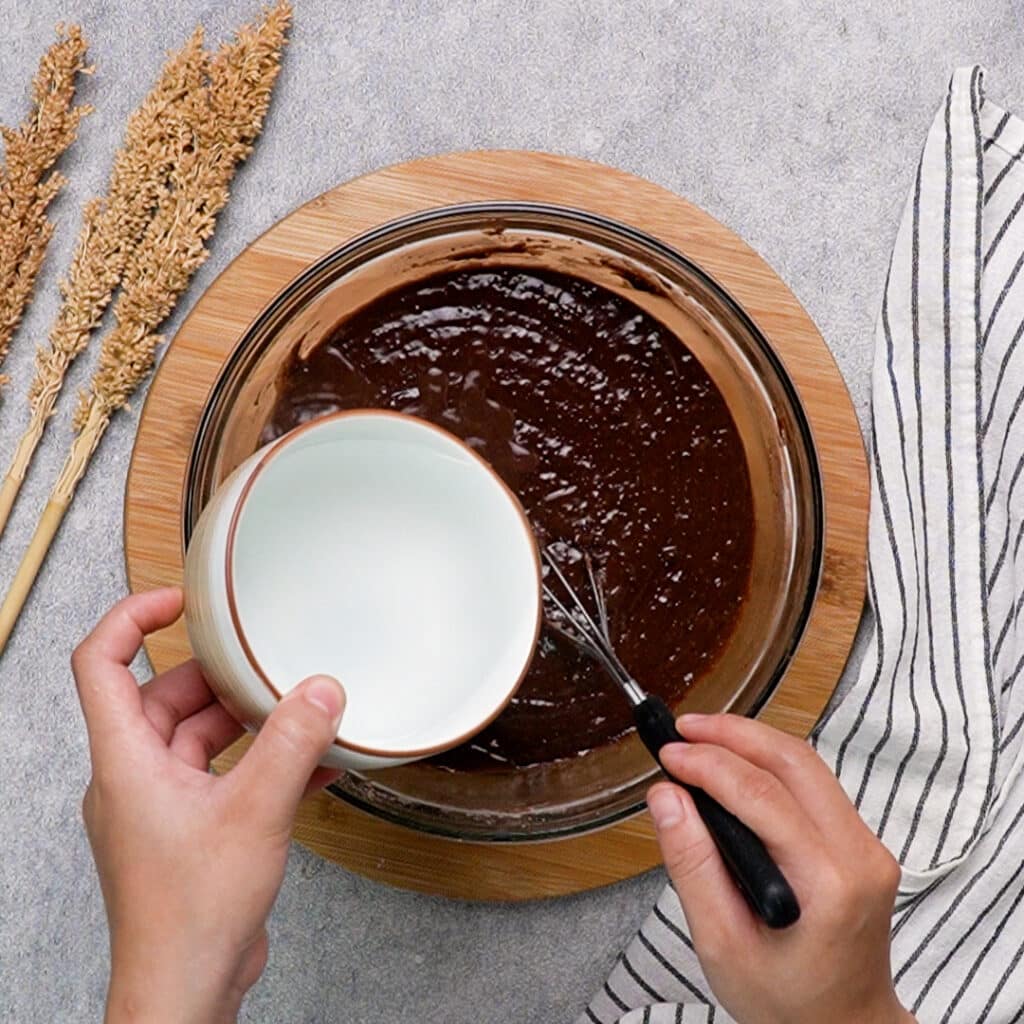
- Add the eggs, milk, vegetable oil, and vanilla extract to the dry ingredients. Mix until well combined.
Step 2: Slowly pour in the boiling water, mixing until the batter is smooth.
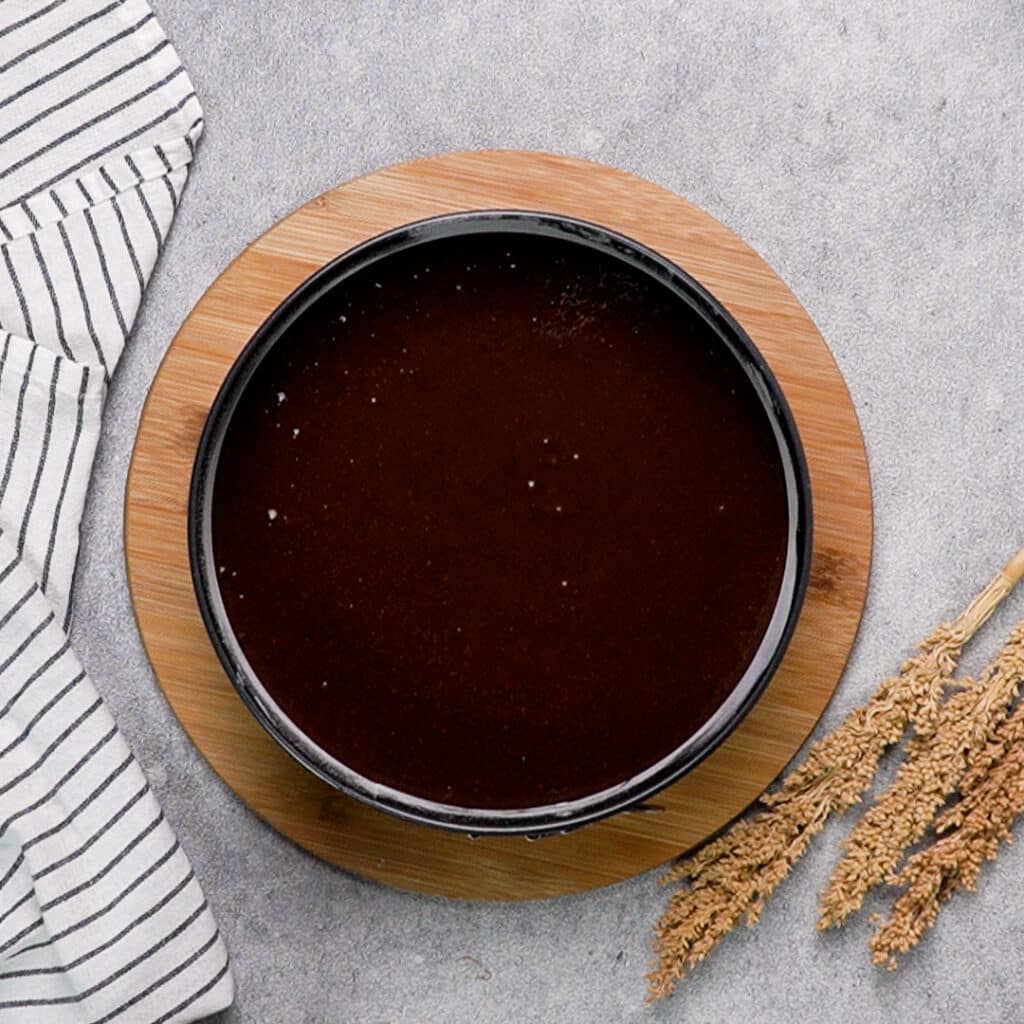
- Pour the batter into the prepared springform pan. Bake for 30-35 minutes, or until a toothpick inserted in the center comes out clean. Allow the cake to cool completely in the pan.
Step 3: While the cake is cooling, prepare the chocolate mousse.
- In a large mixing bowl, beat the heavy cream with an electric mixer until soft peaks form. Gradually add the sugar, cocoa powder, and vanilla extract, continuing to beat until stiff peaks form.
Step 4: Once the cake has cooled, spread the chocolate mousse evenly over the top of the cake, using an offset spatula.
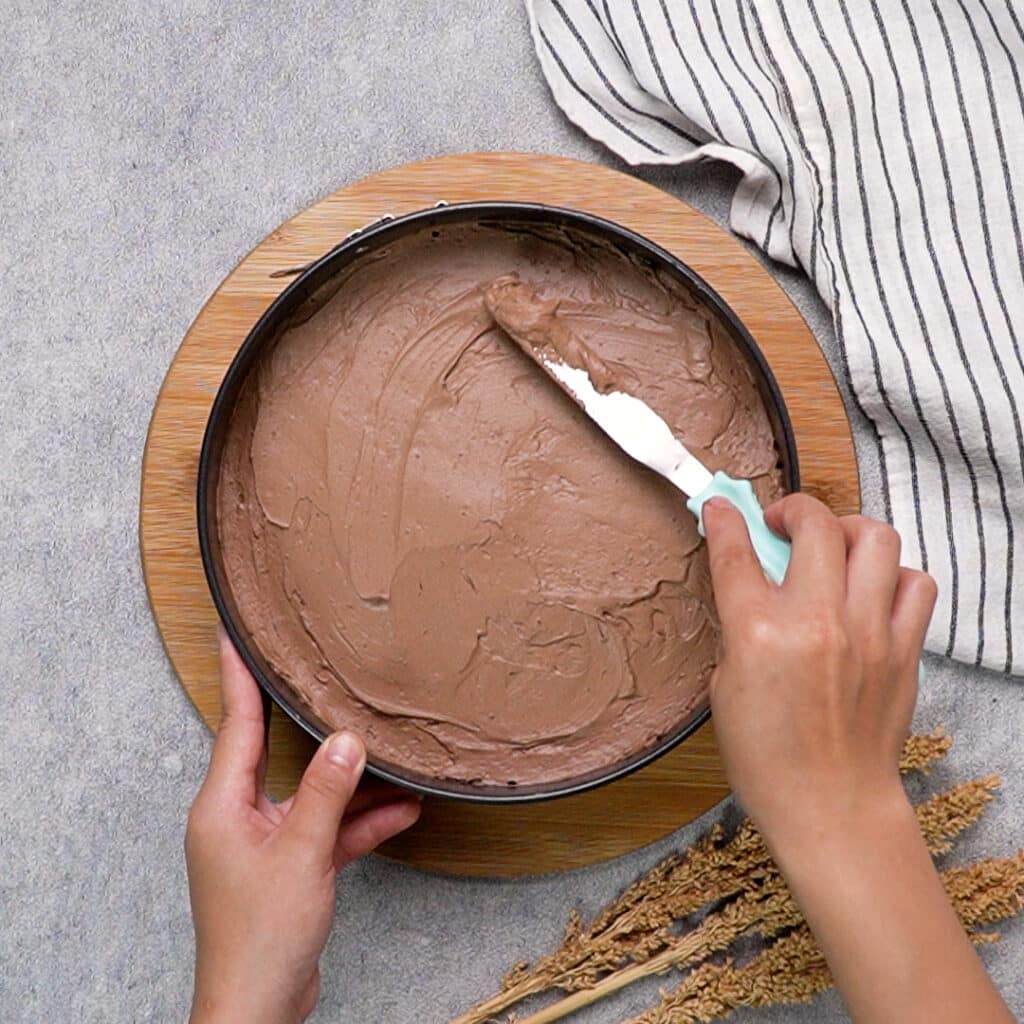
- Refrigerate the cake for at least 2 hours, or until the mousse is firm.
Step 5: To make the white chocolate ganache, place the white chocolate chips in a heatproof bowl.
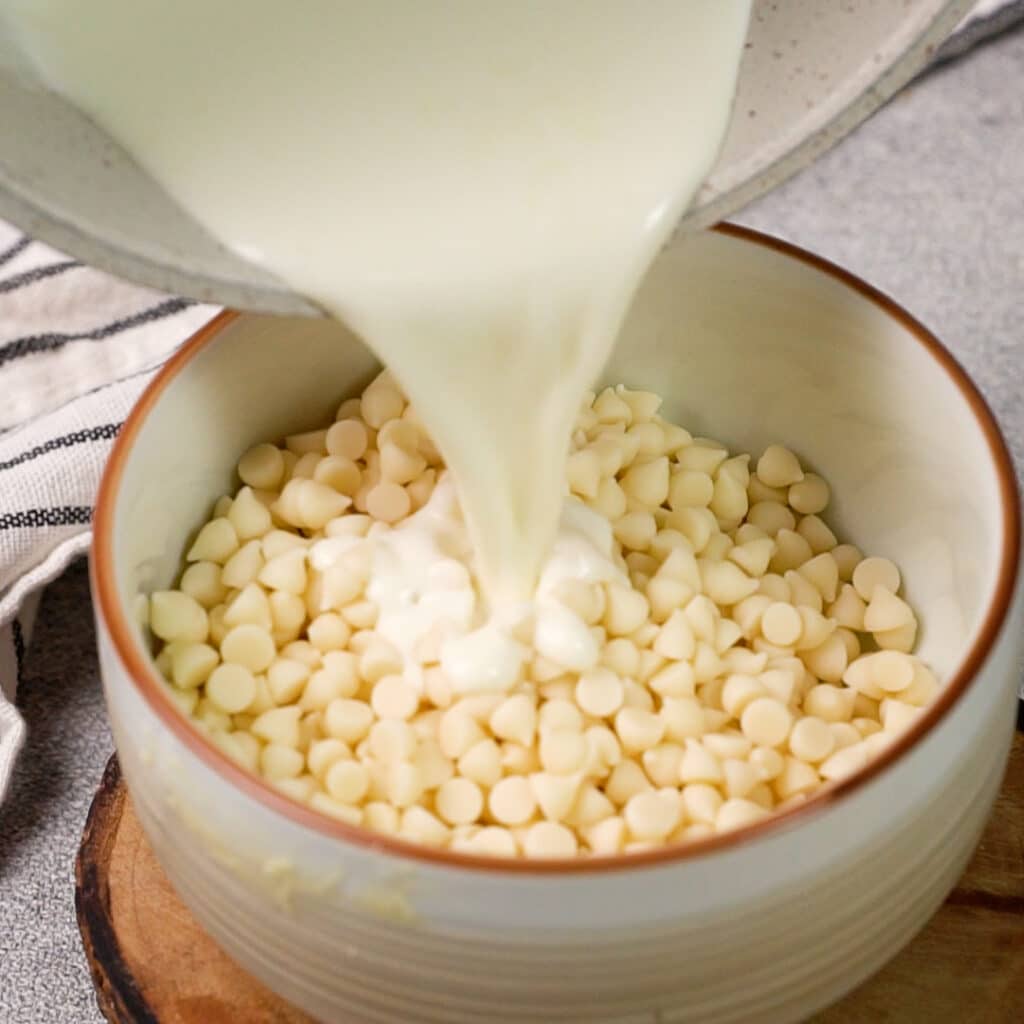
- In a small saucepan, heat the heavy cream over medium heat until it begins to simmer. Pour the hot cream over the white chocolate chips and let it sit for 1 minute. Then, whisk the mixture until smooth.
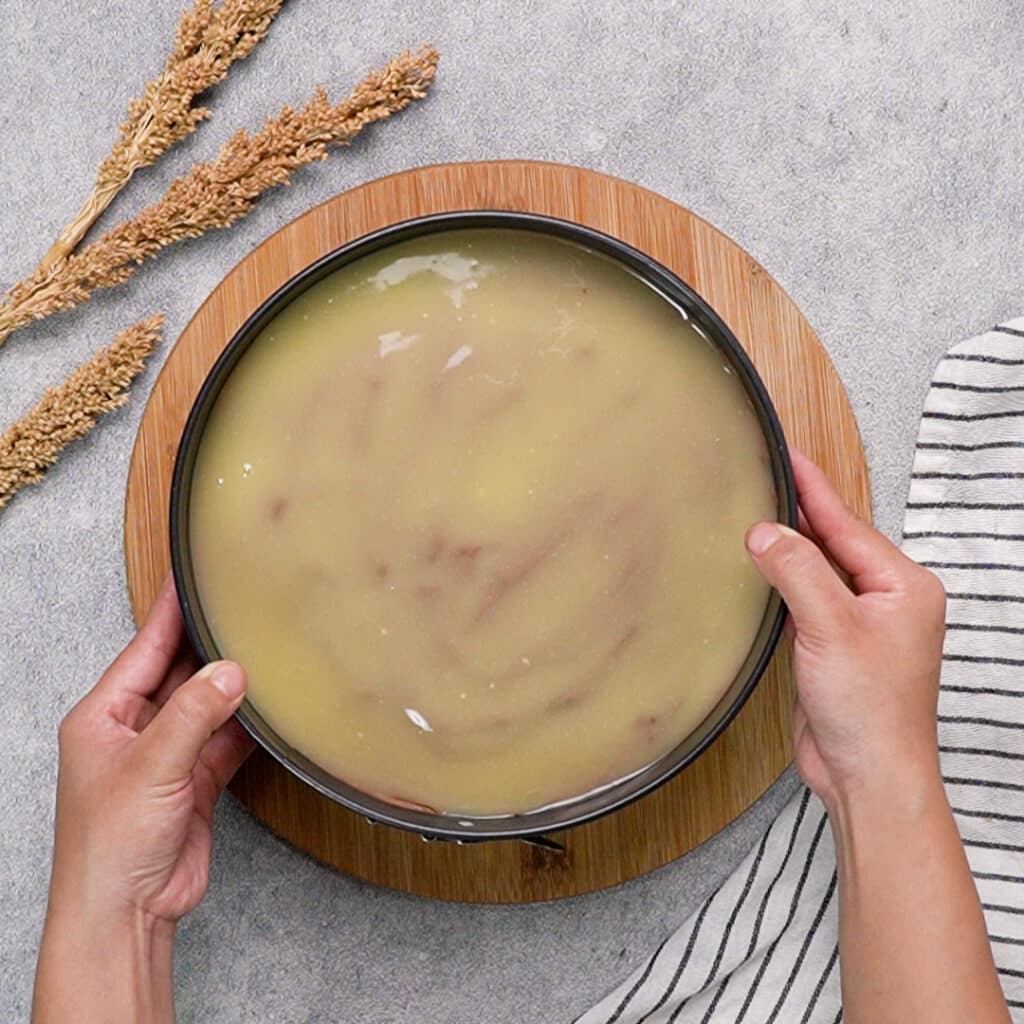
Step 6: Allow the ganache to cool slightly before pouring it over the chilled mousse layer.
- Use an offset spatula to spread the ganache evenly over the top of the cake.
- Refrigerate the cake for an additional 2 hours, or until the ganache is set. To serve, carefully remove the sides of the springform pan and slice the cake into 12 pieces. Enjoy!
Step 7: Enjoy your Irresistible Black Tie Mousse Cake!
Substitutions & Alternatives
Fear not, dear cake lovers, for we have a treasure trove of alternatives and substitutions to ensure that this indulgent chocolate mousse cake can be enjoyed by all! Whether you’re facing dietary restrictions or simply missing a specific ingredient, let’s dive into some scrumptious swaps.
Flour: For those with gluten sensitivities, gluten-free all-purpose flour can be used as a 1:1 replacement in this recipe. Look for a blend containing xanthan gum to maintain the cake’s structure and texture.
Dairy: Dairy-free comrades, you are not forgotten! For the cake, swap the whole milk with your favorite non-dairy milk (almond, soy, or oat milk work well). In the mousse and ganache, replace the heavy cream with canned coconut cream. Just chill the can overnight and scoop out the solid portion to whip up a tropical twist on our velvety mousse.
Sugar: If you’re looking to reduce your sugar intake, try using a granulated sugar substitute such as erythritol or stevia in both the cake and mousse. Just make sure to check the conversion rates on the packaging to ensure you’re using the right amounts.
Eggs: For our plant-based pals or those with egg allergies, replace the two large eggs with either 1/2 cup unsweetened applesauce or two flax eggs (2 tbsp ground flaxseed mixed with 6 tbsp water, let sit for 5 minutes to thicken).
Chocolate: If you’re not a fan of white chocolate, you can easily swap the white chocolate chips for milk or dark chocolate chips in the ganache. Just remember to adjust the sugar levels in the recipe accordingly to strike that perfect chocolatey balance.
Vegetable Oil: If vegetable oil is not your cup of tea, you can substitute an equal amount of melted coconut oil or even unsweetened applesauce for a lower-fat option.
So go forth, intrepid bakers, and fearlessly adapt this divine chocolate mousse cake to suit your needs and taste buds. Remember, the world of culinary creativity is vast, and the kitchen is your playground!
Storage & Reheating
Ah, the age-old question: how do we store this delectable 9-inch chocolate masterpiece? Fear not, my culinary comrades, for we have the answers you seek!
To store your freshly-made chocolate cake, simply cover it with plastic wrap or aluminum foil and keep it in the refrigerator. This will help to preserve the luscious layers of mousse and ganache, keeping them cool and firm. It’s important to note that this cake can last up to 5 days in the fridge, granted you haven’t devoured it all by then (no judgment here).
Now, should you find yourself with some leftover slices and a hankering for a warm and gooey treat, reheating is an option. Although not the most conventional approach, as the mousse and ganache may become a bit melty, it can still be a delightful experience. Simply place a slice on a microwave-safe plate and heat it for about 15-20 seconds, just enough to take off the chill and awaken the rich chocolatey flavors.
If you’re feeling particularly ambitious and want to share the love with future you, this cake can also be frozen! To do so, wrap individual slices tightly in plastic wrap and store them in a freezer-safe container. When you’re ready to indulge, simply thaw the slice in the refrigerator overnight or at room temperature for an hour or two. Voila! It’s like your very own time-traveling pastry chef has gifted you with a delicious treat.
So whether you’re storing it short-term or saving some for a rainy day, proper storage and reheating techniques for this cake are simple and effective. Happy eating!
Serving Ideas
- Take a trip around the world by adding some international flair to this heavenly chocolate cake. Sprinkle a few flakes of sea salt from France’s prized Guérande region, or give it a Mexican twist with a pinch of cinnamon and a hint of chili powder for an unexpected kick.
- Unleash your inner Picasso and create a visually stunning dessert masterpiece with a dusting of powdered sugar and some fresh berries. Arrange raspberries, blueberries, and blackberries in a colorful pattern that’s almost too pretty to eat (almost!).
- Embrace your scientific curiosity by experimenting with different textures. Try adding some crunch with a layer of crushed chocolate cookies or toasted nuts between the cake and mousse. The contrast between smooth mousse and crunchy bits will have your taste buds doing a happy dance.
- Turn your dessert into an interactive experience by creating a DIY toppings bar. Set out bowls of whipped cream, caramel sauce, and an array of your favorite chocolate candies (think crushed peanut butter cups, chocolate-covered pretzels, or toffee bits). Let your guests channel their inner pastry chef and customize their slices to their heart’s content.
- Feeling extra fancy? Elevate your cake game by serving it alongside a velvety scoop of chocolate, vanilla, or raspberry gelato. It’s the perfect marriage of rich European flavors and luxurious textures. Plus, the chilled gelato will help balance out the decadence of the cake, making it a match made in dessert heaven.
- Lastly, don’t forget the power of presentation. Serve your slices on elegant dessert plates with a sprig of fresh mint, a curl of chocolate, or a drizzle of raspberry coulis. A little extra effort can go a long way in making your chocolate cake look like it came straight from a five-star restaurant – bon appétit!
Variations & Customization
Vegan Chocolate Mousse Cake: For a vegan-friendly version, swap the eggs with a flax egg (2 tbsp ground flaxseed mixed with 6 tbsp water), use almond milk instead of whole milk, and replace the heavy cream in both the mousse and ganache with canned coconut cream. Make sure to use dairy-free chocolate chips for the ganache as well.
Gluten-Free Chocolate Mousse Cake: Replace the all-purpose flour with your favorite gluten-free baking flour blend. Ensure that your cocoa powder, baking powder, and baking soda are gluten-free as well.
GAPS/AIP-Friendly Chocolate Mousse Cake: Use coconut flour instead of all-purpose flour, swap vegetable oil with coconut oil, and replace the granulated sugar with honey. For the chocolate mousse, use coconut cream instead of heavy cream and honey instead of granulated sugar. To make the ganache, use carob chips instead of white chocolate chips and coconut cream instead of heavy cream.
Keto Chocolate Mousse Cake: Replace the all-purpose flour with almond flour, swap the granulated sugar with a keto-friendly sweetener like erythritol, and use unsweetened almond milk instead of whole milk. For the mousse and ganache, use erythritol instead of granulated sugar, and make sure to use sugar-free chocolate chips for the ganache.
Celebrating Global Culinary Heritage: You can add a bit of global flair to your Chocolate Mousse Cake by incorporating flavors from around the world. For example, add a pinch of cinnamon and cayenne pepper to the dry ingredients for a Mexican chocolate twist, or mix in some matcha green tea powder to the mousse for a Japanese-inspired variation.
Nutty Addition: If you’re nuts about nuts, consider adding a layer of toasted almonds, hazelnuts, or pecans between the chocolate cake and the mousse for some extra crunch and flavor.
Fruit Fiesta: Top your Chocolate Mousse Cake with fresh berries, sliced bananas, or even tropical fruits like mango or pineapple for a burst of natural sweetness and vibrant color.
Remember, the (chocolate) sky’s the limit when it comes to customizing your Chocolate Mousse Cake. So go ahead, channel your inner Willy Wonka and create a masterpiece that caters to your dietary needs and taste preferences. Happy baking!
Notes & Tips
- The power of sifting: To ensure a super smooth and airy chocolate cake, sift your dry ingredients (flour, baking powder, baking soda, cocoa powder, and salt) together. This not only helps to remove any lumps but also aerates the mixture, resulting in a lighter cake. Your taste buds will thank you!
- Timing is everything: Be careful not to overmix the cake batter, as it can lead to a dense and chewy texture. Mix just until the ingredients are combined, and then stop. This is your cue to break out your best I’m a baking genius dance moves.
- Embrace that global culinary heritage: For an extra touch of international flair, consider using high-quality Dutch-process cocoa powder in your cake and mousse. Originating from the Netherlands, this cocoa powder undergoes a special alkalizing process, giving it a smoother and milder flavor. Say hallo to a more sophisticated chocolate experience!
- Chill out: Make sure to give your cake ample time to cool before adding the mousse layer. If the cake is still warm, the mousse may melt and become a chocolaty mess. Patience is a virtue and, in this case, the key to mousse-tastic success!
- Whipping up perfection: When making the chocolate mousse, be careful not to overwhip the heavy cream. Once you’ve reached stiff peaks, put down that electric mixer! Overwhipping can lead to a grainy and unappetizing texture. You’re aiming for a fluffy, cloud-like mousse that will make your guests swoon.
- The great ganache debate: Some white chocolate chips can be stubborn when it comes to melting. If you’re having trouble achieving a smooth ganache, try using high-quality white chocolate bars instead. They often have a higher cocoa butter content, which melts more easily and gives your ganache a silky, luxurious finish. Trust us, your taste buds will appreciate the upgrade.
- Feeling adventurous? Customize your cake with a sprinkle of culinary creativity. Try adding a layer of fresh raspberries or sliced strawberries between the chocolate mousse and white chocolate ganache for a fruity twist. Or, for a hint of sophistication, mix in a splash of rum, brandy, or coffee liqueur to the chocolate mousse. The possibilities are endless, and you’re the boss of this flavor party!
- Quick tip for easy slicing: To achieve clean, picture-perfect slices of your decadent cake, dip your knife in hot water and wipe it dry before each cut. This melts through the layers like butter, ensuring envy-inducing presentation and brag-worthy social media photos. Your cake will be the talk of the town (or at least your Instagram feed)!
Common Mistakes
Overmixing the batter: Cake batter can be a sensitive soul, so make sure to mix it just enough to combine all the ingredients for a smooth and cohesive batter. Overmixing can lead to a tough and dense cake, which is a no-go for our fluffy, chocolaty dreams!
Not greasing and flouring the pan correctly: This step may seem annoying, but your future self will thank you when your cake slides right out of the pan like a graceful swan. If you skip this essential step, you might end up wrestling with your cake like a hungry bear, and nobody wants a cake with bear-claw marks all over it!
Not allowing the cake to cool completely: Patience is a virtue, especially when it comes to cooling your cake. Trying to spread the mousse on a warm cake will send it sliding and melting all over the place. Give your cake the chill time it deserves, and you’ll be rewarded with a perfectly layered masterpiece.
Not beating the mousse to stiff peaks: When whipping up your mousse, make sure to achieve the coveted stiff peaks (think mountain peaks that stand tall and proud). Underwhipped, soft peaks will result in a lackluster mousse layer, while overwhipped cream can curdle and turn grainy. Keep an eye on your peaks for the ultimate mousse experience.
Failing to chill between layers: This cake may have some waiting periods, but those are essential for the perfect layering. If you rush the process, your ganache might mingle with the mousse and create a messy, albeit delicious, lava flow. Just remember, good things come to those who chill!
Cutting the cake too soon: We know it’s tempting to dive in after all that work, but giving your ganache time to set is essential for those picture-perfect, drool-worthy slices. Let the ganache firm up, and your cake will be ready to impress even the most skeptical of dessert connoisseurs.
Now that you’re armed with the knowledge of these common pitfalls, go forth and conquer this heavenly chocolate cake! Happy baking!
Health Risks & Benefits
Hold onto your hats, folks, because this chocolate mousse cake is not only a scrumptious indulgence, but it also comes with some tantalizing health benefits! It’s time to dive into the dark, luxurious world of cocoa, which has been enjoyed by humans for thousands of years. In fact, ancient Mayans and Aztecs were known to consume chocolate in the form of a bitter, spicy beverage – talk about a mood booster!
Now, let’s break down the (literal) sweet science of cocoa. First off, cocoa powder is packed with antioxidants, which help neutralize harmful free radicals in our bodies. These antioxidants, specifically flavonoids, have been linked to lower blood pressure, improved blood flow, and reduced heart disease risk. So, you could say that enjoying a slice of this chocolate mousse cake is almost like giving your heart a hug (aww, how sweet!).
However, it’s important to remember that this delectable dessert also contains sugar, so moderation is key. Consuming too much sugar can raise the risk of weight gain, diabetes, and heart disease. But hey, we all deserve a little indulgence every now and then, right? So go ahead and treat yourself to a slice of this heavenly chocolate mousse cake, just remember to share with your friends and family. After all, you don’t want to keep all that cocoa goodness to yourself!
For those concerned about the use of vegetable oil in the recipe, you can opt for a healthier alternative such as coconut oil or avocado oil. These oils contain healthier fats and may provide some additional nutritional benefits. Just be sure to adjust the flavor profile accordingly and embrace the experimentation!
In conclusion, while this chocolate mousse cake is not exactly a health food, it does offer some surprising benefits due to its star ingredient – cocoa powder. So don’t be afraid to indulge in a slice of this divine dessert every once in a while. Just remember, as with all things in life, moderation is key. Happy baking, and bon appétit!
Recipe history & context
The heavenly combination of chocolate cake, mousse, and white chocolate ganache in this recipe has roots in the history of three distinct culinary creations. Let’s take a stroll down memory lane and unravel the origins of each component, shall we?
First up, the chocolate cake! The use of chocolate in cake dates back to the 18th century in Europe, following the arrival of cocoa beans from the Americas. This sweet treat gained popularity in the United States in the 19th century, becoming a staple at birthday parties and special occasions. Our recipe takes inspiration from the classic American chocolate cake, known for its rich cocoa flavor and tender crumb.
Next in line, the chocolate mousse! With origins in the French culinary world, the word mousse translates to foam in English, which perfectly describes its light and airy texture. The first recorded recipe for chocolate mousse dates back to the 18th century, and it’s been tantalizing taste buds ever since. For our recipe, we opt for a simple yet decadent version, made with heavy cream, cocoa powder, sugar, and vanilla extract.
Last but not least, the white chocolate ganache! A relative newcomer to the dessert scene, white chocolate was first introduced in the 1930s by the Nestlé company. Though it doesn’t contain cocoa solids, white chocolate is made from cocoa butter, sugar, and milk solids, giving it a creamy, sweet taste that pairs beautifully with the rich chocolate flavors of our cake and mousse. The ganache, a luscious mixture of white chocolate and heavy cream, adds a touch of elegance to the final presentation.
So there you have it: a delightful marriage of old and new, European and American, all in one scrumptious, drool-worthy dessert. Bon appétit!
Common Questions
Absolutely! This decadent chocolate mousse cake is perfect for making ahead. Simply follow the recipe through Step 9, then cover the cake and keep it in the refrigerator for up to 2 days. Just before serving, remove the springform pan’s sides and slice it up. This cake is not only delicious but also a fantastic time-saver for dinner parties or special occasions.
While a 9-inch springform pan is ideal for this recipe, you can also use a regular 9-inch round cake pan. Just be sure to line the bottom with parchment paper and grease the sides well to help the cake release easily. Keep in mind that removing the cake from a regular pan might be a bit trickier, so take extra care when doing so.
Don’t worry! You can still make the mousse without an electric mixer. It will require some elbow grease, but it’s totally doable. Use a large whisk and whip the heavy cream by hand until soft peaks form. Then, gradually add the sugar, cocoa powder, and vanilla extract, continuing to whisk until you achieve stiff peaks. It might take a little longer than using an electric mixer, but the end result will be just as delicious and satisfying.
Of course! If you’d like to switch things up, you can replace the white chocolate ganache with a milk or dark chocolate ganache. Simply use milk or dark chocolate chips instead of the white chocolate chips, and follow the same instructions for heating the cream and mixing the ganache. This will add another layer of chocolatey goodness to your cake, making it even more irresistible.
Yes, there are a few substitutions you can make to create a dairy-free version of this chocolate mousse cake. Replace the whole milk with a dairy-free milk alternative, such as almond or soy milk. For the heavy cream, use a dairy-free whipped topping or a coconut cream-based alternative. Finally, choose dairy-free white chocolate chips for the ganache. With these substitutions, you’ll be able to enjoy a delicious, dairy-free chocolate mousse cake that still packs a flavorful punch.
Equipment
- Medium saucepan
- Whisk
- Heatproof bowl
- Fine mesh strainer
- 4-6 individual serving dishes
Ingredients
- 4 oz dark chocolate chopped
- 2 cups whole milk
- ½ cup granulated sugar
- ¼ cup unsweetened cocoa powder
- 3 tbsp cornstarch
- ¼ tsp salt
- 1 tsp pure vanilla extract
- 1 tbsp unsalted butter
Instructions
- Place chopped dark chocolate in a heatproof bowl.
- In a saucepan, whisk milk, sugar, cocoa powder, cornstarch, and salt. Cook over medium heat, whisking constantly, until thickened and bubbling (10 minutes).
- Remove saucepan from heat and pour mixture through a fine mesh strainer into the bowl with chocolate.
- Let sit for a minute, then whisk until smooth and combined.
- Stir in vanilla extract and butter until melted and incorporated.
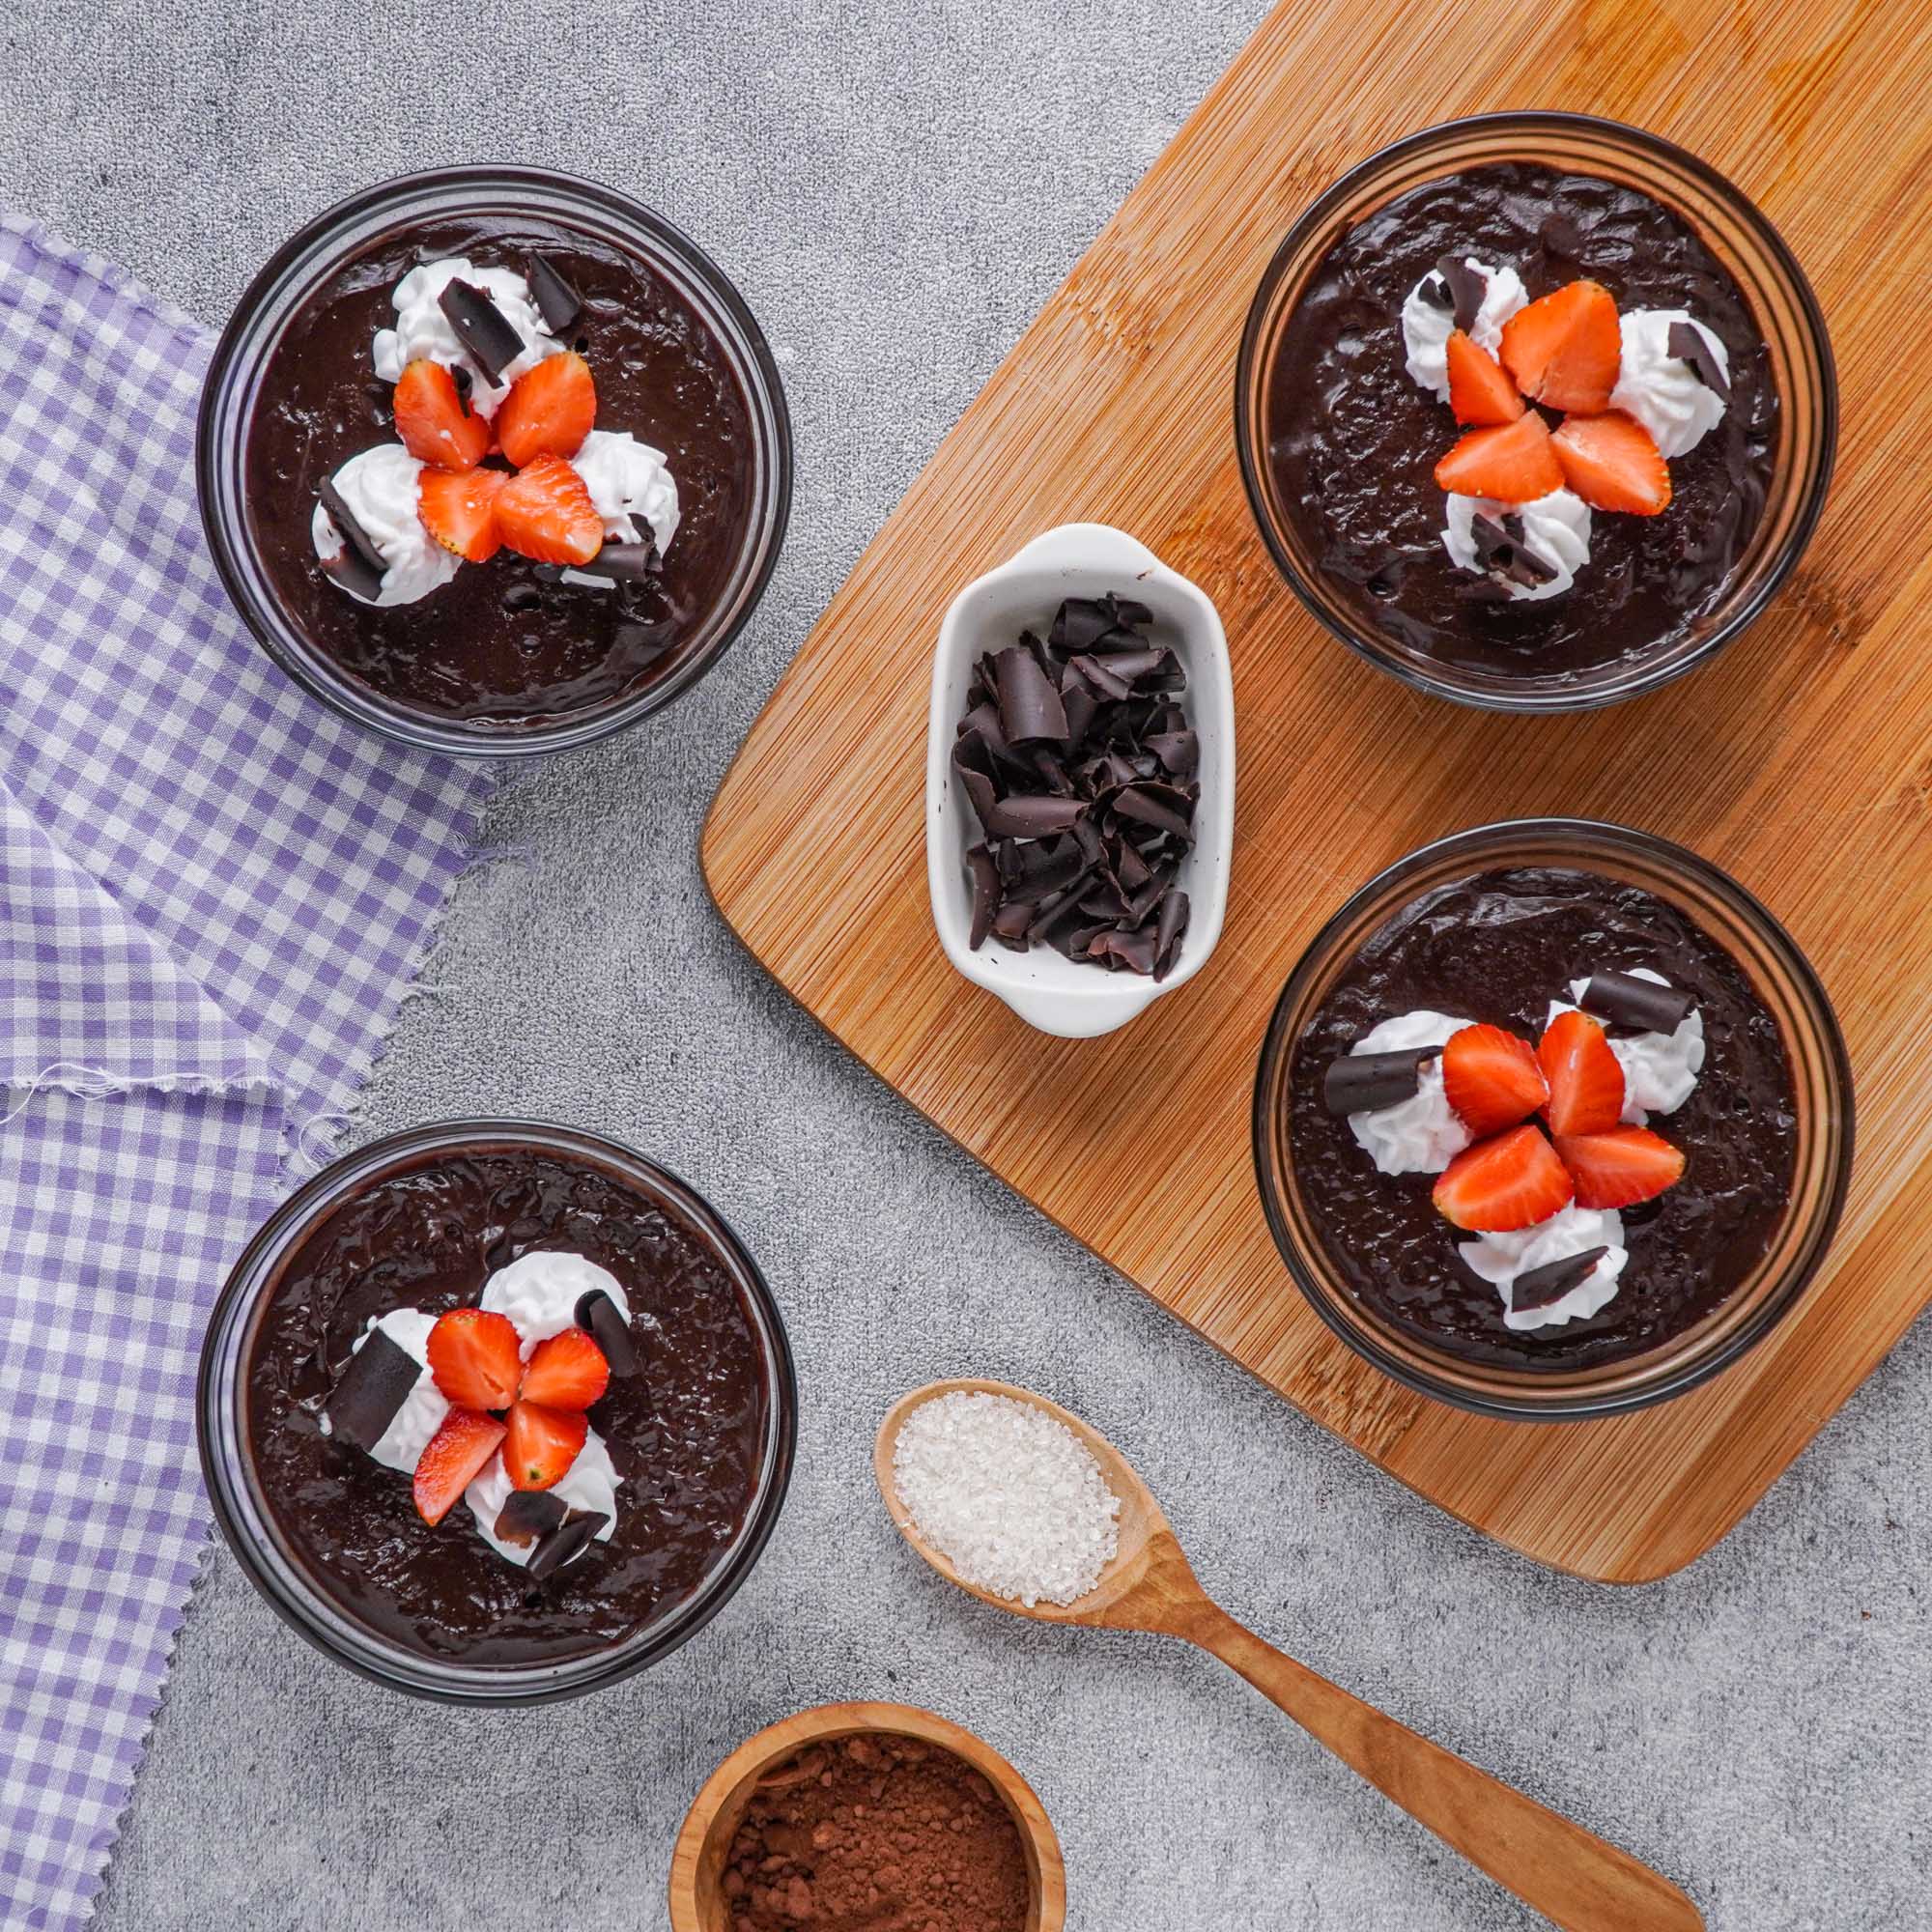
- Divide mixture evenly among 4-6 serving dishes. Cover with plastic wrap, touching the surface of the budino.
- Refrigerate for at least 2 hours, or until set.
- Remove plastic wrap, add optional toppings, and serve.