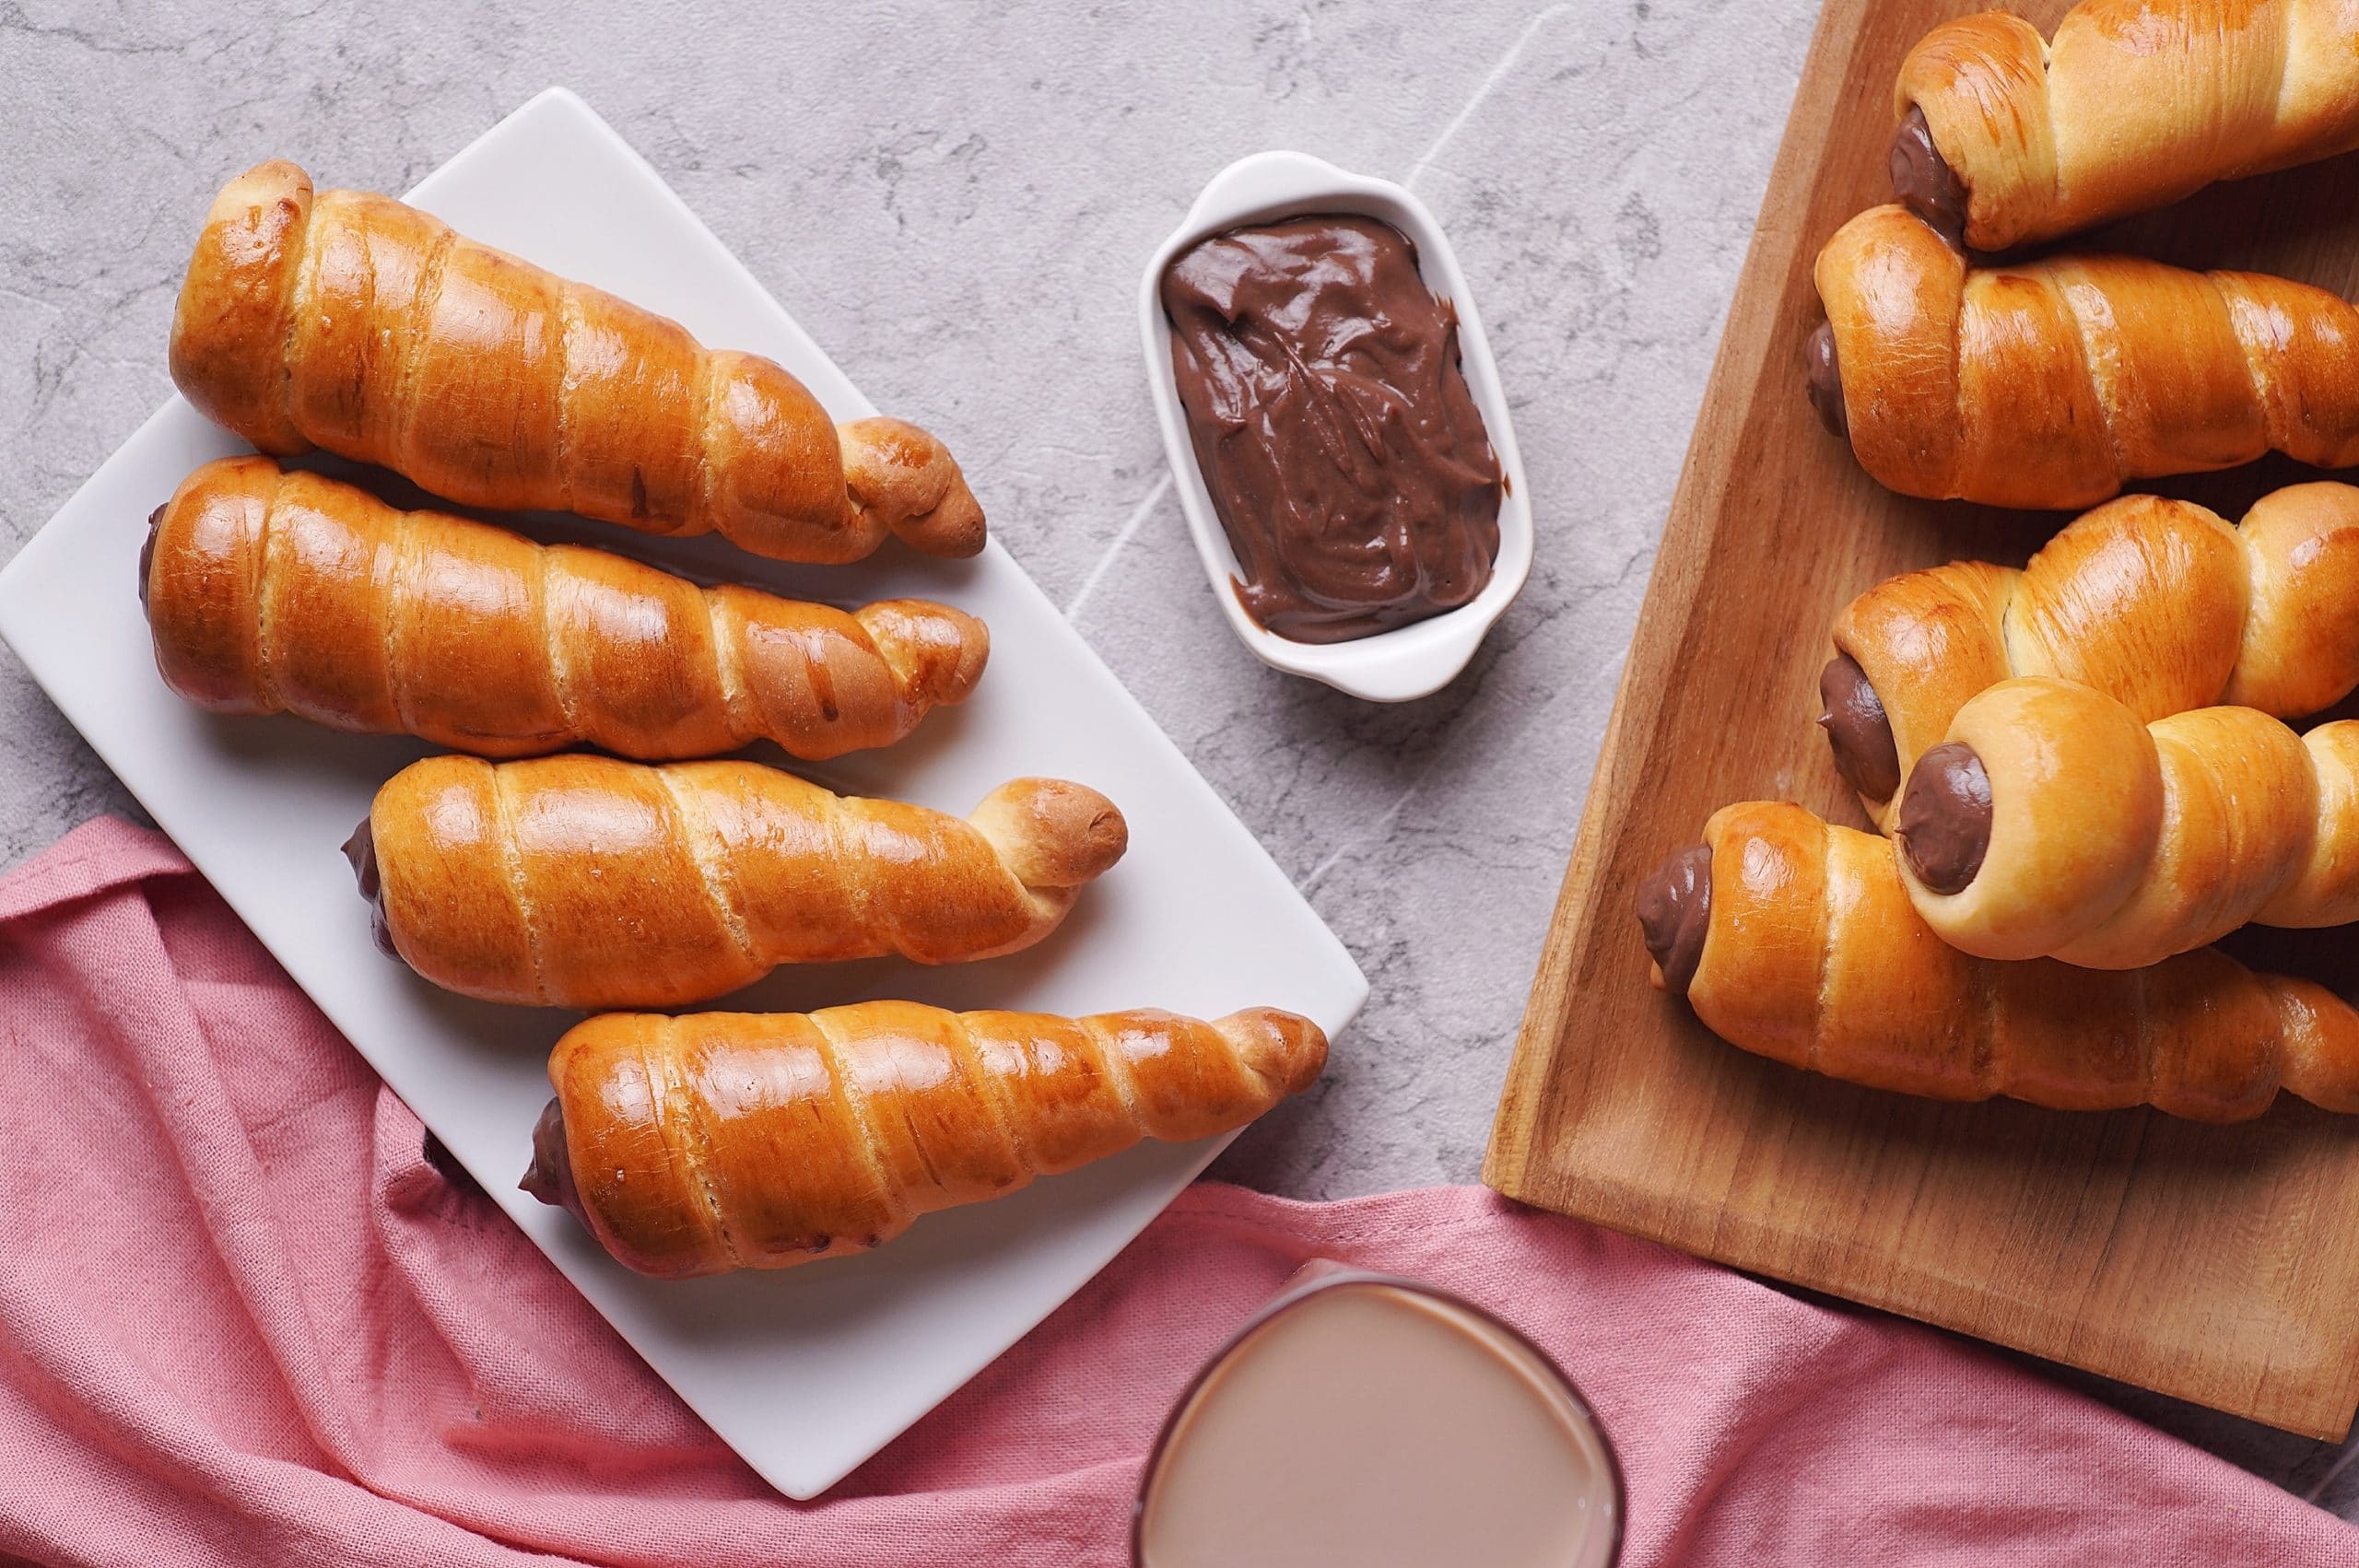
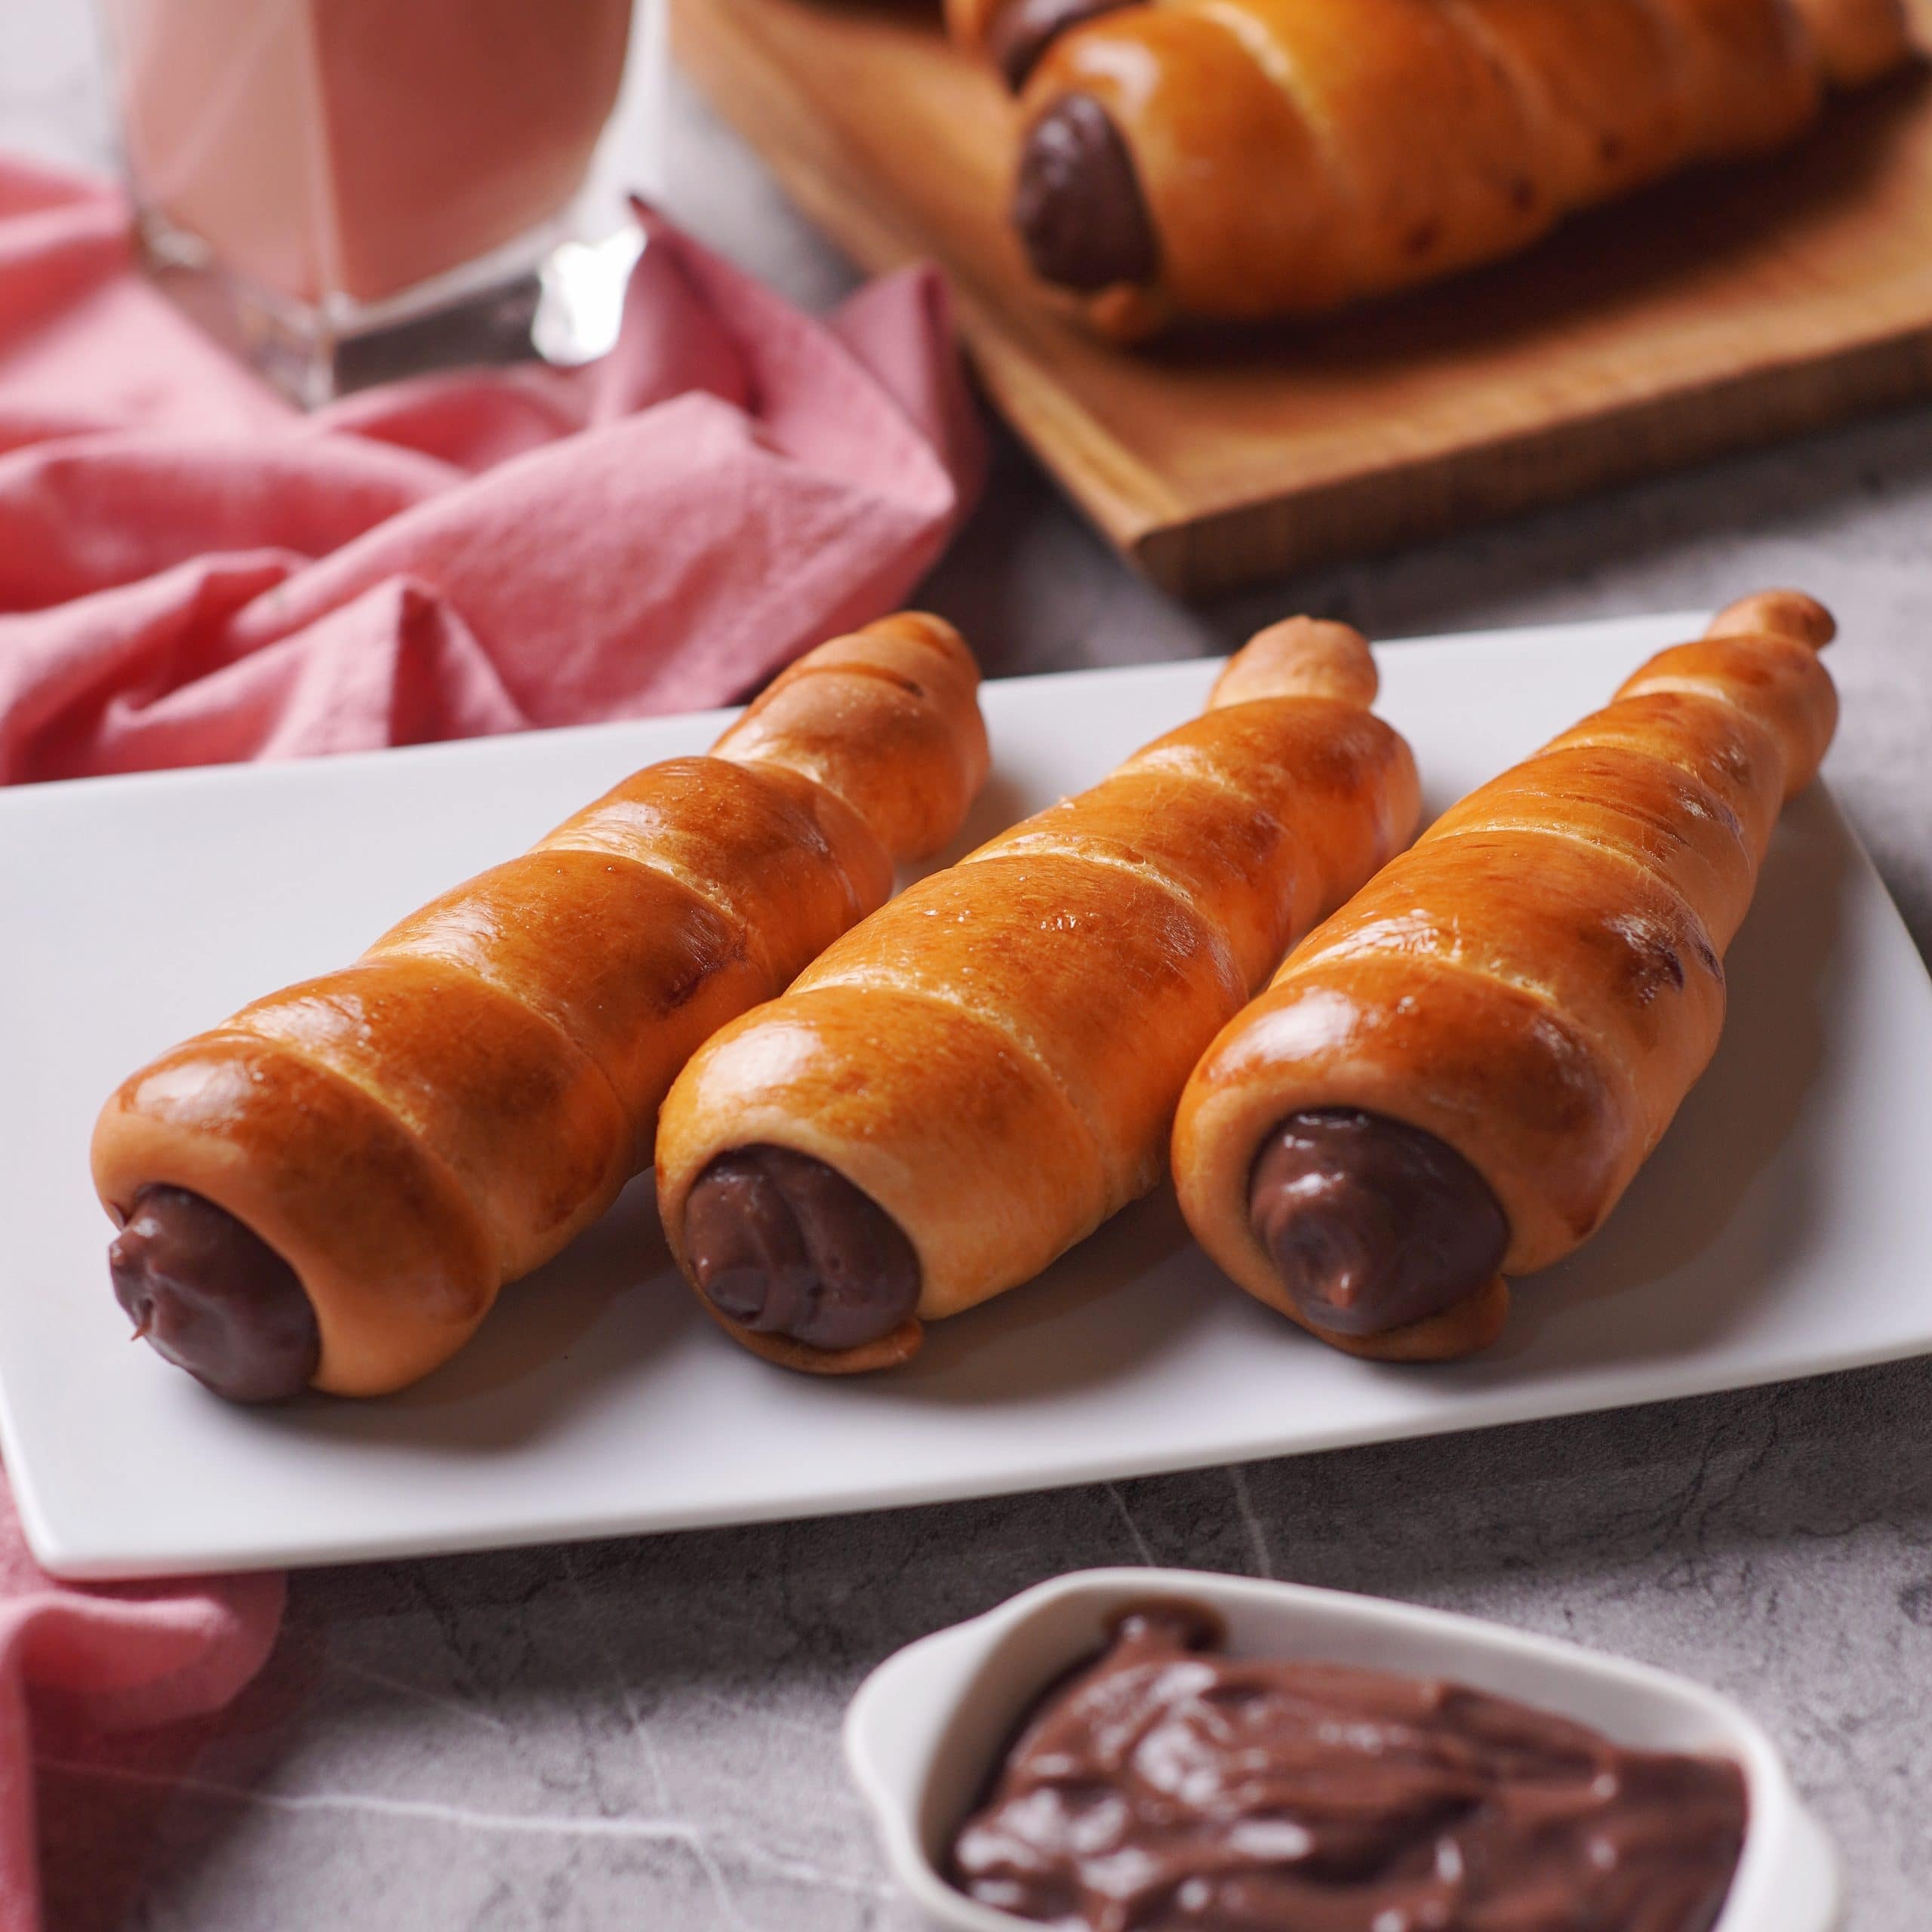
Delicious Chocolate Cornet
Important Note: When you buy through our links, we may earn a commission. As an Amazon Associate we earn from qualifying purchases. Content, pricing, offers and availability are subject to change at any time - more info.
Equipment
- 12 pastry cone molds
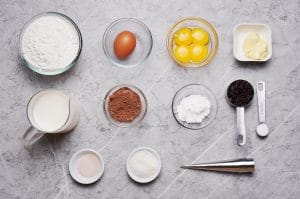
Ingredients
For the cornet:
- 2½ tsp active dry yeast
- 2 cups bread flour
- 2 tbsp sugar
- 1 tsp salt
- 1 egg
- 2 tbsp soft butter
For the filling:
- 2 cups milk
- 4 egg yolks
- ⅓ cup sugar
- 2 tbsp cocoa powder
- 2 tbsp corn starch
- 2 tbsp cake flour
- 1½ tbsp butter
- ¼ cup chocolate chips
Also needed:
- Extra flour
- Extra butter
- 1 egg
Instructions
- All ingredients ready? Let's begin!
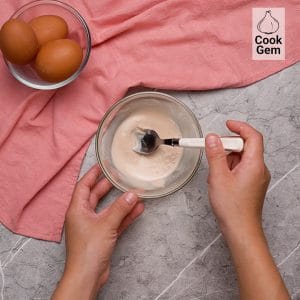
- Mix the yeast in with two tbsp of warm water and stir. Let the yeast sit for about 5 minutes, or until it begins to bubble and looks thicker.
- In a large bowl, add the bread flour, sugar, and salt. Whisk together to combine.
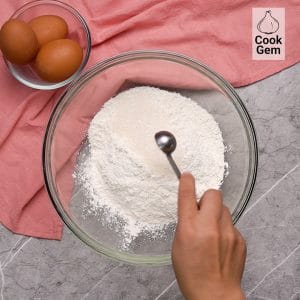
- Add the yeast mix into the flour and whisk again to combine.
- In a small bowl, add the egg and beat it just enough to break up the yolk. Pour it into a ½ cup measuring cup and make up the difference with water.
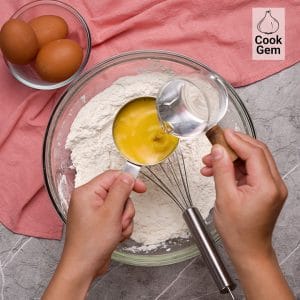
- Whisk the flour mix while you pour the egg into it.
- At this point, you will probably need to use your hands to knead the dough. While you knead, add pieces of butter and continue kneading to combine.
- When the dough becomes a smooth, well mixed ball, cover the bowl and let it rise for an hour or until the dough ball has doubled in size. Make sure to set the dough in a warm place, or it won’t rise as intended.
- While the dough rises, you can start on the chocolate filling. Over medium heat, warm the milk in a saucepan until just before it reaches a boil.

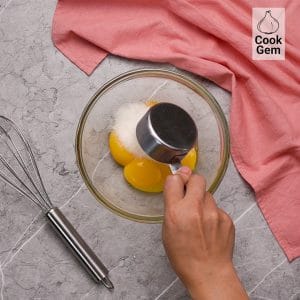
- In a large, clean bowl, add the egg yolks and sugar. Whisk until combined.
- Constantly whisk while you add a little bit of hot milk to the egg mixture. Whisk that for a few seconds before sifting in the cocoa powder, corn starch, and cake flour. Whisk again.

- Slowly adding the rest of the hot milk, still stirring constantly.
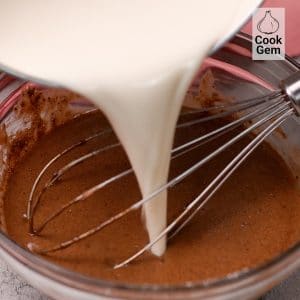
- Use a fine sieve to push the egg mixture through into a pot. The sieve will remove any unwelcome clumps.
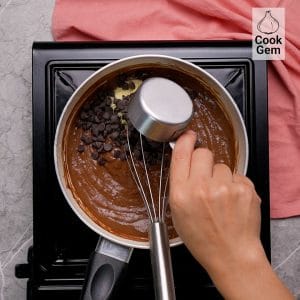
- Put the pot on medium heat and whisk constantly for several minutes, or until the custard has really thickened up. Be patient, as sometimes this can feel like it takes forever.
- When the custard is thick, remove it from the heat and add the butter and chocolate chips. Whisk until the butter and chocolate have melted. If they don’t melt, you can put the pot back on the heat briefly until it does all mix together.
- Move the custard into a bowl and cover it with plastic wrap. Press the wrap inside the bowl and on top of the custard instead of just stretched across. This helps prevent an icky skin from forming.
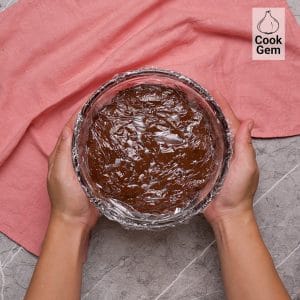
- Put the custard in the fridge for a minimum of 30 minutes (though you can leave it longer).
- When the dough has doubled in size, poke the center with your finger. If the indent stays, the dough is ready.
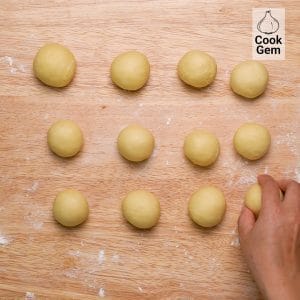
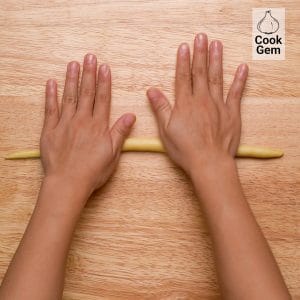
- Lightly flour a surface and place the dough on it. Cut it into 12 even pieces and roll each piece into a ball.
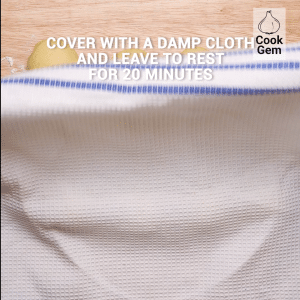
- Cover all the balls with a damp cloth and leave to rest for 20 minutes.
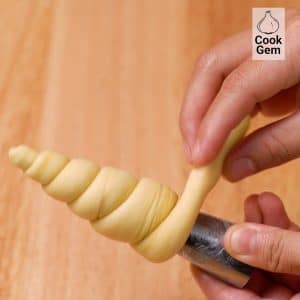
- Cover a baking tray with parchment paper and rub a little butter over 12 5-inch pastry cone molds (if you don’t have any, you can make some out of aluminum foil).
- Roll one of the dough balls into a long rope (about 13 inches) and wrap the dough rope around a pastry cone. Pinch it together so it holds and place it on the baking sheet.
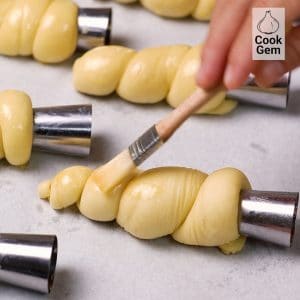
- Repeat with the remaining dough balls and let them rise again for 45 minutes or until they have puffed again.
- Preheat the oven to 350F.
- Crack an egg into a small bowl and whisk. Use a pastry brush to brush the dough with the egg.
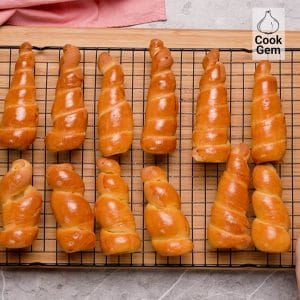
- Bake the cornets for 12-15 minutes or until golden.
- Place the cornets on a cooling rack and don’t try to remove the molds until they are safe to touch. After removing the molds, let the cornets cool completely.
- Get the custard from the fridge and stir it before putting it in a pastry bag with a round tip. If you don’t have a pastry bag, you can use a plastic bag with a tip cut off.
- Insert the piping bag into the cornet and fill, slowly pulling the bag out while squeezing so you fill the cornet as much as possible.

- Before serving, you can sprinkle a little powdered sugar on top for looks. Enjoy!

Video
Nutrition
Chocolate cornets are Japanese sweets. Interestingly though, the word “cornet” actually has its origins in Latin. A chocolate cornet is basically sweet bread stuffed with a chocolate filling. It is a little bit similar to desserts like the French éclair or Italian cream horn. If you like sweet, doughy breads, chocolate, or cream, you’re sure to love chocolate cornets.
This recipe does take over 3 hours, but most of that time is the dough rising. While this dessert may seem exotic, the ingredients are every-day stuff that you most likely already have in your pantry. Like any stuffed, doughy dessert, this recipe is more complicated than your average chocolate chip cookies, so make sure to read the instructions carefully and follow them as closely as you can. Don’t let that get to you though, the results are well worth it!
One of the most important things about this recipe is letting the dough prove correctly. I cannot tell you how many times I have ruined a dish because I don’t have the patience to let the dough rise properly or I because I leave it to prove in an area that isn’t warm enough. You have a higher chance of success if you don’t repeat my mistakes! Badly proved dough results in something very dense and hard. It would still be…sort of edible, but you wouldn’t be able to fill it with cream. I do not recommend it.
Notes & Tips
- These can be stored, covered, in the fridge for three days, but they are definitely better fresh.
- If you want to have some for later, consider leaving a few cornets empty and storing them in an air-tight container at room temperature then filling them before you are ready to eat them.