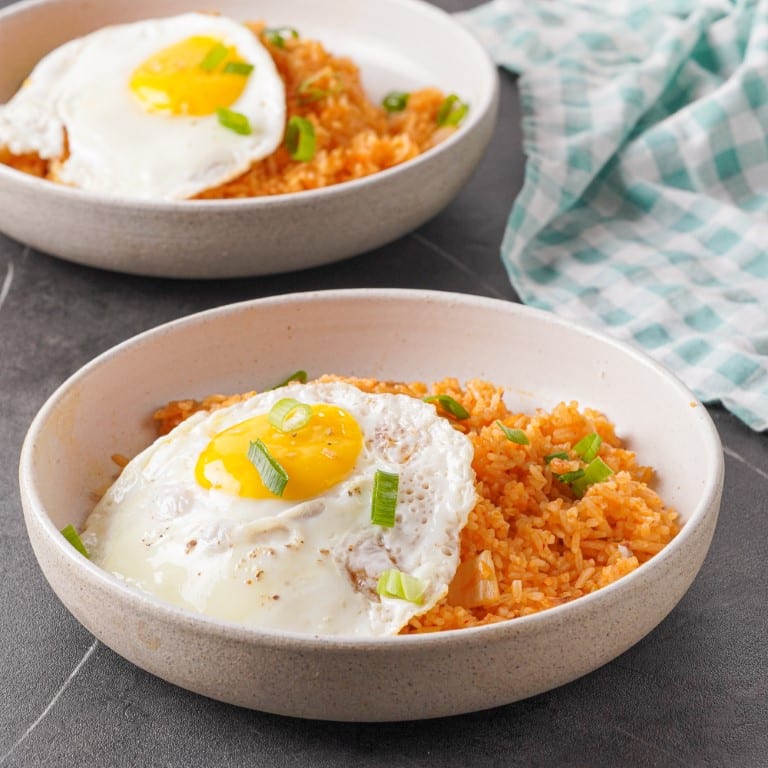
Homemade Japanese Braised Pork Rice Bowl
Important Note: When you buy through our links, we may earn a commission. As an Amazon Associate we earn from qualifying purchases. Content, pricing, offers and availability are subject to change at any time - more info.
Ingredients
- 2 cups cooked rice
- ½ cup packed kimchi drained and chopped
- ¼ cup kimchi juice
- ¼ cup chopped scallions green parts only
- 2 cloves garlic minced
- 2 tsp. soy sauce
- 1 tsp. gochujang
- 1 tablespoon sesame oil
- 1 tablespoon vegetable oil
- 2 eggs to fry sunny side up
- Salt and pepper to taste
Instructions
- Heat a large skillet over medium-high heat and add the vegetable oil.
- Add the minced garlic to the skillet and sauté for 1-2 minutes. Add the chopped kimchi to the skillet and cook for another 2-3 minutes, until slightly softened.
- Massage the cooked rice with sesame oil, using your hands to separate the grains of rice. Add the rice to the skillet and stir to combine.
- In a small bowl, combine the soy sauce, kimchi juice, and gochujang paste until dissolved. Pour into the skillet and stir to combine. Cook, tossing occasionally to cook evenly. Taste, season with salt and pepper, and turn off the heat.
- Fry the eggs sunny side up to your liking.
- Serve the kimchi fried rice hot with scallions and a sunny-side-up egg. Enjoy!
Nutrition
This pork chashu don rice bowl is completely foolproof and incredibly mouth-watering. Once you learn how to make this delectable Japanese braised pork at home you’ll never want to spend 30 bucks on this dish at a restaurant ever again.
Don’t forget to save the pork marinade to drizzle over literally anything later – it has so much flavor and will make noodles, rice, meat, or soups taste amazing.
Why We Love This Chashu Don
This pork chashu rice bowl requires minimal prep and cleanup in comparison to other chasu don recipes. There’s no need to roll up the pork belly. All you need to do is marinate the pork, bake it, base it, and assemble it on top of a flavorful rice bowl.
The meat is tender, bursting with flavor, and has plenty of fat that drizzles over the rice when torched. You can also pan-sear the pork slices to braise them and reserve the drippings for more umami.
The rice in this pork chashu rice bowl recipe is perfectly seasoned with Japanese classic toppings – fried onions, fried shrimp, furikake, spring onions, and sesame oil. But you can use whatever you have at hand.
We’ve not forgotten to add some julienned veggies for freshness. I used daikon radish, but you can substitute any julienned or shredded vegetable such as carrots, cabbage, or leaks.
What Do I Need For This Japanese Chashu Don Recipe?
For making delicious pork chashu don rice bowls, you’ll need:
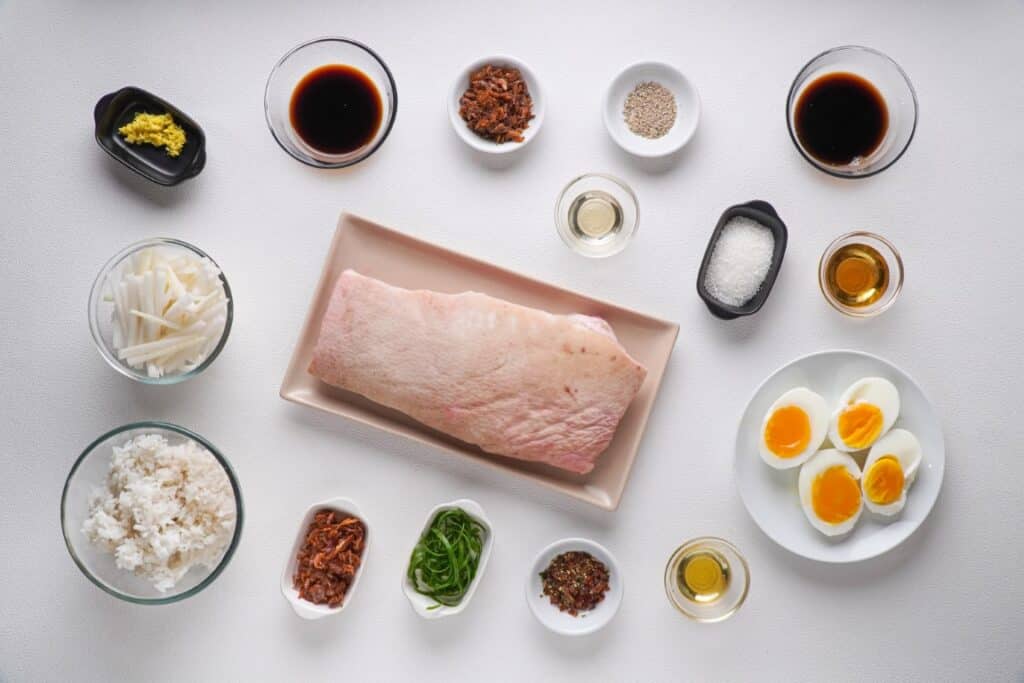
For the pork:
- 1 ½ lb pork belly slab, whole
- ¼ cup dark soy sauce
- ¼ cup light soy sauce light soy sauce
- White pepper (or black pepper)
- 1 Tbsp. each sugar, mirin, honey
- 1-inch ginger, finely grated
For serving the donburi:
- 2 cups cooked rice
- 2 eggs, soft-boiled, peeled and halved
- 4 tsp. sesame oil
- 4 tsp. fried onions
- 4 tsp. fried dried shrimp
- 2 spring onions, finely sliced, divided
- 1 cup daikon radish (or regular radish), thinly julienned
- Furikake (seaweed topping for garnish and flavor)
How To Make Japanese Chashu Don At Home
Step 1: Rinse & pat dry the marinated pork belly
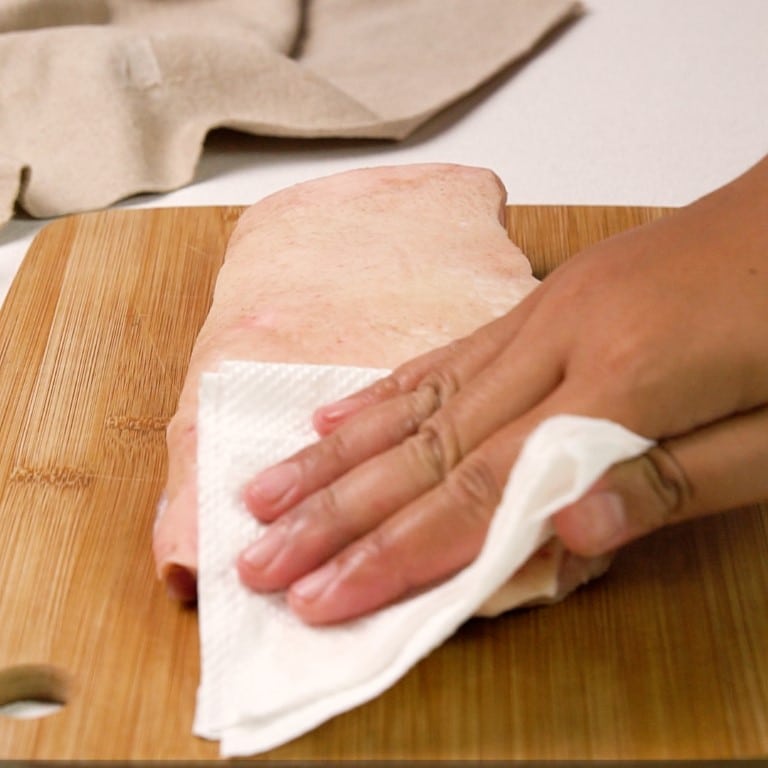
Rinse the pork belly under cold water, then pat dry with paper towels.
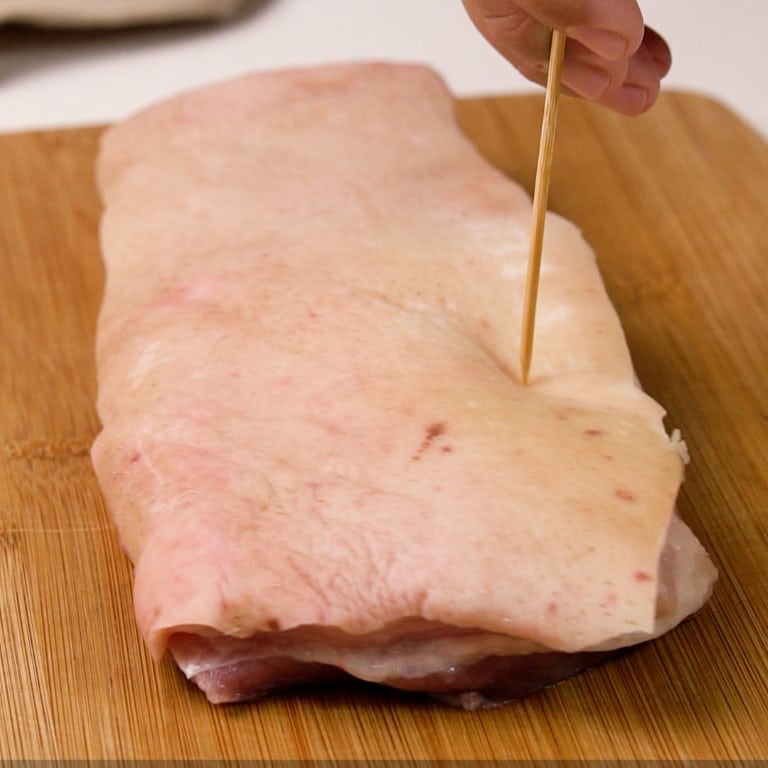
Step 2: Perforate the pork belly skin
Poke holes in the pork belly skin about 1/4-inch deep using a metal skewer, ice pick, or thick wooden skewer. This will allow the marinade to seep into the meat better. Make sure you don’t go too thick and puncture the meat.
Step 3: Prepare the soy-ginger marinade
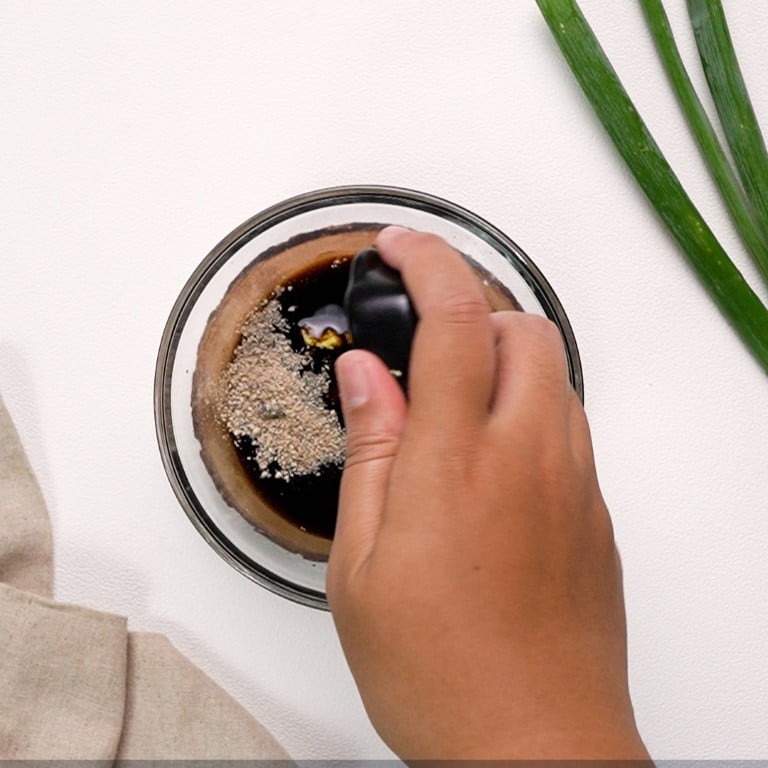
Combine the marinade ingredients in a mixing bowl and whisk together – light and dark soy sauce, sugar, mirin, white pepper, and ginger.
Step 4: Marinate the pork belly in the Ziploc bag

Place the pork belly in a large Ziploc bag, then pour the marinade in with it. Seal the bag tightly and massage the pork belly until covered with sauce.
Chill in the fridge for a minimum of 12 hours and up to 24 hours.
Step 5: Bake the pork belly
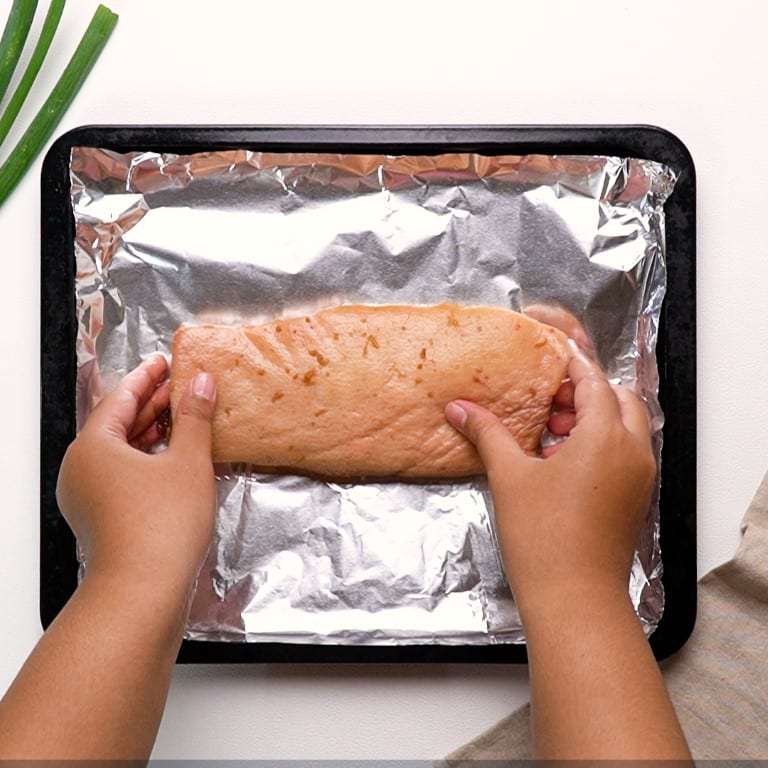
Preheat the oven to 400°F. Remove the pork belly from the fridge 30 minutes before baking.
Line a baking tray with foil and place the pork belly on it. Don’t discard the marinade left in the Ziploc bag.
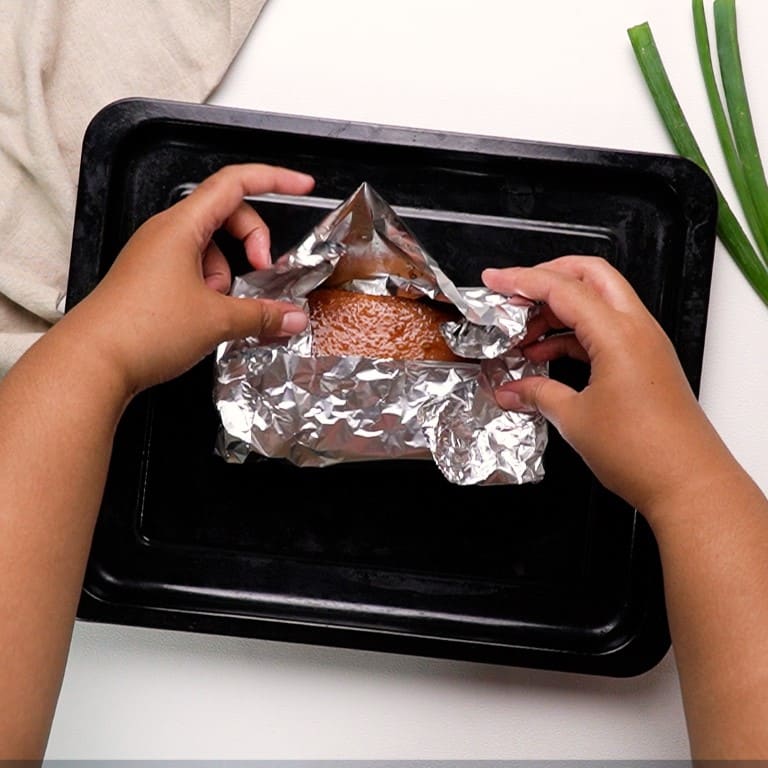
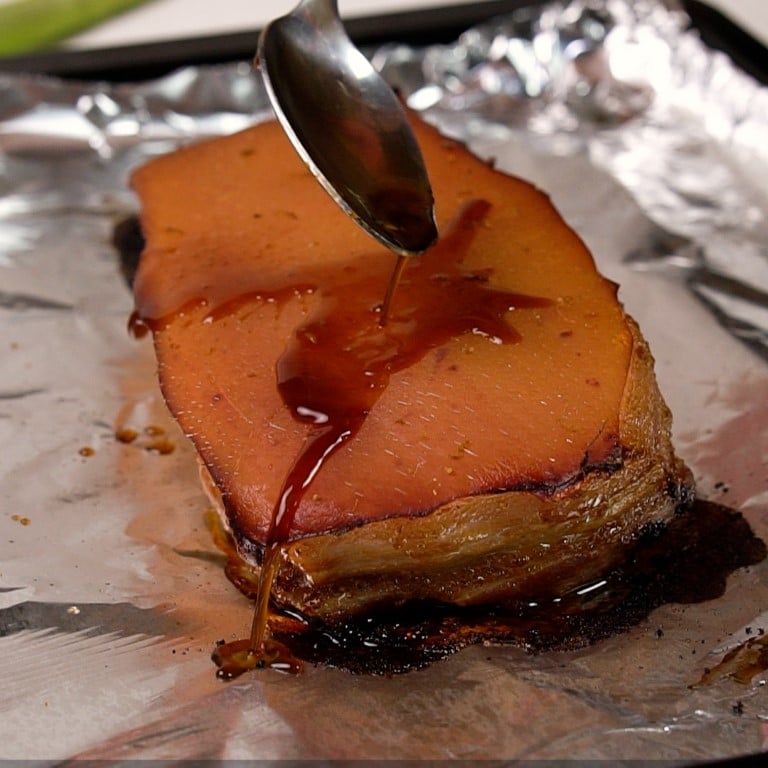
Step 6: Bake and base the pork belly with remaining marinade
Bake for 25 minutes, then base it with half of the remaining marinade, close the sides of the foil around it, and bake for another 10 minutes.
Step 7: Complete baking and let the pork belly rest
Base the pork belly a second time with the remaining marinade and bake for an additional 10 minutes. In total it should take 45 minutes to bake. Remove from the oven and let the pork rest for 5-10 minutes.
Step 8: Prepare and serve rice bowls with toppings and daikon radish
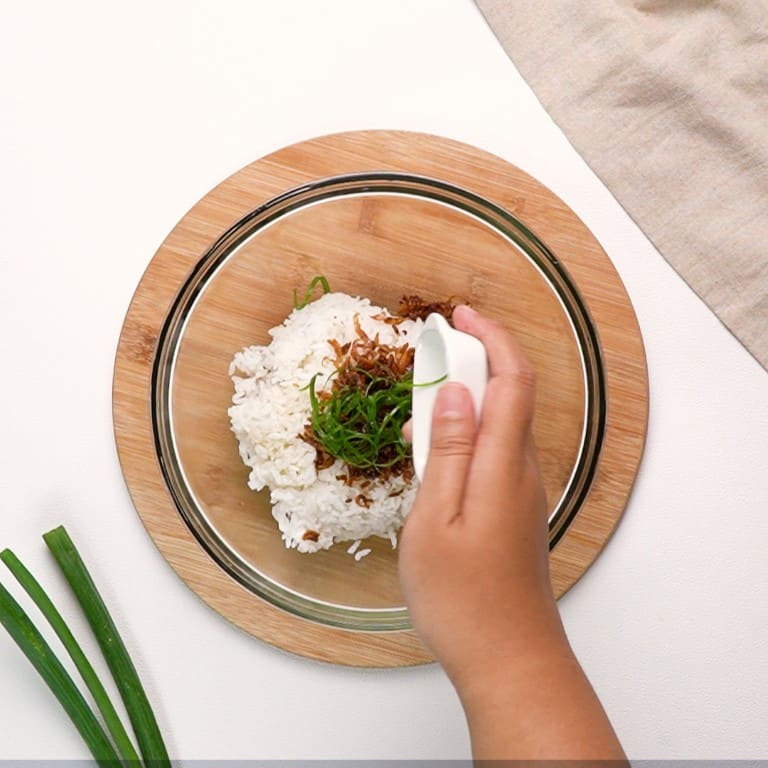
Divide the cooked rice among four serving bowls and top each with 1 teaspoon of sesame oil, fried onions, fried dried shrimp, and half of the spring onions. Toss with chopsticks to combine and top with julienned daikon radish. Drizzle some marinade for extra flavor.
Step 9: Slice the Pork Belly and Assemble it in the Bowls
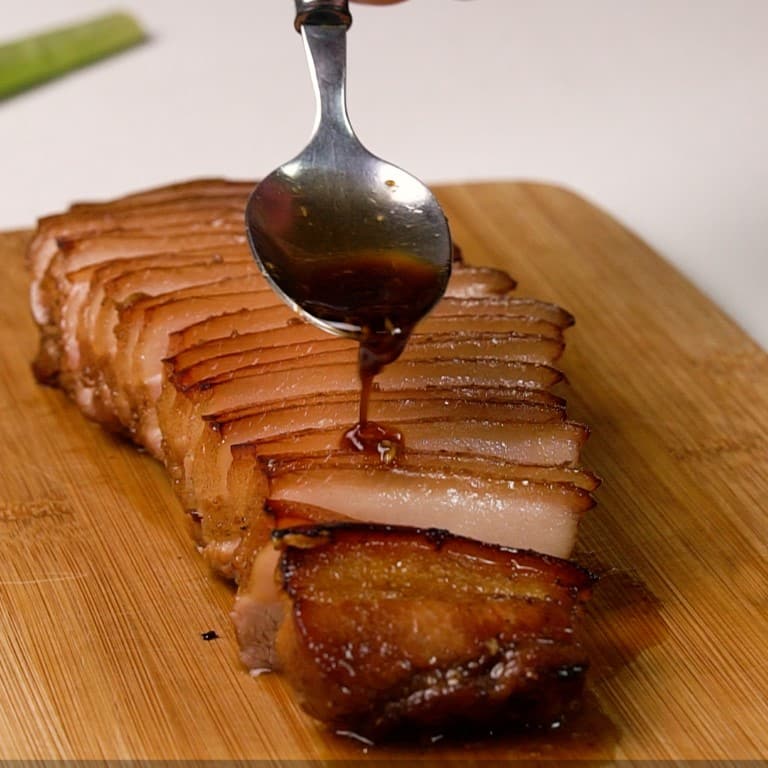
Slice the pork belly into thin rounds using a sharp knife and drizzle some of the marinade over it.
Step 10: Arrange pork slices and drizzle with additional marinade
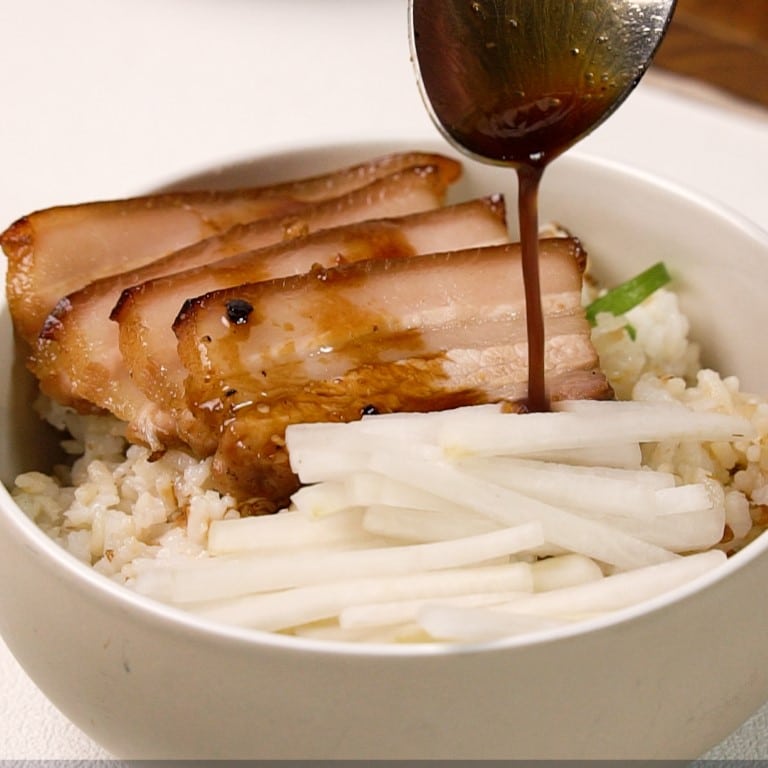
Assemble the pork slices around the mound of radish, dividing them evenly. Add more marinade to the rice and pork slices.
Step 11: Enjoy your Homemade Japanese Braised Pork Rice Bowl!
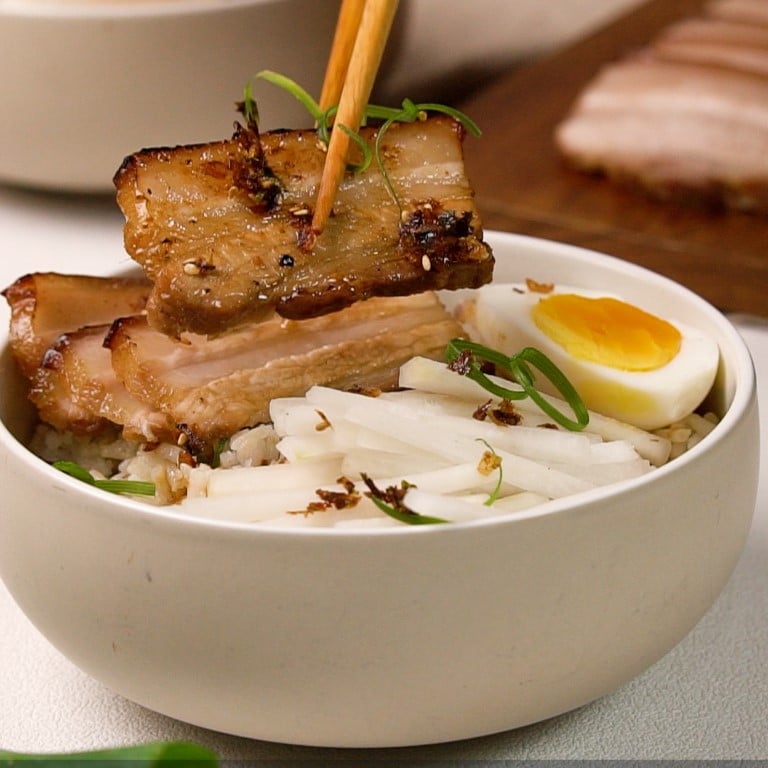
Now comes the fun part, braising the pork with a blow torch! Braise the pork until it sizzles and crisps, rotating the bowl to get all the pieces of pork. Be careful not to burn the pork (or the radish).
If you don’t have a blow torch, you can sear the pork in a pan with some marinade until crisp and browned.
Add half of a soft-boiled egg to the center of each bowl and garnish with furikake and more spring onions. Enjoy your delicious creation!
Recipe Notes
- Don’t toss the marinade at any point! You’ll need it for basing the pork belly while it bakes and then later for drizzling on top of the pork slices and rice. Any leftover marinade can be used as a sauce for noodles, rice, soups, meat, fish, or anything.
- When puncturing holes in the pork belly skin, make sure you don’t go too deep and puncture the meat. But don’t skip this step since it helps the marinade seep into every crack.
- For tips on how to cook perfectly fluffy rice check out our tips on How To Fix Mushy Rice In A Rice or Pressure Cooker. If you have the opposite issue, check this article on How To Fix Rice Sticking To The Bottom of Various Cookers.
- Don’t worry if the meat is a little pink in the center, you’ll finish cooking it when braising it with a blow torch or searing it in a pan.
- Besides the fresh daikon radish, I like to serve chashu don with a pickled or fermented vegetable on the side to aid digestion. Try our recipe for Quick Beni Shoga (red pickled ginger), or make some flavorful Lacto-Fermented Carrots. You can learn more about fermenting here.
- If you’re cooking for 1-2 people, you can cut as much of the pork belly as you need and store the rest in the fridge once cooled for up to 2 days or 4-6 months in the freezer in a sealed container.