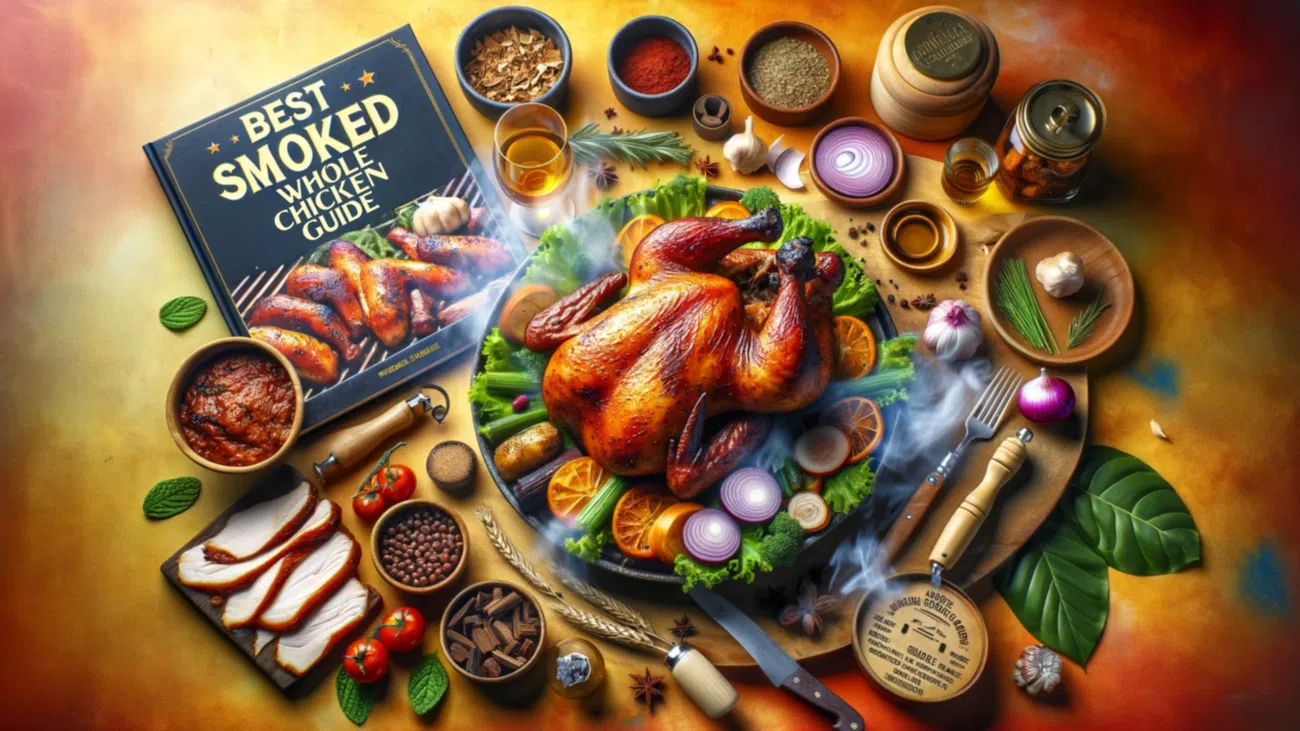
Best Smoked Whole Chicken Guide
Important Note: When you buy through our links, we may earn a commission. As an Amazon Associate we earn from qualifying purchases. Content, pricing, offers and availability are subject to change at any time - more info.
Smoking a whole chicken can be an incredibly rewarding experience. The juicy, smoky flavor and the tender, moist meat are hard to resist for just about anyone. Yes, smoking a whole chicken can be a bit intimidating, especially for those who have never done it before. We’ll be covering everything you need to know to perfect a whole smoked chicken. From seasoning and marinades to smoking techniques, tips, and the effect of various wood chips on flavor, it’s the ultimate guide to smoking a whole chicken.
Key Takeaways
- Always start with a well-seasoned grill and a preheated smoker before adding wood chips, wood chunks, or sawdust. Although 225 to 325°F works as a variable range for smoking depending on method and taste preferences, 225°F for 1 to 1 ½ hours per pound of chicken across all smoking mediums is the top recommendation until it reaches around 135 to 140°F. Turn up the temperature and finish off the chicken at 275°F until it’s fully cooked, which is at an internal temperature of 165°F.
- While certain dishes call for nothing but basic seasoning and wet brining, be sure to experiment with brine injections, marinades, dry and wet rubs, and various types and combinations of wood chips to unlock come-back-for-more depth of flavor that’ll be unique to your style.
- A whole smoked chicken simply prepared is delicious, but spatchcocking is a straightforward preparation technique that allows the meat to become more saturated with flavor thanks to better smoke circulation. Also, beer can chicken and hanging chicken are, but two easy methods to try that’ll ramp up flavor and tenderness. With a little ingenuity, there are lots more to try too.
- Key Takeaways
- How To Smoke A Whole Chicken – Smoking Techniques
- Gas Smoking – How To Smoke A Whole Chicken In A Propane/Gas Smoker
- Smoker Box Smoking – How To Smoke A Whole Chicken In A Stovetop Smoker
- Other/Advanced Whole Chicken Preparation & Smoking Methods
- Beer Can Chicken
- Hanging Chicken
- Hot Smoking
- Cold Smoking
- Smoking A Whole Chicken, Step By Step Guidance, Tips & Advice
- Choosing The Chicken – Size Matters
- Brining
- What Is Brining?
- How to Brine A Whole Chicken
- Wet Brining
- Dry Brining
- Brine Injection
- Dry Brining Vs. Wet Brining Vs. Brine Injection
- Preventing Rubbery/Leathery Skin
- Seasoning A Whole Chicken For Smoking
- Marinating A Whole Chicken For Smoking
- Add Stuffing Before Smoking
- Basting During Smoking
- Selecting & Using The Right Wood Chips
- Mixing And Matching Wood Chips
- Wood Chips Vs. Wood Chunks Vs. Pellets
- The Smoker Setup
- How To Tell When A Whole Chicken Is Done
- Resting, Serving & Carving
- Smoking A Whole Chicken – Frequently Asked Questions
How To Smoke A Whole Chicken – Smoking Techniques
Whether you’re smoking in a traditional smoker, gas/propane smoker, or stovetop unit, here are the exact steps that you need to guarantee perfectly cooked whole-smoked chicken every time.
Traditional Smoking – How To Smoke A Whole Chicken In A Traditional Smoker
Establishing a two-zone system is recommended to achieve the best results when using a traditional smoker.
A two-zone layout involves designating one part of the smoker, typically half of the area, for direct heat while reserving the other section for indirect heat. Start by splitting the wood or charcoal fuel between the two zones, with the bulk being allocated to one side, forming the direct heat zone.
On the opposite side, allocate a smaller quantity of fuel, possibly with a water pan to assist in temperature regulation, to create the indirect heat zone. Always cook over the indirect heat zone and transfer fuel from the direct heat zone as required. This configuration allows for better temperature control and even cooking of your food.
Here’s exactly how to smoke a whole chicken in a traditional smoker. The same basic process applies to most types of preparation, from regular rubbed or marinated chicken to a spatchcocked bird.
Prepare The Chicken
First, prepare the chicken by removing any giblets, trimming excess fat, and patting it dry. Consider spatchcocking the chicken to promote even cooking and reduce the cooking time, or perhaps another method of advanced preparation like beer can chicken or vertically smoked chicken.
Brine, Marinate, Or Rub
Brine, dry brine, or marinate the chicken to enhance its flavor and tenderness. After brining, rinse and pat the chicken dry. Then, apply a dry rub or seasoning of your choice, massaging it into the skin and under the skin for better flavor penetration.
Soak Wood Chips
If using wood chips, soak the chips in water for about 30 minutes to an hour before using them. This helps the chips smolder slowly and produce more smoke rather than burning up too quickly. If using sawdust or pellets, soaking is not necessary.
Set Up The Smoker
Add drained wood chips directly atop the hot coals when using a traditional offset smoker with a separate firebox. For a vertical smoker or kettle grill, create a pouch using aluminum foil pierced with a few holes in an even pattern and place it atop the charcoal or coals first. Use either 1 to 2 cups of pellets or 2 to 4 cups of wood chips, depending on your preferences and the size of your smoker.
Preheat And Finetune Airflow
Preheat your traditional smoker to a temperature range of 225 to 250°F. Depending on the fuel used, type of smoker, amount of fuel, and the weather, this can take anywhere between 15 to 45 minutes. Ensure your smoker is properly cleaned and has good airflow before starting the preheating process in order to facilitate consistent temperature control.
Place The Chicken
Place the chicken breast side up on the smoker’s grate, preferably in the center, away from direct heat, or use a water pan directly beneath the chicken.
Consistent Slow Smoking
Smoke the chicken at 225°F for approximately 1 to 1 ½ hours per pound, depending on its size and the smoker’s temperature. Be patient and avoid opening the smoker too often, as this can cause temperature fluctuations. Keep an eye on the smoke production, and add more wood chips, sawdust, or pellets as needed throughout the smoking process to maintain consistent smoke.
Baste Every 30 To 40 Minutes (Optional)
Use a basting brush or mop to gently apply either melted butter, olive oil, vegetable oil, or a mixture of oil and herbs, and spices every 30 to 40 minutes. A sauce thinned with vinegar works great too. This will help lock in the chicken’s natural juices, which keeps it moist and tender while infusing it with extra flavor.
Raise The Temperature
Raise the temperature of your smoker to 275°F when the internal temperature of your chicken reaches 135 to 140°F measured at the thickest part of the thicken. That typically takes around 2 ½ to 3 hours when smoking a standard-sized 5-pound chicken.
Continue Smoking At Higher Heat
Allow the chicken to smoke at 275°F for the last 30 minutes to an hour of its cooking time, smoking for roughly 10 to 15 minutes at high heat for every pound of the bird’s weight.
Checking For Doneness
The chicken is done when its internal temperature reaches 165°F in the thickest part of the meat, avoiding the bone. The breast is typically the best place to check. Check the chicken’s texture and juices to determine the optimal degree of doneness. The juices should run clear, and the meat should be tender and opaque. If testing a thigh, you’re looking at 170 to 175°F optimally.
If you don’t have a thermometer handy, pierce the thickest part of the meat, usually the thigh or breast, and observe the juices. If the juices run clear without any sign of pinkness and the chicken feels firm and elastic to the touch without softness or sponginess, it is probably done. There should be no pinkness whatsoever.
Rest Before Carving And Serving
Remove the chicken from the smoker and let it rest for at least 10 to 15 minutes to allow the juices to redistribute. Tent the chicken loosely with aluminum foil during resting to retain heat and moisture. Carve and serve after resting.
Gas Smoking – How To Smoke A Whole Chicken In A Propane/Gas Smoker
Configure your gas or propane smoker with a hot and cool zone. As is always the case with chicken, indirect heat produces the best results. Depending on your number of burners, you’ll generally want to turn half to medium to medium-high heat while leaving the other one to two burners off. This creates the cool zone, which is where you’ll be placing the meat.
Always follow the manufacturer’s guidelines for safe operation whenever using a propane/gas smoker. Keep the smoker on a level and stable surface, away from combustible materials. Ensure that your grill is pre-seasoned. Never leave the smoker unattended, and it is best to have a fire extinguisher nearby in case of emergencies.
Here’s how to smoke a whole chicken using a gas smoker.
Prepare Chicken
Clean and trim the chicken, removing any giblets and excess fat. Pre-apply your choice of brine. Let the chicken drip dry, then pat it dry and apply basic seasoning, a dry rub, or marinade.
Fill And Insert Water Pan
Fill the water pan ⅔ full with water or other liquids like apple juice, beer, or wine for added flavor. Position the water pan above the burner to create a moist and stable smoking environment.
Ensure Gas Connection
Check the propane tank connection and hose to ensure a secure and leak-free connection. Perform a soapy water test on the connection points to detect any gas leaks.
Open Valve And Ignite Burner
Once safe operation is confirmed, open the propane tank valve and use the smoker’s ignition system or a long lighter to ignite the burner. Follow the manufacturer’s instructions for safe ignition.
Set Temperature
Adjust the burner control to reach a smoking temperature of 225 to 250°F, which is ideal for breaking down collagen and connective tissues in the chicken over a prolonged period.
Preheat And Attain A Consistent Temperature
Allow the smoker to preheat for 15 to 30 minutes, ensuring a consistent temperature is reached. Use a thermometer to monitor the internal temperature throughout the smoking process.
Add Wood Chips, Sawdust, Or Wood Chunks
Fill the smoker’s wood chip tray or box with your choice of soaked wood chips, sawdust, or wood chunks to produce the desired smoke flavor. Replace as needed during smoking.
Fill And Place The Water Pan
Fill the water pan and place it in its rack, preferably to break the direct heat touching the chicken.
Place Chicken And Slow Smoke
Position the chicken breast side up on the smoker’s grate, preferably in the center and away from direct heat. Smoke for approximately 1 to 1 ½ hours per pound of chicken at 225°F.
Baste Continually (Optional)
Apply a coating of olive oil, vegetable oil, melted butter, or a mixture of your favorite herbs and spices and either oil or butter to the chicken every 30 to 40 minutes using a pastry brush or mop. Thinned sauce (such as hot sauce or barbecue) or a marinade can be used instead.
Maintain Liquid And Wood As Is Necessary
Monitor the water pan and wood chip tray, refilling them as needed to maintain moisture and smoke levels. Avoid opening the smoker too often to prevent temperature fluctuations.
Raise The Heat
Once the chicken reaches an internal temperature of 135 to 140°F measured in the thickest part of the breast, turn up the heat to 275°F. Allow the chicken to smoke at this higher temperature until done to ensure perfect skin.
Confirm Doneness, Rest, And Serve
Check the chicken’s internal temperature, ensuring it reaches 165°F in the thickest part of the meat to confirm that it is cooked. We advise inserting the thermometer into the breast, avoiding the bone. Let it rest while tented for 10 to 15 minutes before carving and serving.
Smoker Box Smoking – How To Smoke A Whole Chicken In A Stovetop Smoker
Most stainless steel stovetop smokers can only accommodate a small chicken unless it’s spatchcocked first. As with all smoked chicken, we strongly suggest spatchcocking but especially when using a stovetop smoker. Follow these instructions to smoke a whole chicken in a stovetop/grill-mounted smoker.
Prepare The Chicken
Clean your chicken and ensure that it has been patted dry. Apply a dry rub or season of your choice after brining, or marinade it beforehand and then set aside.
Assemble The Stovetop Smoker
Set the stovetop smoker across a single burner. Ensure that the burner is aligned with the center of the smoker. To make cleaning easier, cover it with a coating of oil, non-stick spray, or aluminum foil.
Add Wood Chips
Add 2 to 3 tablespoons of wood chips in a small pile in the center of the base pan of the smoker. Soaking is recommended but not necessary.
Place The Drip Tray
Cover the wood chips with the drip tray insert. Just like with the base pan, giving it a coating of oil or vegetable spray or placing a layer of aluminum foil facilitates easy clean-up.
Place The Wire Rack
Place the wire rack after coating it lightly with oil or non-stick spray.
Turn On The Heat
Turn the burner to medium-high heat (approximately heat setting 6 on a standard dial scaling to 10.) If you are using a gas stove, begin the cooking timer immediately. When using an electric stovetop, temporarily set the smoker aside while you wait out a 5-minute preheating period, then start cooking.
Preheat The Smoker
Allow the burner to preheat the smoker, filling it with smoke with its lid closed for 5 minutes or until you see wisps of smoke emanating from under the lid.
Set And Tent The Chicken
Put the chicken breast side up atop the wire rack. Cut a large piece of tinfoil, big enough to cover the entire chicken with some excess on all sides. Position the tin foil over the chicken inside the stovetop smoking, leaving some space between the chicken and the foil to create a tent-like shape. This allows the smoke to circulate around the chi chicken while trapping heat and moisture. Carefully fold and crimp the edges of the tinfoil around the edges of the smoker to seal the ‘tent.’ Slide the lid closed.
Smoke The Chicken
Smoke the chicken for approximately 1 to 1 ½ hours per pound of chicken at 225°F.
Baste Frequently (Optional)
Baste your whole chicken every 30 to 40 minutes with your choice of basting solution to keep it moist and flavorful. Use either a basting brush or mop to apply the basting mixture, making sure to cover all exposed areas of the chicken.
Turn Up The Temperature
Once the chicken reaches an internal temperature of 135 to 140°F in the thickest part of the meat, avoiding the bone, turn up the temperature of your smoker to 275°F. For a 5-pound chicken, this is at around 2 hours in. Heat setting 8 generally equates to the correct temperature. Allow the chicken to smoke until fully cooked.
Check For Doneness, Rest, And Serve
Monitor the internal temperature of the chicken using a meat thermometer, aiming for 165°F in the thickest part of the breast, without touching the bone. Once done, remove it from the smoker and let it rest while tented with foil for 10 to 15 minutes, then carve and serve.
Other/Advanced Whole Chicken Preparation & Smoking Methods
From spatchcocking, beer can chicken, and vertical roasting guides to several other smoking methods, we’ve got all the advanced methods for preparing and smoking a whole chicken waiting here.
Spatchcocking A Chicken
Spatchcocking, also known as butterflying, is a game-changing technique that’ll leave you wondering why you ever smoked chicken any other way! Flattening the chicken ensures a quicker, more even cooking process, locking in those scrumptious juices and delivering a perfectly smoked bird every time.
How To Spatchcock A Chicken
- Pat the chicken dry with paper towels to prevent slipping and make the spatchcocking process easier.
- Position the chicken on a sturdy cutting board with the breast side down and the legs facing towards you. Ideally, make sure the cutting board has a groove around the edge to catch any juices.
- Identify the chicken’s backbone, which runs along the center of the back from the neck to the tail.
- Using sharp kitchen shears, begin cutting along one side of the backbone. Start at the tail end and work your way up toward the neck. Keep the shears close to the bone for a clean cut and minimal meat loss. Be prepared to apply some force, as you may need to cut through rib bones rigorously.
- Repeat the process on the other side of the backbone, starting at the tail end and working your way up. Once you’ve completed both cuts, remove the backbone completely and set it aside, as it can be used for making stock.
- For a flatter spatchcocked chicken, locate the keel bone (a thin, triangular bone) at the center of the breast. Make a small incision on either side of the bone and carefully work your fingers underneath to separate the keel from the breast meat. Once it’s loose, pull the bone upwards to remove it.
- Carefully flip the chicken over, keeping it flat on the cutting board.
- Press down firmly on the center of the breastbone with the palm of your hand to flatten the chicken. You should hear a crack as the breastbone and cartilage break, allowing the chicken to lay flat.
- Tuck the wingtips behind the breast and secure them in place to prevent them from burning during the prolonged cooking period. Toothpicks work great, as does twine.
- Now that your chicken is spatchcocked, it’s ready to be seasoned and cooked according to your desired method.
Beer Can Chicken
Beer can chicken is a popular, fun, and flavorful smoking technique that involves placing a whole chicken over a partially filled can of beer, which steams the meat from the inside, resulting in a juicy, tender, and aromatic bird. Choose a beer that complements the flavors of your chosen seasonings and the chicken. You can experiment with different types of beer, such as lagers, ales, or even stouts, to find the perfect pairing. Most cooks opt for something high in hops.
How To Make Beer Can Chicken
- Open the can of beer, pour out (or drink) half of the contents, and use a can opener or a knife to make additional holes in the top. This will help the beer steam to escape and infuse the chicken during cooking.
- Remove the giblets and neck, and rinse the chicken well. Pat dry with paper towels to remove any excess moisture. Prebrine, allow to dry, and then season the chicken generously, both inside and out, with your desired rub or spices. Gently lift the skin and apply some of the seasoning directly onto the meat for more flavor penetration.
- Holding the chicken upright with the neck facing upwards, gently lower the chicken onto the beer can so that the can is inserted into the cavity. Make sure the chicken is stable and sitting securely on the can to prevent it from falling over during cooking.
- Preheat your smoker to 225 to 250°F. If using a charcoal smoker, arrange the coals on one side and place a drip pan on the other to catch any juices and prevent flare-ups. You’re looking for indirect heat.
- Place the chicken in a standing position on the grate above the drip pan. Ensure that the legs form a tripod with the beer can, creating a stable base.
- Add your desired wood chips to the smoker. Keep an eye on the smoker’s temperature and adjust vents or dampers as needed to maintain the fixed range.
- Close the smoker’s lid and smoke the chicken until it reaches an internal temperature of 165°F in the thickest part of the breast, avoiding the bone. This process may take anywhere from 3 to 5 hours, depending on the size of the chicken and the smoker’s temperature. For crispier skin, crank up the heat to 275°F for the last hour of cooking.
- Carefully remove the chicken from the smoker, ensuring not to spill the hot beer from the can. Let the chicken rest for 10 to 15 minutes before carefully removing the beer can and carving the chicken.
Hanging Chicken
Hanging chicken is a smoking technique where whole chickens are suspended vertically, allowing for even heat distribution which grants a crispy, well-browned exterior. This method encourages better smoke penetration, imparting a rich, smoky flavor throughout the bird. Juices from the chicken self-baste the meat as they drip down, enhancing the tenderness and moistness of the final product.
How To Hang A Whole Chicken
- Remove the giblets and neck from the chicken, and rinse it under cold water. Brine and pat dry with paper towels to remove any excess moisture, or preferably allow it to dry in the fridge first.
- Season the chicken generously, both inside and out, with your desired rub or spices. Gently lift the skin and apply some of the seasoning directly onto the meat for better flavor penetration.
- Trussing helps the chicken cook evenly and maintain its shape during smoking. Start by laying the chicken breast side up on a cutting board. Cut a long piece of kitchen twine, about 3 to 4 feet in length. Tuck the wingtips behind the back of the chicken. Place the center of the twine under the tail of the chicken, bring the ends up over the legs, and cross the twine over the legs. Wrap the twine around the ends of the drumsticks, pulling them together, then bring the twine back towards the neck, looping it under the wings and tying it tightly at the neck. This will keep the legs and wings close to the body, preventing them from burning during smoking.
- Acquire a stainless steel chicken hook or hanger designed for smoking or grilling. This hook typically has a sharp, pointed end and a loop or handle on the opposite side. Carefully insert the sharp end of the hook through the neck cavity, ensuring it goes through the breastbone for stability. Alternatively, you can insert the hook through the vent or tail end of the chicken and out through the neck cavity. The chicken should hang vertically, with the breast facing up and the legs pointing down.
- Preheat your smoker to a temperature range of 225 to 250°F. Add your desired wood chips. Keep an eye on the smoker’s temperature and adjust vents or dampers as necessary to maintain the desired temperature.
- Hang the chicken from the smoking rack using the loop or handle of the chicken hook. Make sure the chicken hangs freely and is not touching the walls or other parts of the smoker. This allows for even circulation of heat and smoke around the chicken. If your smoker does not have a built-in hook or hanger, you can use an S-hook or any other hook-like accessory designed to hold the chicken.
- Smoke the chicken until it reaches an internal temperature of 165°F in the thickest part of the meat, generally, the breast, while avoiding the bone. This process may take anywhere from 3 to 5 hours, depending on chicken size and smoker temperature. To produce crispier skin, turn the heat up to 275°F for the last hour of cooking.
- Carefully remove the chicken from the smoker, being cautious of the hot hook. Let it rest for 10 to 15 minutes before removing the hook, cutting the kitchen twine, and carving the chicken.
Hot Smoking
Hot smoking involves cooking the chicken at a higher temperature, usually between the range of 250°F to 275°F, which grants a more intense smoky flavor with a slightly sharper taste. Some even claim fantastic results at as high as 320°F. Hot smoking promotes the formation of a crispy, well-browned exterior, making it a popular choice for those seeking a balance between flavor and texture, as well as those who want to avoid the risk of leathery skin and rubberiness completely.
Cold Smoking
Cold smoking is a method where food is smoked at lower temperatures (usually below 100°F) for an extended period, imparting a smoky flavor without cooking the meat. This technique is typically used for flavoring foods like cheese, nuts, and cured meats. However, due to food safety concerns and the risk of harmful bacteria growth, cold smoking is not recommended for a whole chicken or other poultry products.
Smoking A Whole Chicken, Step By Step Guidance, Tips & Advice
The key to perfecting a whole smoked chicken is getting all stages of preparation just right. Here is a breakdown of everything that you need to know, from picking the bird and cleaning to brining, seasoning, rubs, marinades, wood chip selection, and how to pull off the perfect smoke.
Choosing The Chicken – Size Matters
Opt for a medium-sized chicken (about 4 to 5 pounds) to ensure even cooking and a shorter smoking time. Larger chickens may take longer to cook, often resulting in unevenly cooked meat when new to smoking. The larger the chicken, the more necessary it is to monitor its internal temperature using a meat thermometer more frequently. If you do go for a larger chicken, ensure that you rotate it often to avoid overcooking.
Fresh Or Frozen
Whenever possible, choose fresh chicken for better flavor and texture. If you must use frozen chicken, allow it to thaw completely in the refrigerator before smoking. Depending on the size of the chicken, thawing may take 24 to 48 hours. To ensure even thawing, place the chicken on a tray or plate in the refrigerator to catch any drippings. Be sure to pat the chicken dry with paper towels before applying the seasoning or marinade, as this will allow the spices to adhere better and create a flavorful crust during the smoking process.
Organic Or Conventional
Organic chickens are often more flavorful and tender, but conventional chickens can yield great results as well. Ultimately, it comes down to personal preferences and budget. Organic chickens are raised without antibiotics and growth hormones and are fed a diet free of genetically modified organisms, which some believe leads to a better taste and texture. On the other hand, conventional chickens are more affordable and widely available, making them a practical option for many home cooks. To ensure the best possible outcome, regardless of the type of chicken you choose, focus on proper handling, seasoning, freshness, and cooking techniques.
Brining
As all culinary professionals know all too well, brining is an essential step to elevating any chicken dish. Brining significantly enhances the flavor and juiciness of a whole chicken before smoking. It helps to tenderize and lock in moisture by means of denaturing the meat, ensuring a succulent and flavorful end result with far less chance of dry or rubbery chicken, even if smoked for too long.
What Is Brining?
Brining is a scientific process that involves immersing a whole chicken, or any meat, in a solution of water and salt, often complemented by sugar, herbs, and spices. The key to understanding the efficacy of brining lies in the principles of osmosis and protein denaturation.
Osmosis is a natural phenomenon in which water molecules move across a semipermeable membrane, such as the chicken’s muscle fibers, to equalize the concentration of solutes (salt, in this case) on both sides of the membrane. When the chicken is submerged in a brine solution, the salt concentration in the brine is higher than that in the chicken’s cells. This triggers osmosis, and the water molecules move into the chicken’s cells to balance the salt concentration, thereby increasing the overall moisture content of the chicken.
The salt in the brine solution aids in denaturing the proteins within the chicken’s muscle fibers. This denaturation process causes the proteins to unwind and reconfigure, forming a matrix that can trap and hold water more effectively. As a result, the chicken retains moisture during the cooking process, preventing it from drying out.
The brining process also allows for the diffusion of flavor compounds from the herbs and spices in the brine solution into the chicken, which enhances its overall taste profile. This combination of moisture retention and flavor infusion makes brining an essential technique for anyone looking to elevate their chicken dishes, particularly when smoking whole chicken.
How to Brine A Whole Chicken
Follow these easy instructions for wet brining, dry brining, and performing a brine injection to take your smoked chicken to a whole new level of tasty goodness.
Wet Brining
To wet brine a chicken, follow these steps:
- Prepare the brine by combining one gallon of water with 1 cup of kosher salt and ½ cup of sugar. Stir until the salt and sugar dissolve completely.
- Customize the brine by adding aromatic herbs and spices such as bay leaves, garlic, black peppercorns, or citrus zest to infuse the chicken with additional flavors.
- Submerge the whole chicken in the brine solution, ensuring it is fully covered.
- Refrigerate the chicken in the brine for 4 to 12 hours. Consider extending the brining time to a maximum of 24 hours for larger birds.
- Remove the chicken from the brine and rinse thoroughly under cold water to eliminate any excess salt.
- Pat the chicken dry with paper towels before proceeding with your smoking process.
Dry Brining
To dry brine a chicken, follow these steps:
- Start by patting the chicken dry with paper towels, removing any excess moisture on the surface.
- Weigh the chicken or observe its weight at purchase to determine the amount of salt needed. Use approximately 1% of the chicken’s weight in salt. For example, if the chicken weighs 4 pounds (1814 grams), use around 0.63 ounces (18 grams) of salt which equates to just under 4 teaspoons. A good rule of thumb is to use one teaspoon of salt per pound in dry brining seasoning blends.
- If desired, mix the salt with other seasonings, such as herbs, spices, and citrus zest, to add more flavor depth.
- Apply the salt mixture evenly to the entire chicken, including the cavity and under the skin. Be thorough but gentle, ensuring not to tear the skin.
- Place the chicken on a wire rack set over a rimmed baking sheet or tray, allowing air circulation around the entire bird.
- Refrigerate the chicken uncovered for at least 12 hours or up to 48 hours, allowing the salt to penetrate and the skin to dry out for a crispier finish when smoked.
- Remove the chicken from the refrigerator before smoking and let it sit at room temperature for 1 hour, allowing it to cook more evenly. If desired, apply additional seasonings, such as a dry rub, before smoking.
Brine Injection
Brine injection is a quick and efficient method to impart flavor and moisture into a whole chicken before smoking, ensuring a juicy and tender result. Cooks can achieve optimal flavor penetration and even distribution by injecting the brine directly into the meat. Follow these steps to inject a whole chicken with brine:
- Prepare the brine solution by combining 1 cup of water with ¼ cup of kosher salt and ¼ cup of sugar. Stir until the salt and sugar dissolve completely. You can also add your choice of herbs, spices, or flavorings to the brine.
- Allow the brine solution to cool to room temperature, and then strain it through a fine-mesh sieve to remove any solids that could clog the injector needle.
- Fill a meat injector with the strained brine solution, ensuring there are no air bubbles within the syringe.
- Inject the brine evenly throughout the chicken, targeting the breast, thighs, legs, and wings. Use a grid-like pattern to ensure even distribution, injecting the brine approximately 1 to 2 inches apart.
- Allow the injected chicken to rest in the refrigerator for at least 1 to 2 hours to let the brine work its magic.
- Remove the chicken from the refrigerator and pat it dry with paper towels before proceeding with your smoking process.
Dry Brining Vs. Wet Brining Vs. Brine Injection
Dry brining involves rubbing salt and seasonings directly onto the meat, resulting in a crispier skin but possibly uneven flavors. Wet brining submerges the meat in a liquid solution, ensuring even flavor distribution and tenderization, but may require more space and create a less crispy skin. Brine injection directly infuses the solution into the meat, allowing for a quicker process and even distribution of flavors, but may not tenderize as effectively as traditional brining. Each method has its pros and cons, so consider your desired outcome, space, and equipment when choosing a brining technique.
Preventing Rubbery/Leathery Skin
The best way to ensure crispy skin without any degree of leatheriness or a rubbery feel is to allow the chicken to dry in the fridge before smoking. Your chicken’s skin should be completely free from all excess moisture. Place it on a plate and allow it to sit uncovered in the refrigerator for 2 hours. Pour off the water that is shed as it collects in the plate. This should be necessary every 20 to 30 minutes. Letting chicken dry in the fridge is always recommended but near-essential when smoking a brined chicken.
Seasoning A Whole Chicken For Smoking
Seasoning a whole chicken before smoking is the culinary equivalent of painting a masterpiece. Each layer of flavor adds depth and complexity to the final dish. Just as an artist carefully selects their colors and brushes to create a visual feast, a skilled cook thoughtfully chooses herbs, spices, and seasonings to craft an unforgettable gastronomic experience. By seasoning your chicken prior to smoking, you’re laying the foundation for a symphony of flavors that will tantalize the taste buds and leave a lasting impression on you and your guests.
Basic Seasoning
At a minimum, season your chicken generously with salt and pepper. This simple seasoning enhances the natural flavors of the chicken and helps to create a delicious, crispy skin. For an elevated flavor experience, consider incorporating additional herbs and spices such as paprika, garlic powder, onion powder, or a custom spice blend to complement the smoky undertones. Experiment with different combinations to tailor the seasoning to your palate, ensuring each bite is bursting with mouth-watering flavor. Remember, when it comes to seasoning a whole chicken before smoking, the sky’s the limit. Let your culinary creativity shine and elevate your dish to the next level.
The amount of salt needed to season a whole chicken before smoking depends on the size of the bird and personal taste preferences. As a general guideline, you can use about ½ to ¾ teaspoon of kosher salt per pound of chicken. However, it’s important to adjust the salt quantity according to your taste, especially if you’re using additional seasonings or a brining method that incorporates salt. Remember to season both the exterior and the cavity of the chicken for optimal flavor distribution.
Rubs
Rubs are a combination of dry spices and herbs that are massaged onto the chicken’s surface. They are a versatile and creative way to enhance the flavor profile of your smoked chicken. These mixtures of dry spices and herbs are carefully massaged onto the chicken’s surface, allowing the flavors to penetrate the meat and create a rich, aromatic crust. Experimenting with different spice blends, such as barbecue, Cajun, or Mediterranean, helps one tailor the taste of smoked chicken to suit your preferences and discover new culinary delights.
In addition to the classic combination of spices, consider incorporating ground chilies, smoked paprika, or even coffee grounds for a bold, unique flavor. Don’t be afraid to add a touch of sweetness with brown sugar or honey, as they can help balance the savory and spicy elements of your rub. Remember to apply the rub evenly on the chicken’s skin, as well as under the skin and inside the cavity, to ensure the flavors are well-distributed throughout the bird.
Barbecue Rub:
- 2 Tbsp Brown Sugar
- 1 Tbsp Paprika
- 1 Tbsp Smoked Paprika
- 1 Tbsp Garlic Powder
- 1 Tbsp Onion Powder
- 1 Tsp Ground Cumin
- 1 Tsp Chili Powder
- 1 Tsp Black Pepper
- 1 Tsp Salt
Mediterranean Rub:
- 2 Tbsp Dried Oregano
- 1 Tbsp Dried Basil
- 1 Tbsp Dried Rosemary
- 1 Tbsp Dried Thyme
- 1 Tbsp Garlic Powder
- 1 Tbsp Onion Powder
- 1 Tbsp Lemon Zest
- 1 Tsp Black Pepper
- 1 Tsp Salt
Cajun Rub:
- 2 Tbsp Paprika
- 1 Tbsp Cayenne Pepper
- 1 Tbsp Garlic Powder
- 1 Tbsp Onion Powder
- 1 Tbsp Dried Oregano
- 1 Tbsp Dried Thyme
- 1 Tsp Ground Black Pepper
- 1 Tsp Ground White Pepper
- 1 Tsp Salt
Marinating A Whole Chicken For Smoking
Marinades are liquid mixtures that infuse the chicken with flavor, combining both acidic and flavorful components to create a balanced taste. The acidic ingredients, such as vinegar, citrus juice, or yogurt, break down the proteins in the chicken, resulting in a tender, juicy texture. Meanwhile, the flavorful components like herbs, spices, and oils seep into the meat, adding depth and complexity. For advanced chefs, crafting unique marinades by balancing acid, oil, and seasonings will elevate the final dish. Marinate your chicken for 4 to 12 hours in the refrigerator for optimal flavor absorption.
After marinating the chicken for 4 to 12 hours, remove it from the refrigerator and discard the used marinade. Pat the chicken dry with paper towels to eliminate the excess moisture, and let it rest at room temperature for about 30 minutes before smoking. During this time, preheat your smoker and prepare a water pan if necessary. Just before placing the chicken in the smoker, lightly coat its skin with oil, and optionally, season with a dry rub or additional salt and pepper as desired.
Citrus-Herb Marinade:
- 1/2 Cup Olive Oil
- 1/4 Cup Lemon Juice
- 1/4 Cup Orange Juice
- 3 Cloves Garlic, Minced
- 2 Tbsp Chopped Fresh Rosemary
- 1 Tbsp Chopped Fresh Thyme
- Salt And Pepper To Taste
Spicy Chipotle Marinade:
- 1/2 Cup Olive Oil
- 1/4 Cup Apple Cider Vinegar
- 3 Tbsp Adobo Sauce (From Canned Chipotle Peppers)
- 2 Tbsp Honey
- 2 Cloves Garlic, Minced
- 1 Tsp Ground Cumin
- Salt And Pepper To Taste
Yogurt-Tandoori Marinade:
- 1 Cup Plain Yogurt
- 1/4 Cup Lime Juice
- 2 Tbsp Grated Ginger
- 2 Cloves Garlic, Minced
- 2 Tbsp Garam Masala
- 1 Tbsp Paprika
- Salt And Pepper To Taste
Teriyaki Marinade:
- 1/2 Cup Soy Sauce
- 1/4 Cup Mirin
- 1/4 Cup Sake Or Rice Wine
- 2 Tbsp Brown Sugar
- 2 Cloves Garlic, Minced
- 1 Tbsp Grated Ginger
Garlic And Herb Marinade:
- 1/2 Cup Olive Oil
- 1/4 Cup White Wine Vinegar
- 4 Cloves Garlic, Minced
- 2 Tbsp Chopped Fresh Basil
- 1 Tbsp Chopped Fresh Oregano
- Salt And Pepper To Taste
Add Stuffing Before Smoking
Smoking a whole chicken with a flavorful stuffing can enhance the overall taste and juiciness of the dish while providing an exciting twist to the meal. To stuff a whole chicken, start off by removing the giblets and rinsing the cavity extremely well. Create a suitable stuffing that pairs well with smoked chicken, such as a combination of sautéed onions, garlic, fresh herbs, diced apples, and cornbread. Loosely pack the stuffing into the chicken’s cavity without overfilling it, as this will lead to uneven cooking. Secure the cavity opening with kitchen twine or toothpicks and then smoke as per usual. When testing for doneness, the stuffing should also reach 165°F, just like the rest of the bird. The turkey stuffing above works wonderfully for chicken – give it a try.
Basting During Smoking
Basting a chicken during smoking is an important step to ensure that the meat remains tender, moist, and flavorful throughout the cooking process. Periodically applying a liquid or fat-based solution to the surface of the chicken locks in its natural juices, preventing the meat from drying out as it smokes. Basting helps create a barrier that prevents the smoke from overpowering the chicken’s delicate flavors. Either a basting solution or a thinned down sauce (with the help of vinegar or another acidic liquid) can be used. Fans of sauce should explore our wrap-up of the best bottled barbecue sauces – you may just find a new favorite.
When basting, the liquid basting solution evaporates upon contact with the hot meat, creating steam that promotes a moist environment within the smoker. This steam helps to break down collagen and connective tissues, resulting in tender, juicy chicken. Basting also assists in forming a beautiful, caramelized crust on the chicken at the same time, adding both color and depth of flavor while preventing rubberiness of any sort or a leathery texture from forming.
Incorporating a small amount of vinegar into a basting solution can yield significant benefits when smoking chicken. The acidity of vinegar helps to balance and enhance the flavors of the meat and the smoke, cutting through the richness while adding a pleasant tanginess. Furthermore, the acidic nature of vinegar also acts as a natural tenderizer, breaking down the proteins in the chicken and contributing to a more tender, succulent finished product.
Basic Baste:
- 1/4 Cup White Vinegar
- 1/4 Cup Olive Oil
- 2 Tbsp Melted Butter
- 1 Tsp Garlic Powder
- Salt And Pepper To Taste
Smoky BBQ Baste:
- 1/4 Cup Red Wine Vinegar
- 1/4 Cup Ketchup
- 2 Tbsp Worcestershire Sauce
- 2 Tbsp Brown Sugar
- 1 Tsp Liquid Smoke
- Salt And Pepper To Taste
Beer And Mustard Baste:
- 1/4 Cup Malt Vinegar
- 1/4 Cup Beer
- 2 Tbsp Grainy Mustard
- 1/4 Cup Olive Oil
- Salt And Pepper To Taste
Selecting & Using The Right Wood Chips
Pairing poultry and a personal selection of spices, rubs, or marinade with the right wood chips will transform ordinary smoked chicken into something heavenly. Here’s a breakdown of how to use wood chips with a breakdown of all the varieties and flavors to choose from.
How Many Wood Chips To Use
Use approximately 4 cups of wood chips for a whole chicken. Soak the chips in water for 30 minutes prior to smoking to help them smolder slowly and produce more smoke. If you foresee difficulty maintaining a consistently high temperature in your smoker, avoid smoking the wood chips completely instead.
Flavor Profiles Of Wood Chips
Let’s take a close look at the diverse flavor profiles of various wood chips available to cooks and what they do to chicken.
Applewood
Applewood provides a gentle, sweet, and fruit-infused essence that enhances the flavor of poultry and pork. When used to smoke chicken, it imparts a delicate touch of fruity sweetness that complements the meat’s natural flavors.
Cherrywood
Cherrywood is subtly sweet with a hint of fruitiness, making it ideal for poultry, pork, and beef. The refined nuance it adds to smoked chicken enriches the taste profile without overpowering the inherent flavors.
Hickory
Hickory offers a robust, tangy, and smoky profile that adds a hearty depth to chicken, elevating it beyond the ordinary. The bold taste notes contrast with the chicken’s natural flavors, creating a rich and complex dish. Smoked chicken with hickory wood is ideal for those who appreciate intense smokiness.
Mesquite
Mesquite has a vibrant, earthy, and intense flavor profile that is suitable for the daring, adding complexity to chicken when used sparingly. While it is traditionally used for beef and game meats, mesquite can create a unique, bold taste in poultry but use mesquite cautiously, as it can overpower the chicken’s delicate flavors when overused. It’s best for plainly seasoned whole birds rather than in conjunction with pungent marinades and rubs.
Pecan
Pecan wood imparts a nutty, understated, and faintly sweet essence to poultry and pork, teasing the palate with its exquisite subtlety. The nuanced flavor profile complements the natural flavors of chicken, delivering a wonderful balance of savory and sweet notes.
Alder
Alder wood provides a feather-light and demurely sweet smoke, complementing chicken and fish extremely well. The delicate flavor enhances the chicken’s natural taste without overwhelming it, resulting in a subtly sweet dish. Alder-smoked chicken is perfect for those who appreciate a light, sophisticated flavor profile.
Oak
Oak wood is balanced, hearty, and adaptable, harmonizing with chicken and imparting a time-honored smokiness. Its medium, robust flavor pairs well with most meats, creating a versatile smoking option that enhances the natural taste of chicken. Oak-smoked chicken is a classic, satisfying dish that appeals to a wide range of palates.
Maple
Maple wood lends a gentle, ambrosial, and slightly smoky essence to poultry and pork, creating a sublime culinary experience. The mild, sweet flavor subtly enhances the taste of chicken, delivering a delicate balance of smokiness with an underlying sweet taste.
Grapevine
Grapevine wood chips impart a unique, fruity, and slightly tart flavor profile to chicken, adding distinct complexity that’s quite different from traditional wood flavors.
Peach
Peach wood chips offer a delicate, sweet, and fruity flavor that is perfect for enhancing the natural taste of a smoked whole chicken. This mild fruitwood imparts a subtly sweet and slightly smoky aroma to the poultry.
Mixing And Matching Wood Chips
Experimenting with different combinations of wood chips can elevate your smoked chicken to new heights by creating a more complex and intriguing flavor profile. Try mixing milder woods, like apple or cherry, which impart subtle fruity notes, with stronger options like hickory or mesquite, known for their bold and robust smoky flavors. You can even introduce more exotic woods, such as pecan or alder, to add depth and character to your smoked chicken. The key is to balance the flavors of your chosen woods, considering both the intensity and the specific aroma each type brings to the table.
Wood Chips Vs. Wood Chunks Vs. Pellets
Wood chips, wood chunks, and pellets are popular options for smoking whole chicken, each with unique characteristics suitable for different scenarios and skill levels. Wood chips, small and thin, burn quickly and intensely, best for shorter smoking sessions or electric and gas smokers. Wood chunks, larger and slower burning, provide steady smoke for longer sessions, particularly in charcoal or offset smokers. Pellets, and compressed sawdust cylinders, offer consistent burning and precise temperature control and are designed for use in pellet smokers.
The Smoker Setup
Traditional charcoal smokers are renowned for providing an authentic, smoky flavor to the meats cooked in them. They allow for precise temperature control through the use of vents, which regulate airflow and control combustion but require constant attention. Electric smokers are known for their ease of use and convenience, offering simple temperature control with the push of a button. They maintain a consistent temperature and produce relatively mild smoke. Gas smokers, which utilize propane or natural gas, are convenient, but it can be tricky to achieve the same intensity and depth of flavor as other smoking means. Pellet smokers are excellent just clean them regularly and maintain the appropriate pellet-to-air ratio.
The Ideal Smoking Temperature
Aim for a temperature range of 225 to 250°F when smoking whole chickens. Cooking at this low and slow pace allows the collagen and connective tissues in the meat to break down, resulting in a tender and juicy texture while allowing the skin to crisp up and develop a delicious golden texture. Generally, you should allocate approximately 45 minutes to an hour per pound of chicken at a consistent smoking temperature of 225°F. For example, a small 3-pound chicken will take roughly 2.25 to 3 hours, while a larger 5-pound chicken may require 3.75 to 5 hours to cook fully.
Keep The Temperature Consistent
Monitor the temperature with a reliable, probe-style thermometer placed near the chicken to ensure even heat distribution. Unless you’re the proud owner of a high-end smoker with high-quality temperature probes, we strongly advise procuring your own and using them instead, as the accuracy of most entry-level probes is atrocious. Different smokers have varying methods for controlling temperature. Familiarize yourself with your particular setup for optimal results.
For charcoal smokers, regulate heat by adjusting the vents, allowing more air to flow and increase the temperature, or reducing airflow to lower it. In electric or gas, smokers use the built-in temperature controls to maintain the desired heat. Remember to periodically check the fuel levels, replenishing charcoal, wood chips, or pellets as needed to maintain a steady temperature. Also, avoid opening the smoker too often, as this causes heat loss and extends the cooking time to an unsuitably long prolonged period.
Keep the smoker’s door closed as much as possible, but if you need to add fuel, such as charcoal or wood chips, do so quickly to minimize heat loss. In case of wind or cold weather, consider using a windbreak or insulation blanket to help stabilize the temperature. Additionally, rotate the chicken occasionally to ensure even cooking, especially if your smoker has hot spots.
Another tip for maintaining a consistent temperature is to not overcrowd the smoker, as doing so can impede airflow and make it more difficult to control the heat. Lastly, be patient and allow time for the smoker to return to the desired temperature after making any adjustments, as it can take several minutes for the temperature to stabilize after doing anything.
Consider Using A Water Pan
Using a water pan when smoking a whole chicken provides several benefits, regardless of the type of smoker being used. It helps maintain moisture within the smoker, preventing the chicken from drying out. The water in the pan also acts as a heat sink, absorbing and redistributing heat, which helps maintain a stable, consistent temperature. While many aromatic compounds do not infuse, adding certain flavorful liquids like juice, beer, or wine to the water pan will impart subtle flavor.
Place the water pan on a lower rack or shelf directly above the heat source in a traditional smoker. Most electric smokers come with a built-in water pan which is typically above the element. Gas smokers have their water pan placed above the burner. If your stovetop smoker doesn’t have a built-in water pan, you can create a makeshift water pan by using a small, heat-resistant container or a shallow aluminum foil tray. Place the improvised water pan on the side opposite the heat source, ensuring it’s filled with water or another liquid. Check the liquid level of your water pan periodically during the smoking process and top up as necessary.
How To Tell When A Whole Chicken Is Done
Insert a digital thermometer into the thickest part of the chicken, avoiding the bone. The best place to check is generally the breast. The chicken is done when the internal temperature reaches 165°F. If checking a thigh, you’re looking for 170 to 175°F. If you do not have a digital thermometer on hand, there are, fortunately, other ways to determine if your smoked chicken is fully cooked.
One method is to pierce the chicken with a sharp knife or fork in the thickest part of the thigh. If the juices run clear, without any pink or red tinge, it is a good indication that the chicken is cooked through. Another method is to check the leg joints. They should move easily and feel loose when the chicken is done. Keep in mind that these methods are nowhere near as accurate as using a digital thermometer, but they can help in a pinch.
Resting, Serving & Carving
Once your chicken has been smoked to perfection, it’s finally time for a brief resting period, and then it’s down to carving and serving. Here is everything you need to know to ensure that your whole smoked chicken is plated perfectly.
The Importance of Resting
Resting your smoked chicken is essential to preserving that sought-after juiciness. This critical step allows the meat to reabsorb the juices, ensuring a tender and flavorsome eating experience. Allow your smoked chicken to rest for at least 10 to 15 minutes, tented with aluminum foil to retain its warmth.
Carving Tips for Whole-Smoked Chicken
Invest in a high-quality, sharp carving knife for smooth cuts and to prevent tearing the meat. Use a large cutting board with a well or a carving board with spikes to hold the chicken in place, preventing it from sliding around while carving. A carving fork helps immensely to stabilize the chicken while you slice.
Here are the basic steps for carving a whole chicken correctly:
- Begin by cutting the skin between the thigh and the breast, then pull the leg away from the body and cut through the joint to separate the leg from the body.
- Next, remove the wings by cutting through the joint connecting each wing to the body, using the tip of your knife to locate the joint.
- Carve the breast by making a starting cut from the breastbone download, slicing parallel to the ribcage, then cut horizontally along the base of the breast to release each slice. Separate the breast meat from the rib cage by cutting along the breastbone and following the contours of the ribs.
- Slice the breast meat into portions and serve with your favorite sides. Retain the chicken carcass for making homemade chicken stock or soup, maximizing the value of the smoked chicken.
Smoking A Whole Chicken – Frequently Asked Questions
Have you been left wondering anything about how to smoke a whole chicken? We should have the answers you’re looking for here. All the finer details are covered.
To achieve melt-in-your-mouth tenderness, smoke your chicken low and slow for approximately 1 to 1 ½ hours per pound at a consistent temperature of 225°F. For example, if you have a 4-pound chicken, expect it to be perfectly smoked in about 4 to 5 hours.
225°F is the optimal temperature for smoking a whole chicken for the first three-quarters of the smoking period. While you might be tempted to go lower at 200°F, sticking to 225°F ensures that the collagen and connective tissues break down more effectively, resulting in a tender and juicy texture every time. After your chicken reaches an internal temperature of 135 to 140°F measured in the breast or thigh, crank up the heat to 275°F for the last of its cooking to pull off perfect skin every time.
Flipping is not necessary when smoking chicken. While this may at first sound counterintuitive, the beauty of smoking lies in its ability to cook chicken evenly without any need for turning. Just place your chicken on the smoker and monitor the temperature carefully.
A frozen or partially frozen chicken will not cook evenly, and you risk the possibility of having undercooked portions. Always ensure your chicken is fully defrosted and at a consistent temperature throughout its flesh before placing it in the smoker for the best and safest results.
Generally, you should replenish wood chips or pellets every 45 minutes to an hour. However, it’s important to monitor the smoke output, as different smokers and smoking materials may have varying burn rates. If you notice the smoke diminishing, it’s time to add more wood chips, pellets, or your preferred smoking material to ensure the continuous infusion of that desirable smoky flavor into your chicken throughout the cooking process.
Soaking wood chips is a common practice that isn’t always necessary. Certain chefs dislike the way that soaked wood chips are prone to lowering the temperature, making exact temperature control outside of the scope of beginners necessary. Soaked wood chips are typically only essential when using traditional smokers where direct contact with the hot coals occurs. We suggest experimenting for yourself to determine the blend of soaked and unsoaked wood chips that grants optimal smoke production and flavor intensity for your specific setup and preferences.
Yes, you can smoke a whole chicken without skin, but without taking proper precautions, it will dry out excessively and often turn rubbery. Skinless smoked chicken should always be brined. No exceptions. A marinade or rub also helps but apply it generously to compensate for the lack of skin. Use a water pan to keep the smoker’s humidity high. Baste every 10 to 15 minutes so that your chicken stays moist. Consider smoking at a lower temperature of around 200 to 225° and wrap the chicken in aluminum foil or butcher paper for the last hour of the smoking process.