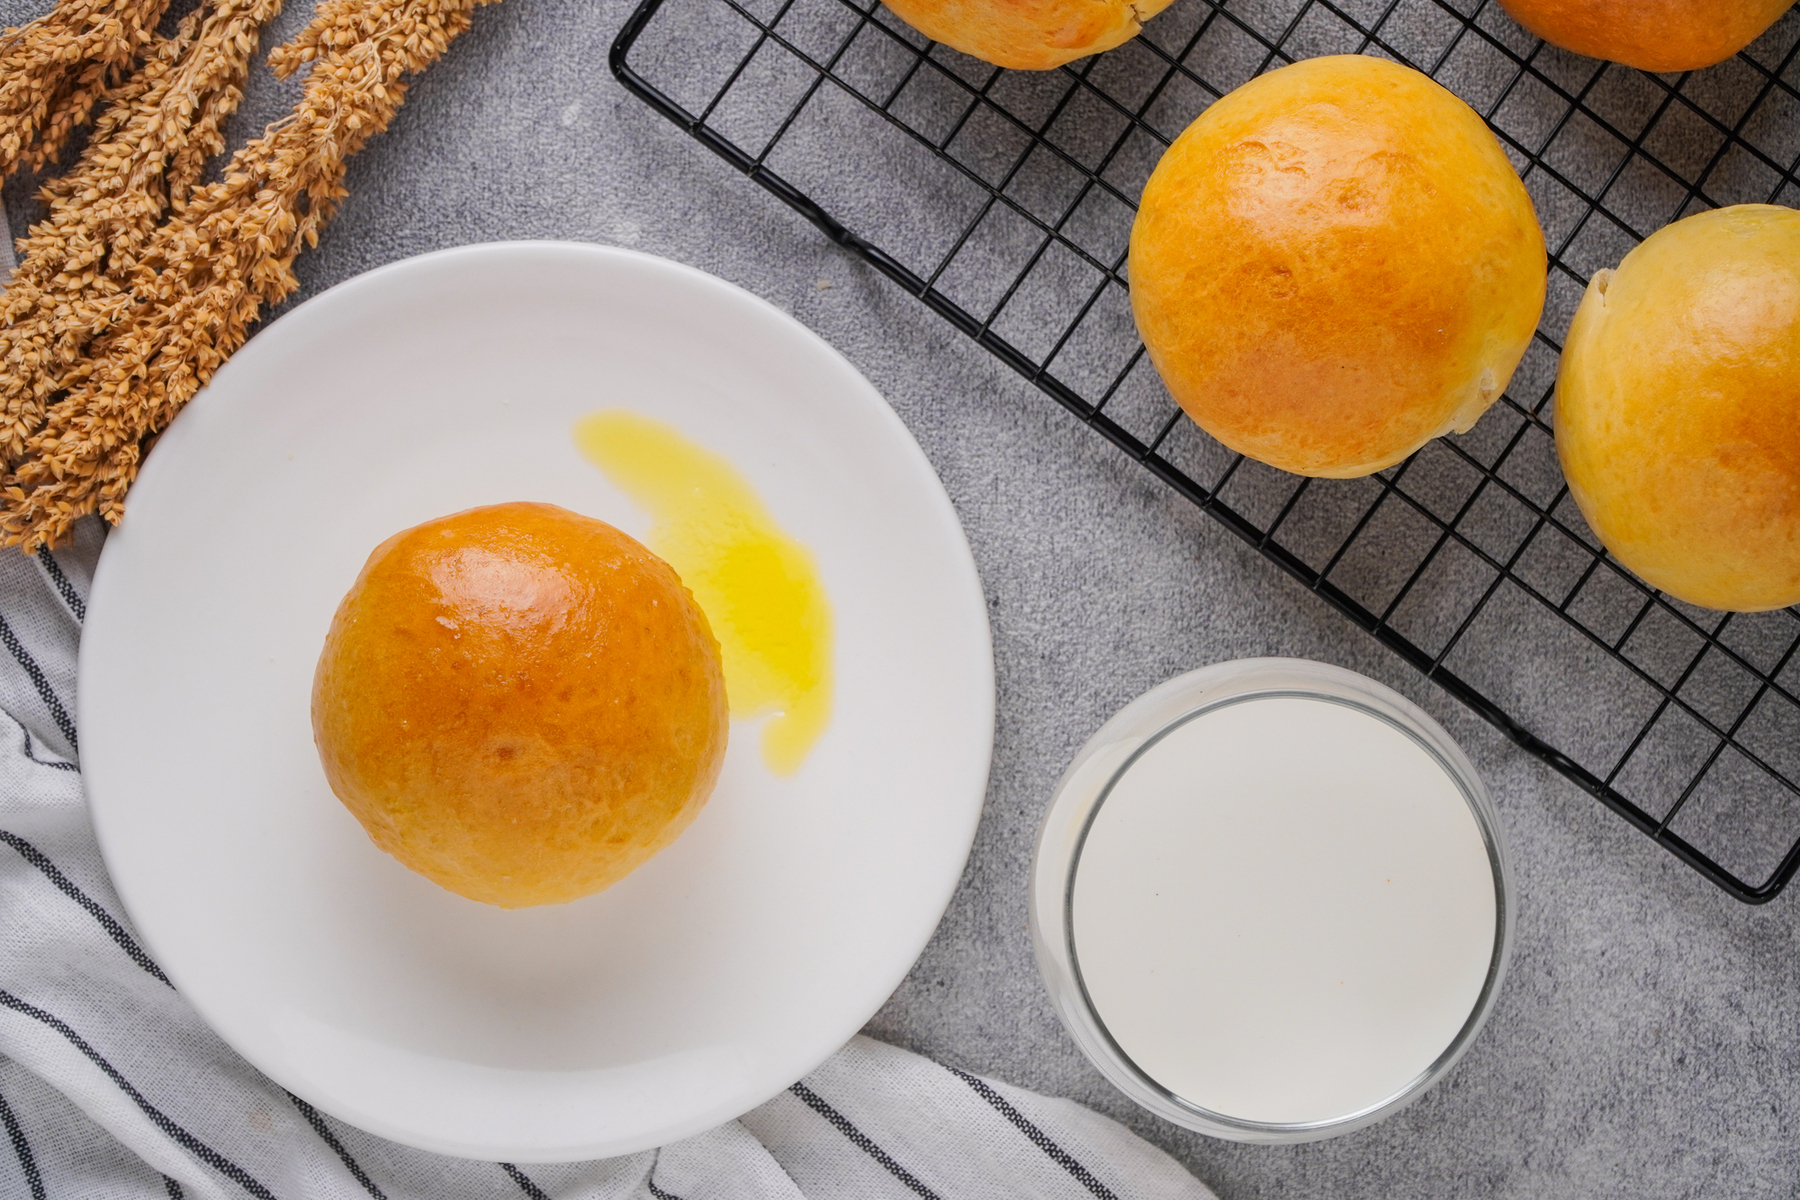
Homemade Chilean Country Bread (Pan Amasado)
Important Note: When you buy through our links, we may earn a commission. As an Amazon Associate we earn from qualifying purchases. Content, pricing, offers and availability are subject to change at any time - more info.
Equipment
- Large mixing bowl
- Wooden spoon
- Baking sheet
- Parchment paper
- Pastry brush
Ingredients
- 4 cups all-purpose flour
- 2 teaspoons salt
- 1 tablespoon sugar
- 1 tablespoon active dry yeast
- ¼ cup warm water 110°F
- 1 cup warm milk 110°F
- ¼ cup vegetable oil
- 1 egg beaten (for egg wash)
Instructions
- In a large mixing bowl, combine the flour, salt, and sugar. Mix well.
- In a separate small bowl, dissolve the active dry yeast in the warm water. Let it sit for 5 minutes until it becomes foamy.
- Add the yeast mixture, warm milk, and vegetable oil to the dry ingredients. Mix with a wooden spoon until a soft dough forms.
- Knead the dough on a lightly floured surface for about 10 minutes, or until it becomes smooth and elastic.
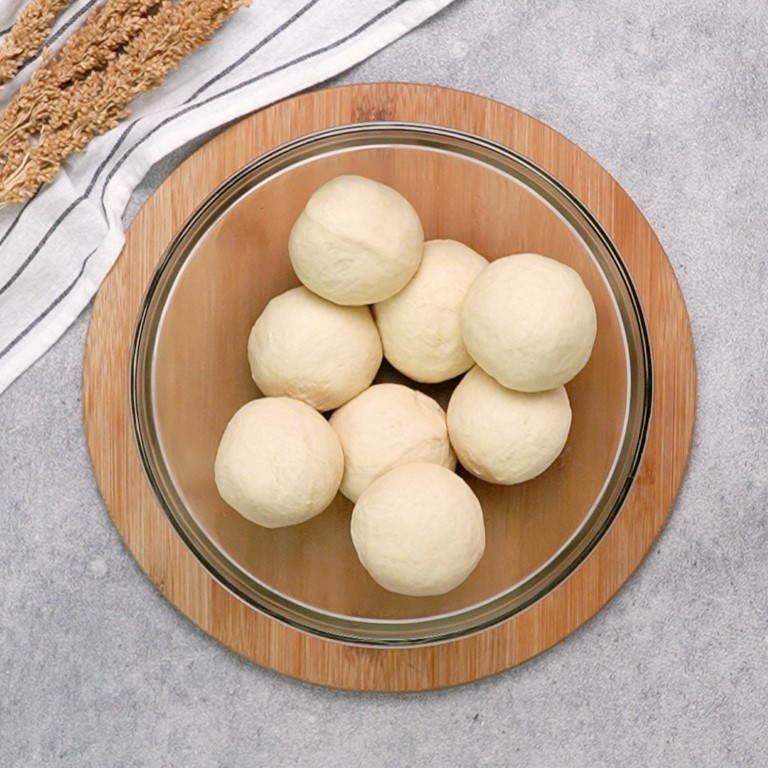
- Place the dough back in the mixing bowl, cover with a clean cloth, and let it rest in a warm place for 1 hour, or until it doubles in size.
- Preheat your oven to 400°F (200°C) and line a baking sheet with parchment paper.
- Once the dough has risen, punch it down and divide it into 8 equal pieces. Shape each piece into a round roll and place them on the prepared baking sheet, leaving enough space between each roll for expansion.
- Brush the tops of the rolls with the beaten egg using a pastry brush. This will give them a nice golden color when baked.
- Bake the rolls in the preheated oven for 20-25 minutes, or until they are golden brown and sound hollow when tapped on the bottom.
- Remove the rolls from the oven and let them cool on a wire rack. Enjoy your homemade Chilean Country Bread warm or at room temperature.
Nutrition
Imagine the warm, scrumptious aroma of freshly baked bread wafting through your kitchen, eliciting memories of cozy afternoons spent in your grandmother’s embrace. Now, what if I told you that you could recreate this nostalgic experience with a simple, yet delicious Chilean recipe? Enter Pan Amasado, a traditional Chilean country bread that has been delighting taste buds across generations. This rustic, hearty bread is the perfect accompaniment to any meal, whether you’re enjoying a bowl of piping hot soup or a hearty spread of cold cuts and cheese. Trust me, once you’ve tried your hand at making this versatile and delectable bread, you’ll wonder how you ever lived without it.
But wait, there’s more! Not only is Pan Amasado scrumptious and satisfying, it’s also incredibly easy to make. With just a few basic ingredients and minimal kneading, you’ll be able to whip up a batch of these golden, crusty loaves in no time. Plus, this recipe provides a fantastic opportunity to learn about Chilean culinary heritage and embrace the time-honored tradition of breadmaking. So, tie on your favorite apron, roll up your sleeves, and let’s dive into the wonderful world of Pan Amasado!
Yield & Servings:
8 bread rolls
Timing:
Prep Time: 20 minutes
Cook Time: 20-25 minutes
Resting Time: 1 hour
Ingredients:
4 cups all-purpose flour
2 teaspoons salt
1 tablespoon sugar
1 tablespoon active dry yeast
¼ cup warm water (110°F)
1 cup warm milk (110°F)
¼ cup vegetable oil
1 egg, beaten (for egg wash)
Notable Equipment & Tools:
Large mixing bowl
Wooden spoon
Baking sheet
Parchment paper
Pastry brush
Step-by-Step Instructions:
Step 1: Gather and Prep Your Ingredients
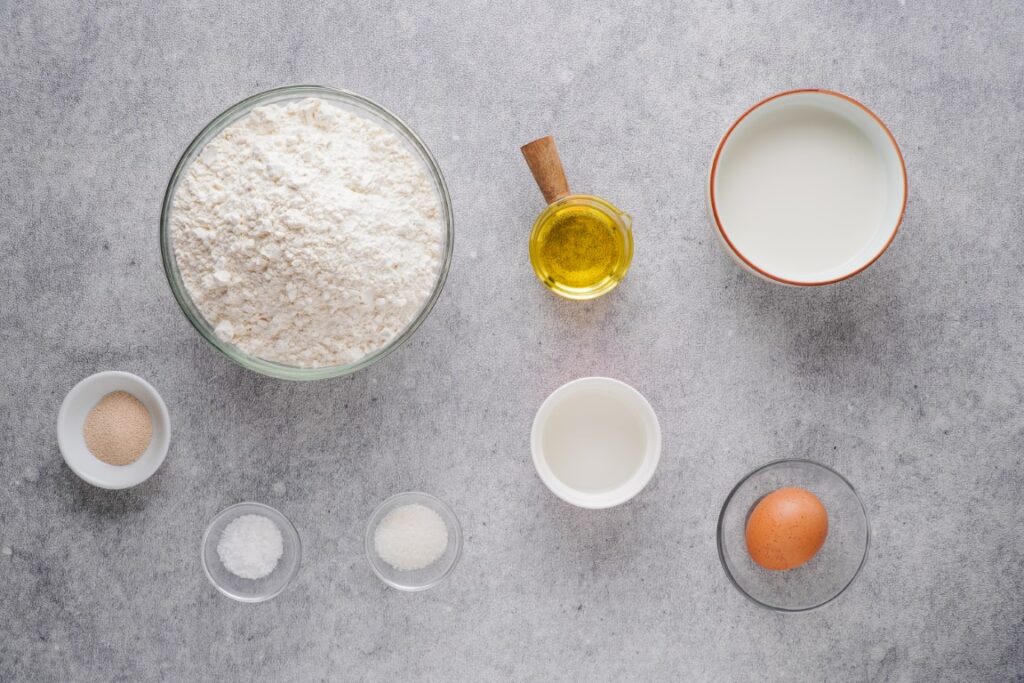
All ingredients ready? Let’s begin!
Step 2: Combine Dry Ingredients
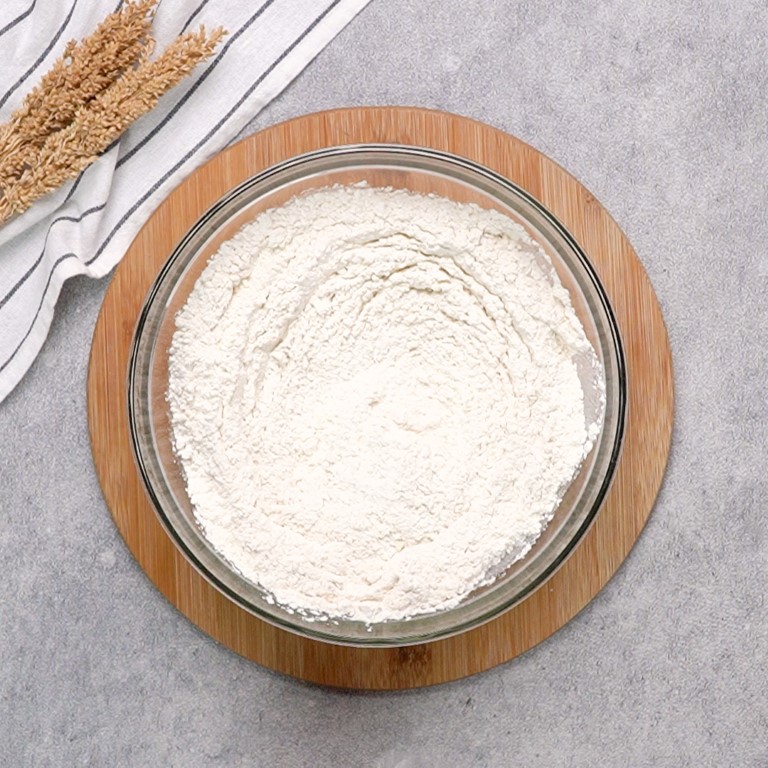
In a large mixing bowl, combine the flour, salt, and sugar. Mix well.
Step 3: Dissolve Active Dry Yeast in Warm Water
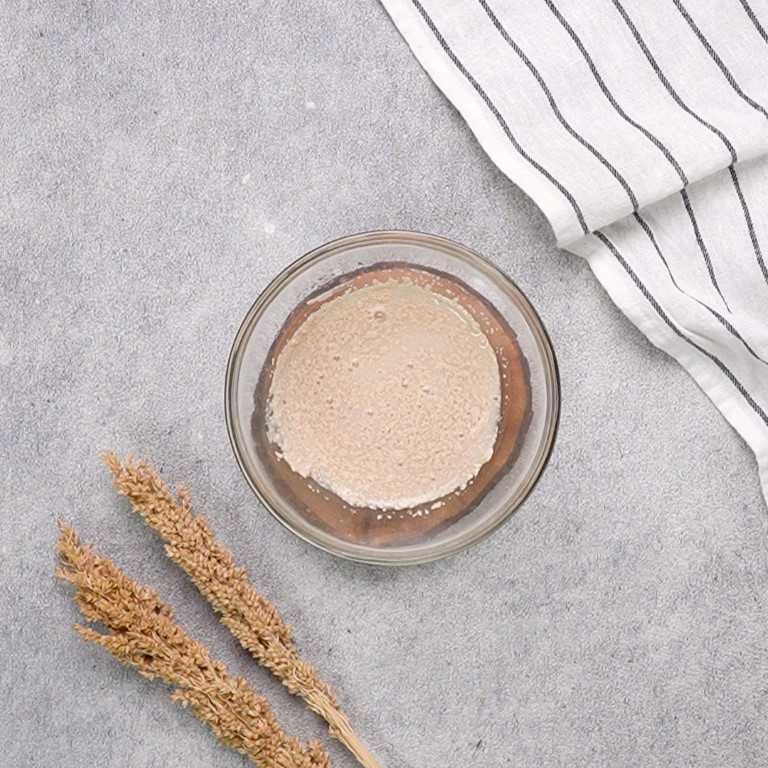
In a separate small bowl, dissolve the active dry yeast in the warm water. Let it sit for 5 minutes until it becomes foamy. Add the yeast mixture, warm milk, and vegetable oil to the dry ingredients. Mix with a wooden spoon until a soft dough forms.
Step 4: Knead the Dough
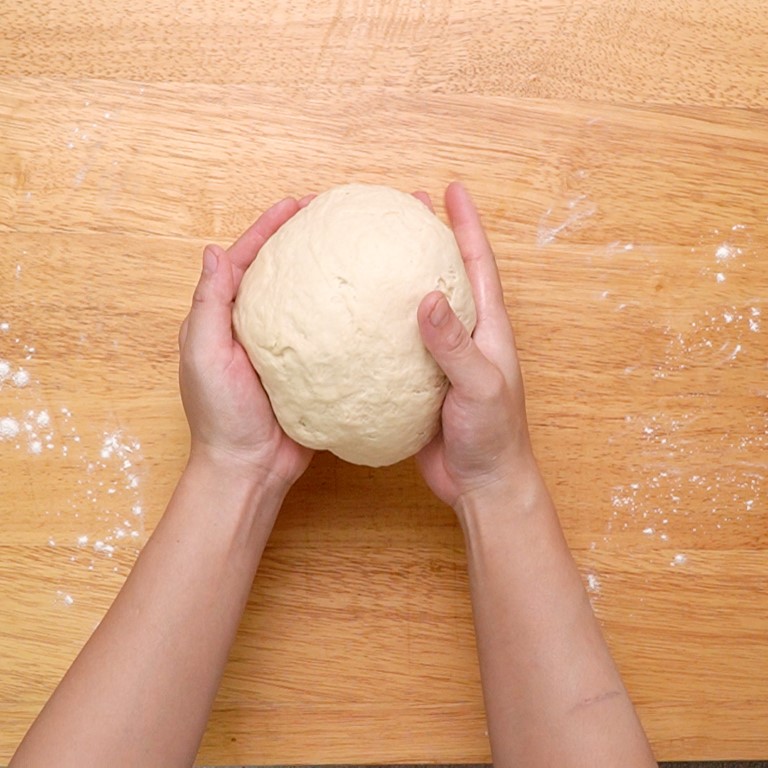
Knead the dough on a lightly floured surface for about 10 minutes, or until it becomes smooth and elastic.
Step 5: Allow the Dough to Rise

Place the dough back in the mixing bowl, cover with a clean cloth, and let it rest in a warm place for 1 hour, or until it doubles in size. Preheat your oven to 400°F (200°C) and line a baking sheet with parchment paper.
Step 6: Portion and Prepare the Rolls
Once the dough has risen, punch it down and divide it into 8 equal pieces.
Step 7: Form Round Rolls and Arrange on Baking Sheet
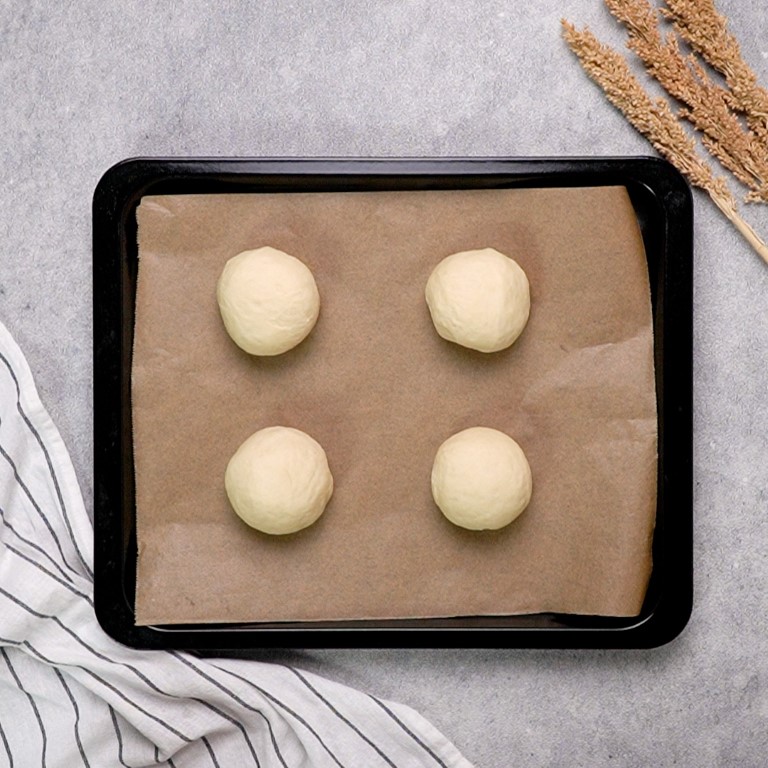
Shape each piece into a round roll and place them on the prepared baking sheet, leaving enough space between each roll for expansion.
Step 8: Brush with Beaten Egg

Brush the tops of the rolls with the beaten egg using a pastry brush. This will give them a nice golden color when baked.
Step 9: Bake Until Golden Brown
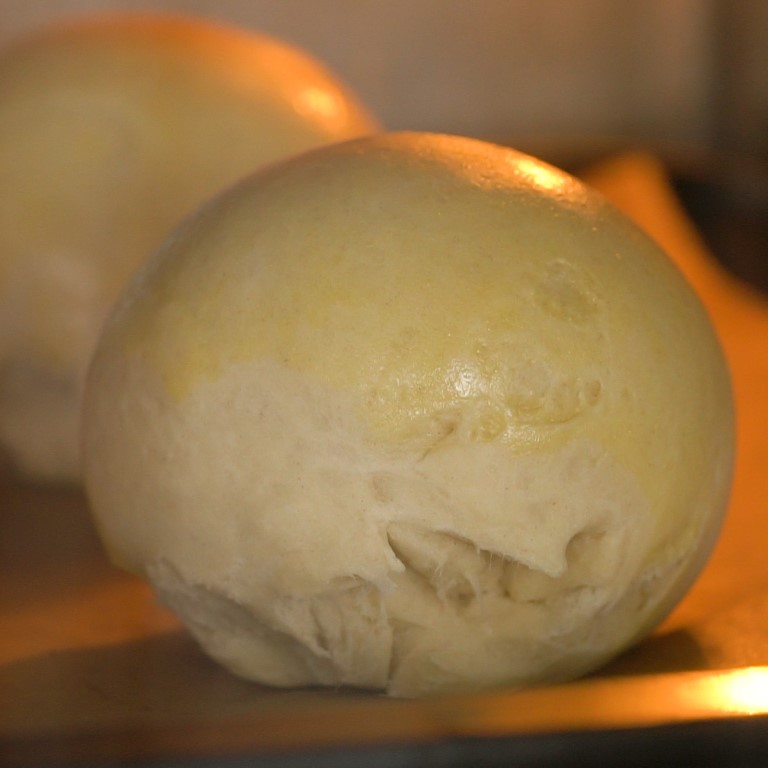
Bake the rolls in the preheated oven for 20-25 minutes, or until they are golden brown and sound hollow when tapped on the bottom.
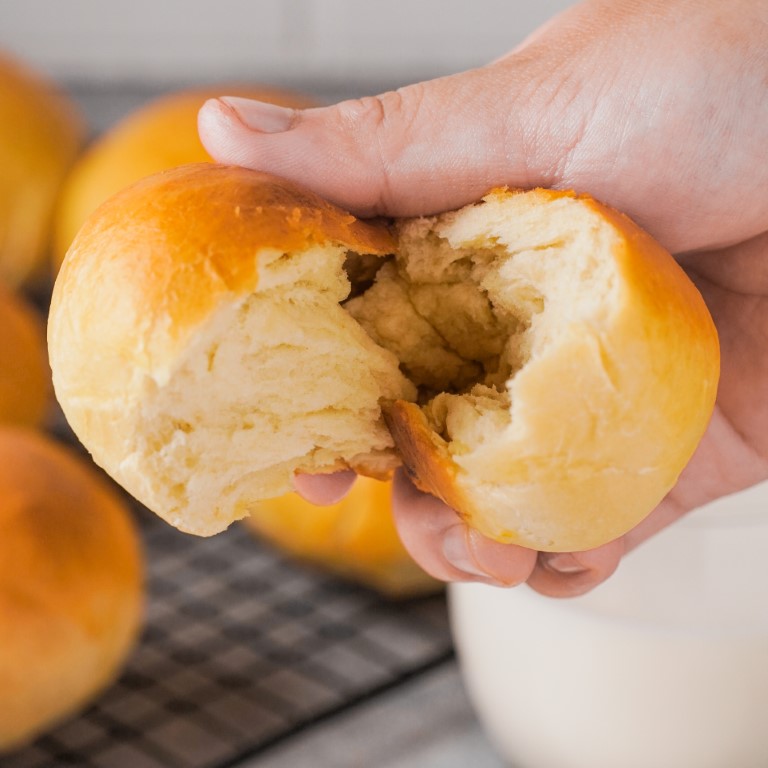
Step 10: Savor the Warmth of Homemade Chilean Country Bread!
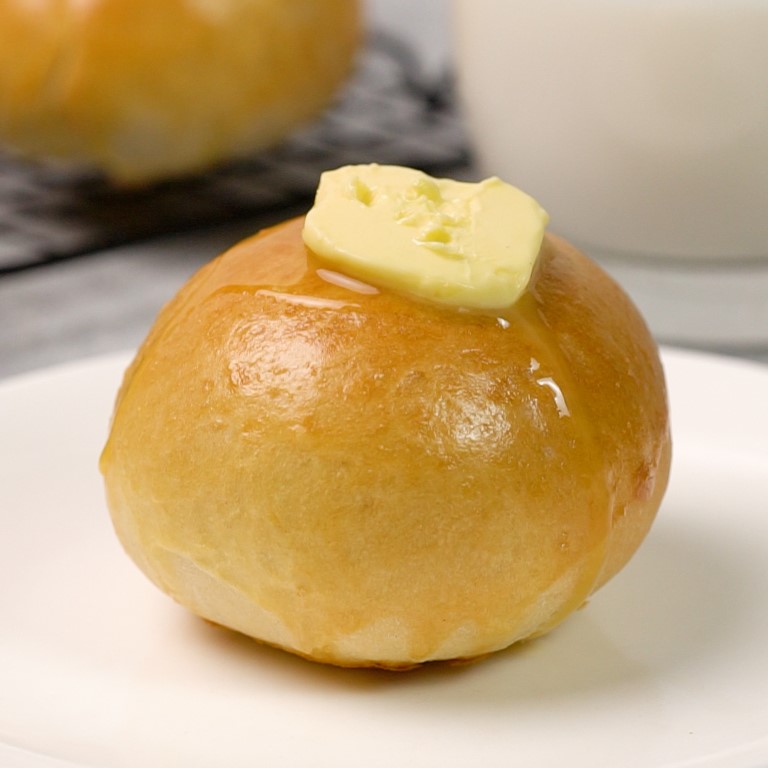
Remove the rolls from the oven and let them cool on a wire rack. Enjoy your homemade Chilean Country Bread warm or at room temperature.
Substitutions & Alternatives
Fear not, adventurous bakers! Whether you have dietary restrictions or simply need to work with what’s in your pantry, we’ve got you covered with some fantastic substitutions and alternatives for this Chilean Country Bread recipe.
1. Flour: If you’re looking to make these bread rolls gluten-free, substitute the all-purpose flour with gluten-free flour. Remember, gluten-free flours tend to absorb more liquid, so you may need to adjust the amount of flour or liquid accordingly. Additionally, you can opt for whole-wheat flour for a nuttier and healthier alternative, but keep in mind this may result in denser rolls.
2. Milk: Lactose intolerant? No problem! Swap out the warm milk with warm almond milk, soy milk, or any other plant-based milk of your choice. Just make sure it’s unsweetened and unflavored to maintain the integrity of the bread’s taste.
3. Vegetable Oil: If you want to experiment with different fats, feel free to replace the vegetable oil with melted butter or olive oil. Just be aware that using olive oil may give your rolls a slightly different flavor.
4. Egg Wash: If you’re baking for vegans or those with egg allergies, skip the traditional egg wash and brush the tops of your rolls with a mixture of plant-based milk and maple syrup or agave nectar. This will still give your bread rolls that beautiful golden sheen.
5. Yeast: If you only have instant yeast on hand, don’t fret! Simply use an equal amount of instant yeast as you would active dry yeast, but skip the step of dissolving it in water. Instead, add the instant yeast directly to the dry ingredients and proceed with the recipe.
6. Active Dry Yeast: In a pinch and don’t have any yeast? You can make soda bread rolls by replacing the yeast with 2 teaspoons of baking powder and reducing the resting time to 10 minutes. They’ll have a different texture, but will still be delicious.
Before you get started, remember that making substitutions can yield different results, so be prepared to embrace your inner scientist and experiment with the ingredients. After all, the culinary world is a playground just waiting for you to explore. So, what are you waiting for? Time to get those hands dirty and whip up a batch of delightful and delectable Chilean Country Bread rolls with your own unique twist!
Storage & Reheating
Now that you’ve mastered the art of making scrumptious Chilean Country Bread rolls, it’s time to be a storage and reheating guru! Fear not, for these tips will help you preserve the freshness and taste of your magnificent bread creation.
Storage – Seize the Freshness!
After allowing your bread rolls to cool on a wire rack, make sure to store them in an airtight container or a resealable plastic bag. This will help maintain their moist and tender texture. Keep them at room temperature and savor their deliciousness within 2-3 days. If you’re dreaming of longer-lasting bread rolls, continue reading.
Freeze for Future Feasting!
You have the power to enjoy these bread rolls weeks later with the magic of freezing! Simply wrap each roll individually in plastic wrap or aluminum foil, then place them in a zip-top freezer bag (squeeze out the excess air to avoid freezer burn). Label the bag with the date, and your rolls will stay fresh in the freezer for up to 3 months. Talk about a bread roll time capsule!
Reheating – Bring Back the Warmth!
When you’re ready to indulge in your stored bread rolls, reheating is the key to reviving their original warm and cozy charm. If you’ve kept them at room temperature, simply pop them in a 350°F (175°C) oven for 5-10 minutes, until warmed through.
If your rolls have been hibernating in the freezer, allow them to thaw at room temperature for a couple of hours before following the reheating process mentioned above. This ensures even heating and prevents any icy surprises.
Expert Tip – Steam for Softness!
For an extra tender touch when reheating, place a small oven-safe dish of water on the lower rack of your oven while you reheat the rolls. This will create steam, resulting in an even softer texture – because who doesn’t love a warm, pillowy bread roll?
Now, armed with these storage and reheating techniques, you can confidently serve, preserve, and savor your homemade Chilean Country Bread rolls with gusto. Happy eating!
Serving Ideas
1. Bread and Butter: Sometimes, simplicity is best. Serve these warm, fluffy bread rolls with a generous slathering of good quality butter, and watch as they disappear from the table. For an added touch of sophistication, consider using flavored butters, such as garlic or herb-infused varieties, to complement these scrumptious rolls.
2. Soup’s On: What better way to enjoy homemade Chilean Country Bread than with a steaming bowl of your favorite soup? The crusty exterior and soft interior of these rolls make them perfect for dipping, sopping up every last drop of deliciousness. Whether you’re serving a classic tomato soup or a hearty minestrone, these rolls will elevate your soup game to new heights.
3. Sandwich Sensation: Transform these bread rolls into the ultimate sandwich vessels by slicing them in half and piling on your favorite fillings. With their sturdy yet tender texture, they’ll hold up well to a variety of ingredients, from cold cuts and cheese to grilled vegetables and spreads. Why not try a Chilean Barros Luco, made with thinly sliced beef and melted cheese, for a true taste of global culinary heritage?
4. Breakfast Bonanza: Start your day off right by using these versatile rolls in your breakfast routine. Toast them and top with avocado and a poached egg for a trendy, healthy, and filling morning meal. Or, stuff them with scrambled eggs, bacon, and cheese for a portable and satisfying breakfast sandwich to fuel your day.
5. Bread Pudding Perfection: If you find yourself with leftover Chilean Country Bread rolls, give them a second life by repurposing them into a decadent bread pudding. Simply cube the rolls, soak them in a mixture of milk, eggs, sugar, and spices, and bake until custardy and golden. Top with a drizzle of caramel or a scoop of ice cream for an indulgent dessert that’s sure to impress.
No matter how you choose to serve these delightful Chilean Country Bread rolls, you’ll be basking in the warm, doughy glow of homemade goodness. So, roll up your sleeves, preheat that oven, and get ready for a baking adventure that will leave your taste buds dancing the cueca (that’s the Chilean national dance, in case you were wondering). Happy baking!
Variations & Customization
As the saying goes, variety is the spice of life! That’s why we’re happy to provide some variations and customization options for this Chilean Country Bread recipe to accommodate different dietary restrictions and preferences. Let’s get rolling with these inclusive tweaks:
1. Vegan: For vegans, you can easily swap out the warm milk for a plant-based milk, such as almond, soy, or oat milk. Additionally, replace the egg wash with a vegan alternative like a mixture of plant-based milk and maple syrup, or melted vegan butter.
2. Gluten-Free: To make these bread rolls gluten-free, use a gluten-free all-purpose flour blend instead of the regular all-purpose flour. Keep in mind that gluten-free doughs may require a little extra moisture, so be prepared to adjust the liquid ingredients accordingly.
3. GAPS/AIP: For those following a GAPS or AIP diet, substitute the all-purpose flour with a combination of cassava flour, tapioca starch, and coconut flour. You can experiment with the ratios until you find the best texture for your rolls. Additionally, replace the vegetable oil with coconut oil, and use a dairy-free milk option.
4. Keto: To make these rolls keto-friendly, replace the all-purpose flour with almond flour or coconut flour, and use a sugar substitute like erythritol or stevia for the sugar in the recipe. You can also add a bit of psyllium husk powder to improve the texture of the dough.
5. Multigrain: Give your rolls a nutritious boost by adding a mix of whole grains and seeds to the dough. You can include flaxseeds, chia seeds, sunflower seeds, oats, or a combination of your favorite grains for a heartier, more textured bread roll.
6. Herb Infused: Get creative and add some herbs and spices to your bread dough. Rosemary, thyme, oregano, basil, or even a dash of garlic powder can elevate your rolls to scrumptious new heights.
7. Sweet or Savory: Customize your bread rolls by adding sweet or savory fillings. For a sweet variation, consider cinnamon, raisins, or chocolate chips. For a savory twist, how about some sun-dried tomatoes, olives, or cheese?
Remember, experimenting in the kitchen is part of the fun! Embrace the opportunity to tailor this recipe to your tastes and dietary needs, all while learning more about the fascinating world of bread-making. Happy baking!
Notes & Tips
1. Yeast is your friend: The secret to perfectly fluffy bread rolls lies in the yeast. It’s alive, so treat it with care! Ensure that your warm water and milk are at the optimal temperature of 110°F (43°C). Anything too hot will kill the yeast, while a cold environment will make it sluggish. Remember, happy yeast equals happy bread!
2. Keep it covered: While resting the dough, you may use a clean cloth or plastic wrap to cover the bowl. This will retain the moisture and warmth needed for the dough to rise properly. A cozy dough makes for a fluffy, tender roll.
3. Weather woes: If you live in a particularly cold or humid area, the dough may take longer to rise. To create a warm environment for your dough, try placing the bowl in a turned-off oven with the light on or on top of a warm appliance like the refrigerator.
4. Divide and conquer: To make evenly sized bread rolls, weigh the dough and divide it by 8. Use a kitchen scale to measure out each piece, ensuring each roll will cook at the same rate and make your bread basket look professionally crafted.
5. Get creative with shapes: Chilean Country Bread comes in various shapes and sizes, so don’t be afraid to experiment! You can make braided rolls, knots, or even cute animal shapes. Just remember to adjust the baking time accordingly.
6. Freeze for later: If you can’t consume all 8 bread rolls in one go, simply let them cool completely, then store them in an airtight container or freezer bag. They’ll last for up to a month in the freezer. To reheat, just pop them in a 350°F (175°C) oven for 5-10 minutes or until warmed through.
7. Buen provecho: Chilean Country Bread is a versatile treat that pairs well with anything from hearty stews to a simple slather of butter and jam. Embrace the global culinary heritage and enjoy these bread rolls with Chilean pebre, a tasty salsa made from tomatoes, onions, and cilantro.
Now that you’re armed with these tips, it’s time to don your apron, channel your inner Chilean baker, and get ready for the intoxicating aroma of freshly baked bread to fill your home. Happy baking!
Common Mistakes
1. Skimping on the yeast: The yeast plays a critical role in achieving the perfect fluffy texture of these Chilean bread rolls. Don’t be stingy with it, and make sure to use the full tablespoon called for in the recipe. Your taste buds will thank you!
2. Not letting the yeast get foamy: Patience is key when it comes to working with yeast. It’s crucial to allow the yeast to dissolve properly in warm water and become foamy. This process activates the yeast, which is essential for the dough to rise. Skipping this step or rushing it can lead to dense, under-risen rolls.
3. Using cold milk and water: Temperature matters when it comes to bread making. When the recipe calls for warm milk and water, it’s not just a suggestion. The ideal temperature of 110°F helps activate the yeast, ensuring proper dough rising and a perfect final product. Cold liquids can slow down or even kill the yeast, leading to disappointing results.
4. Over-kneading or under-kneading the dough: Kneading the dough for the right amount of time is crucial for developing the gluten structure, which gives the bread rolls their chewy texture. Under-kneading can result in tough and dense rolls, while over-kneading can cause the dough to become sticky and difficult to handle. Aim for 10 minutes of kneading, or until the dough is smooth and elastic.
5. Skimping on the resting time: Just like us, dough needs some time to rest and rise to achieve its best form. Give your dough the full hour to rise and double in size. Trying to speed up the process might leave you with flat, dense rolls that lack the desired fluffy texture.
6. Crowding the baking sheet: When placing the shaped rolls on the baking sheet, be sure to leave enough space for them to expand during baking. Overcrowding the rolls can cause them to stick together or bake unevenly.
7. Skipping the egg wash: A little egg wash can go a long way in adding a beautiful golden color and a delightful sheen to your bread rolls. Don’t skip this step, as it can make all the difference in the final presentation. Plus, it’s a simple way to impress your friends and family with your newfound bread-making skills.
Now that you’re armed with the knowledge of these common mistakes and how to avoid them, you’re well on your way to baking a batch of irresistible Chilean Country Bread rolls. Happy baking!
Health Risks & Benefits
These Chilean Country Bread rolls are not only scrumptious, but they also come with a few health benefits worth mentioning. The use of all-purpose flour means they provide a good source of carbohydrates, which give us energy and help our brains function properly. Flour is also fortified with essential nutrients like iron, folic acid, and B vitamins.
The warm milk in the recipe provides calcium, which is vital for strong bones and teeth. Additionally, milk contributes to the overall nutrient density of these rolls, as it contains protein, vitamins A and D, and potassium. In fact, a single serving of milk provides 9 essential nutrients your body needs!
Now, let’s not forget about the vegetable oil, which adds some healthy fats to the mix. While consuming too much fat can be unhealthy, using moderate amounts of vegetable oils can help in maintaining a good balance of fats in our diets.
On the flip side, moderation is key when it comes to consuming these rolls, as they do contain sugar and salt. Consuming too much sugar can lead to weight gain and other health issues, while excessive salt intake can contribute to high blood pressure. However, as long as you keep an eye on portion sizes and enjoy these rolls as part of a balanced diet, you can happily indulge in their warm, golden goodness.
In summary, these Chilean Country Bread rolls offer a delightful taste of global culinary heritage, with some nutritional benefits to boot. Just remember to savor them in moderation, and you’ll be on your way to becoming an empowered and well-informed home chef! Bon appétit!
Recipe History & Context
Bread has been enjoyed throughout human history, and this Chilean Country Bread recipe is no exception. Hailing from the beautiful South American nation of Chile, this bread is a symbol of comfort, warmth, and togetherness for many Chilean families. The humble bread roll has seen countless variations across cultures and continents, but this recipe offers a delicious taste of authentic Chilean cuisine.
It can be traced back to the arrival of wheat in the Americas during the Spanish colonization in the 16th century. The Spanish brought their bread-making techniques and ingredients to Chile, which quickly became staples in Chilean kitchens. Over the centuries, the recipe has evolved to include local ingredients and techniques, resulting in the scrumptious Chilean Country Bread we know and love today.
One key aspect of Chilean bread-making is the use of both water and milk in the dough, which gives the bread a tender, rich texture. The addition of a little vegetable oil in the dough also contributes to its softness, making these rolls perfect for dinner parties or family gatherings. And let’s not forget the finishing touch – a shiny egg wash, giving the rolls their signature golden-brown crust.
Chilean Country Bread is a versatile and crowd-pleasing recipe, perfect for sopping up the juices of a hearty Chilean stew or simply enjoyed with a slathering of butter. So, gather your friends and family and set sail on a culinary adventure to the land of the Andes and Pacific coastlines where this delightful bread was born. As you break bread together, you’ll be joining countless generations of Chileans in celebrating the power of food to bring people together. ¡Buen provecho!
Common Questions
While all-purpose flour is the most common choice for Chilean Country Bread, you can definitely experiment with other types of flour, such as whole wheat or bread flour. Keep in mind that using a different flour may alter the texture and taste of the bread rolls. Whole wheat flour, for example, will create a denser, more robust roll, while bread flour will yield a chewier texture.
No worries! You can substitute instant yeast for active dry yeast in this recipe. Just be sure to adjust the amount: use ¾ tablespoon of instant yeast instead of 1 tablespoon of active dry yeast. You can skip the step of dissolving the yeast in warm water – simply combine the instant yeast with the dry ingredients, then add the warm milk and oil as directed.
Absolutely! Chilean Country Bread is a versatile canvas for your culinary creativity. Feel free to add your favorite herbs, spices, or other mix-ins to suit your taste. Some popular options include rosemary, oregano, garlic, or even sun-dried tomatoes and olives. Just be sure not to go overboard with the additions, as it may affect the dough’s consistency and rise.
You sure can! After kneading the dough and letting it rise, simply punch it down and store it in an airtight container in the refrigerator for up to 24 hours. When you’re ready to bake, remove the dough from the fridge, divide it into rolls, and let them come to room temperature before proceeding with the egg wash and baking steps.
To keep your Chilean Country Bread rolls fresh and tasty, store them in an airtight container or plastic bag at room temperature for up to 3 days. If you won’t be able to finish them within that time frame, you can also freeze the rolls for up to 3 months. Just be sure to wrap each roll individually in plastic wrap, then store them in a freezer-safe bag or container. To enjoy, simply thaw the rolls at room temperature and reheat them in a warm oven (around 300°F) for a few minutes until they’re soft and warm again.