Homemade Guyanese Roti
Important Note: When you buy through our links, we may earn a commission. As an Amazon Associate we earn from qualifying purchases. Content, pricing, offers and availability are subject to change at any time - more info.

Ingredients
- 3 cups flour
- ¼ tsp salt
- 2 tsp baking powder
- 1 ¼ cup warm water
- ¾ cup vegetable oil
Instructions
- All ingredients ready? Let's begin!

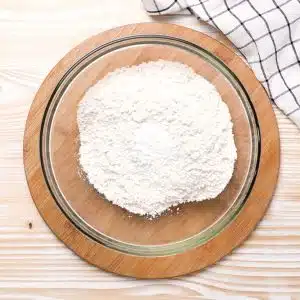
- Add the flour, salt, and baking powder to a large bowl. Whisk together to combine.
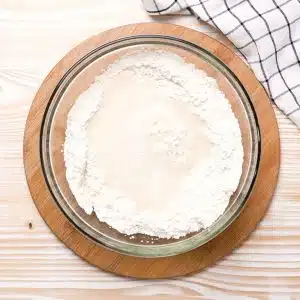
- Use the whisk to make a little well in the middle of the bowl. Add the warm water into the well (hot water from your tap is perfect).
- Use a wooden spoon, spatula, or your hands to mix the water into the flour. You will need to use your hands towards the end regardless to make sure the ingredients fully combine.
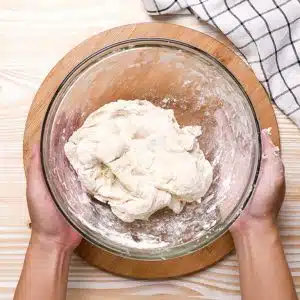
- Once the dough has mixed enough in the bowl, turn it onto a lightly floured surface. Use your hands to knead it for about 5 minutes. If the dough is too sticky, sprinkle it with flour until it is more stretchy than sticky.

- Roll it into a ball or pinch the edges and pinch them together underneath so the surface is smooth on top.
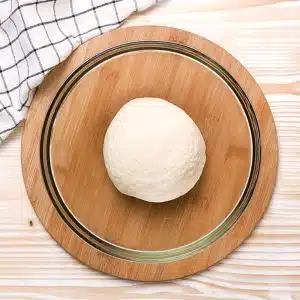
- Place the dough back into the bowl and cover with a clean towel. Leave in a warm spot for half an hour.
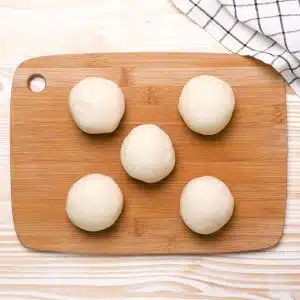
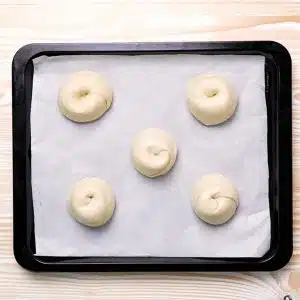
- After half an hour has passed, separate the dough into 5 equal pieces. You can do this by eye or by using a kitchen scale.
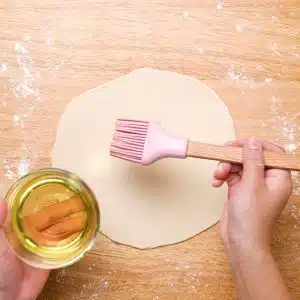
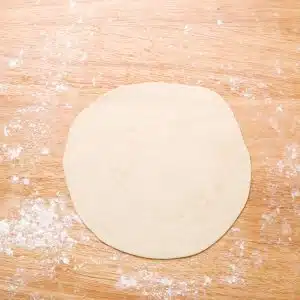
- On a lightly floured surface, roll each portion of dough into a large, flat circle like a pizza. Use a pastry brush to brush oil over the surface of each dough circle.
- Place a sharp knife or pizza cutter in the middle of a dough circle and slice outwards, so it is cut halfway through. Starting at one side of the cut, tuck the corner into the center of the dough. Where the dough has folded it will make another corner. Tuck that corner into the middle too.
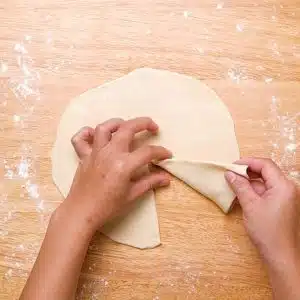
- Continue all the way around until you reach the other edge of the cut, then press that last corner into the center so it all sticks together.
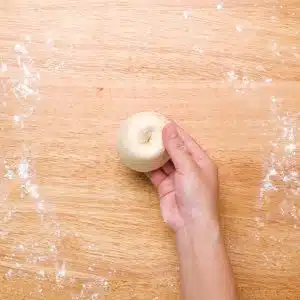
- Repeat with all 5 portions of dough then place on parchment paper, cover with a kitchen towel, and allow to sit for half an hour.

- After half an hour, place a large skillet over medium heat.
- On a lightly floured surface, roll out one of your dough balls big enough to cover the entire base of your skillet (about 1/8 inch thick).
- Carefully place the flat dough into the ungreased skillet and cook for 30-60 seconds, or until the surface starts to bubble.
- Use a spatula to flip the roti over in the pan. Brush the surface with more oil. Cook for approximately 30 seconds.

- Flip the roti again in the pan and brush the surface again with oil. Allow to cook for another 30 seconds.

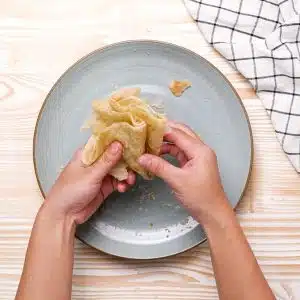
- Immediately after cooking, you will need to “clap” the roti. This can be done using your hands, but for beginners you may prefer putting the cooked roti into a bowl and covering it. Keep the bowl covered and shake it vigorously for a few seconds or until it begins to flake.
- Transfer the roti to a clean plate and repeat the process for the remaining dough. Serve warm and enjoy!

Nutrition
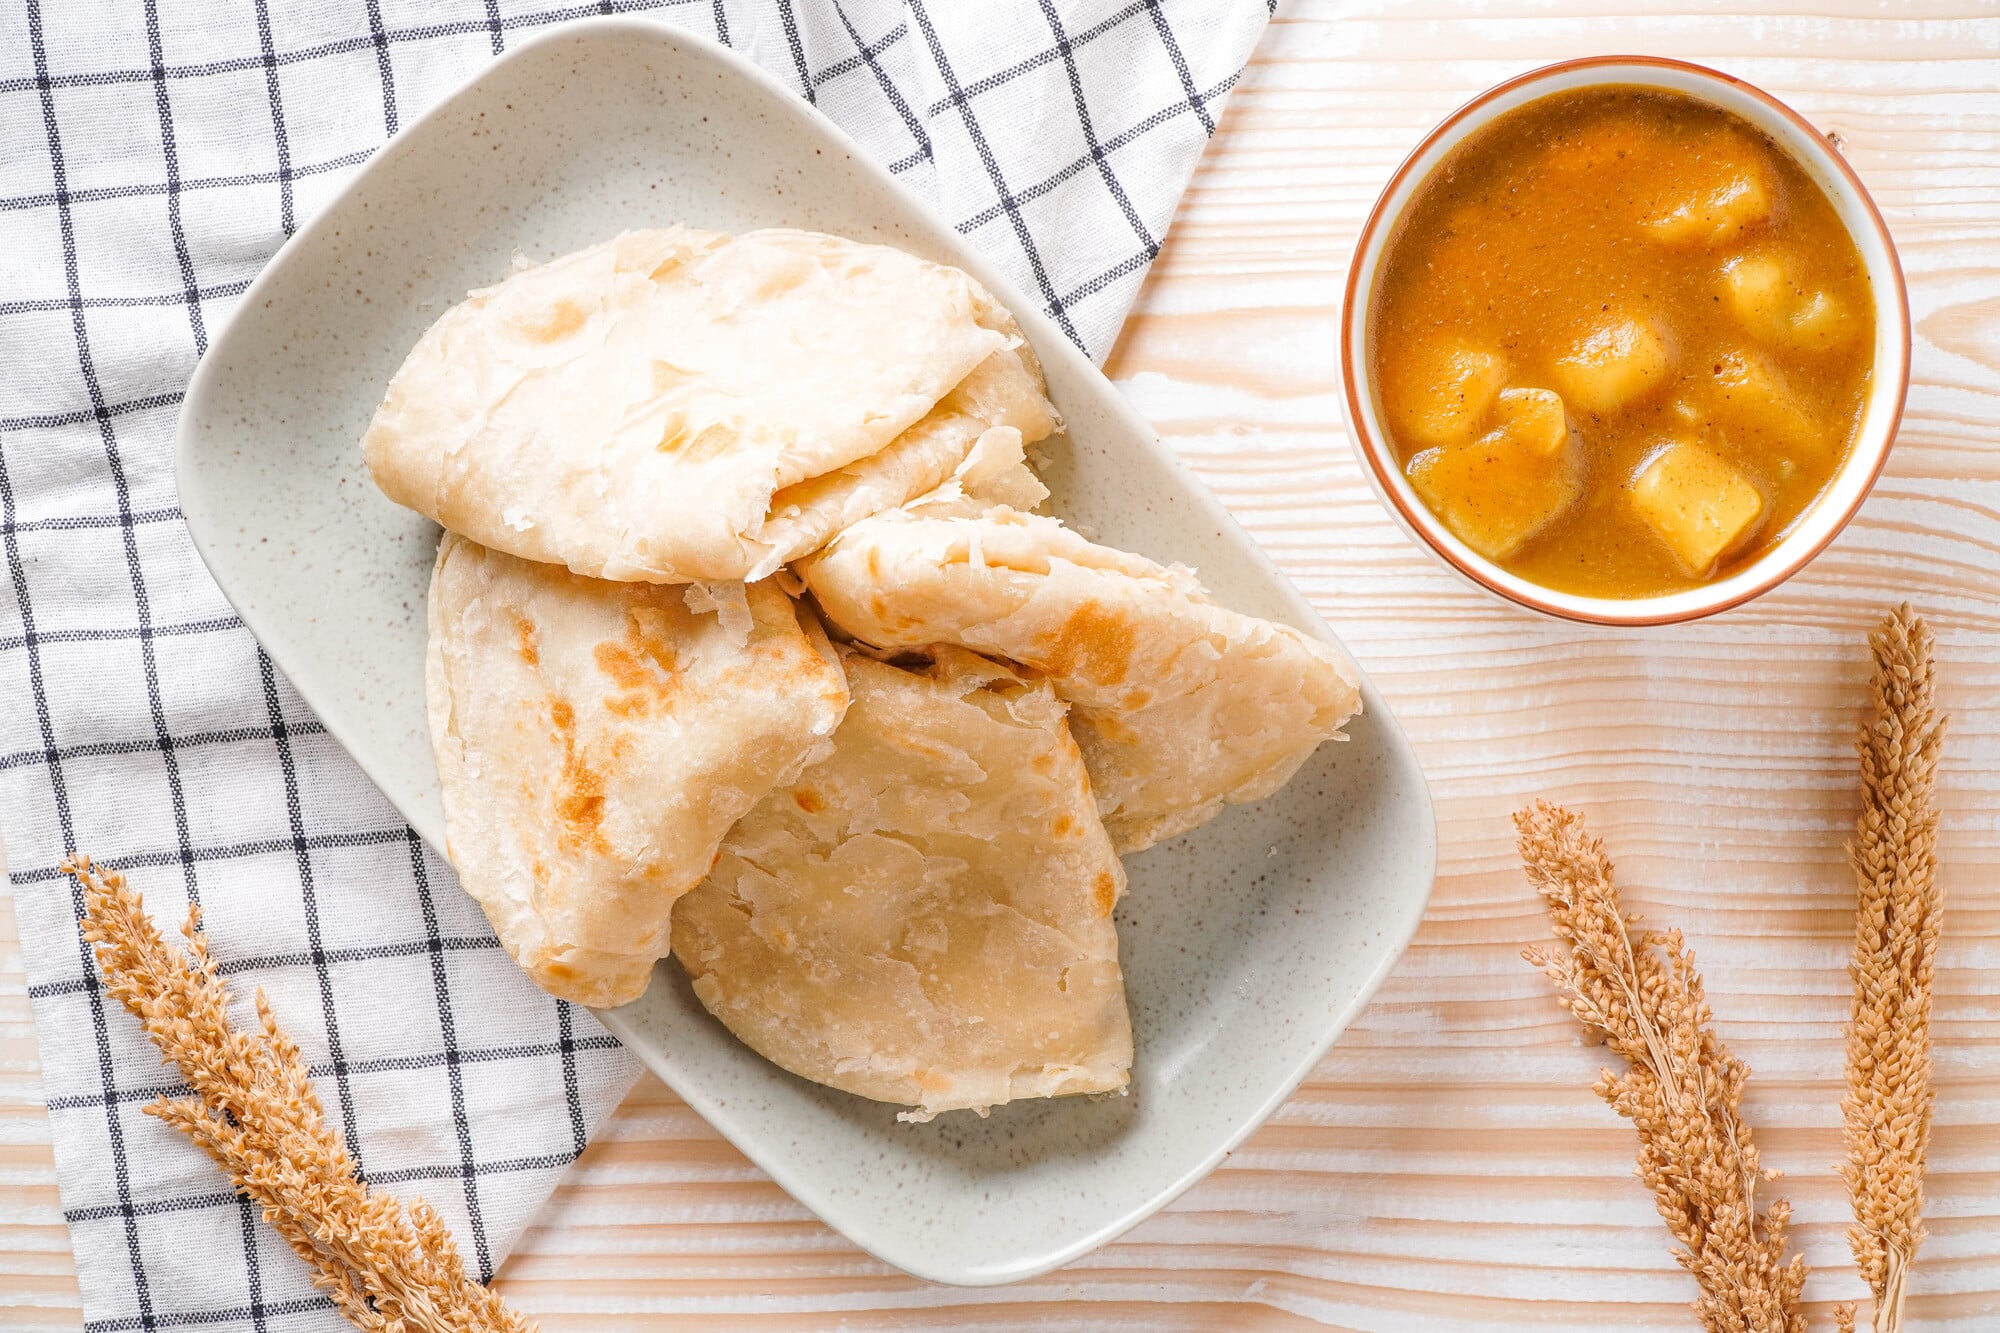
Guyanese roti is a beautiful, delicious type of bread that goes amazing with any meal and on its own. Texture wise, it’s somewhere between a crepe, a pie crust, and naan, which make it very unique. It’s a thin, soft, dough-based flatbread of sorts but it is also incredibly dainty and flaky. When used alongside large meat and veggie entrees, it makes every bite feel like a savory pastry.
While roti doesn’t function like bread where it needs time to rise, roti does require several resting times. Because of this, you should make an effort to begin their preparation a few hours before you intend to serve them.
The ingredients needed for roti are very basic and you probably have all of them already. Roti go wonderfully with a lot of dishes, even ones from different cuisines like this this simple Gongura Paneer from India. Once you get the hang of these, you might be making them for every meal!
Notes & Tips
- Roti can be stored covered in the fridge for around 3 days. Reheat for a few seconds in the microwave. The longer the roti sits out, the drier it will become, so you might want to try placing a damp paper towel on top to add some moisture.
- I don’t recommend freezing roti because it is likely to tear apart when you try to reheat it, but if you try, make sure it is in an airtight container and it will last for several months. However, if you wanted to freeze the uncooked dough at any point during the process and defrost it to cook later, that would work well.
- The processing of clapping roti is to eliminate air bubbles and separate the layers of dough to result in the special flaky texture of finished roti. If you do it in a bowl or other similar container, the shaking does enough to dislodge the layers. If you want to try doing it with your hands, wrap a single roti in a paper towel and clap it hard between your hands a few times before unfolding it and placing it on a plate. Feel free to experiment with both methods to discover what you prefer!
- Roti may look simple, but looks can be deceiving. One of the trickiest parts about making this dish is when you fold it together an it can take some practice to get right. What you want the end result to be is layers of alternating dough and oil–similar to pastry puff. Those layers are what causes the lovely flaky texture that distinguishes roti.
Substitutions
If you want to try making roti with something other than vegetable oil, that is very doable. You can use any oil (though maybe avoid strong ones like sesame oil). You can also use melted butter.